

Guide · immediate placement
The sealing socket abutment: what it is, why it works, and how to make one chairside in minutes
A sealing socket abutment (SSA) is a custom healing abutment placed at immediate implant placement, shaped to the extraction socket so it closes the socket over the graft and guides the soft tissue while the implant integrates. It was described with CAD/CAM. The same shape can be made in composite at the chair, at the surgical appointment, without a scanner or a lab.
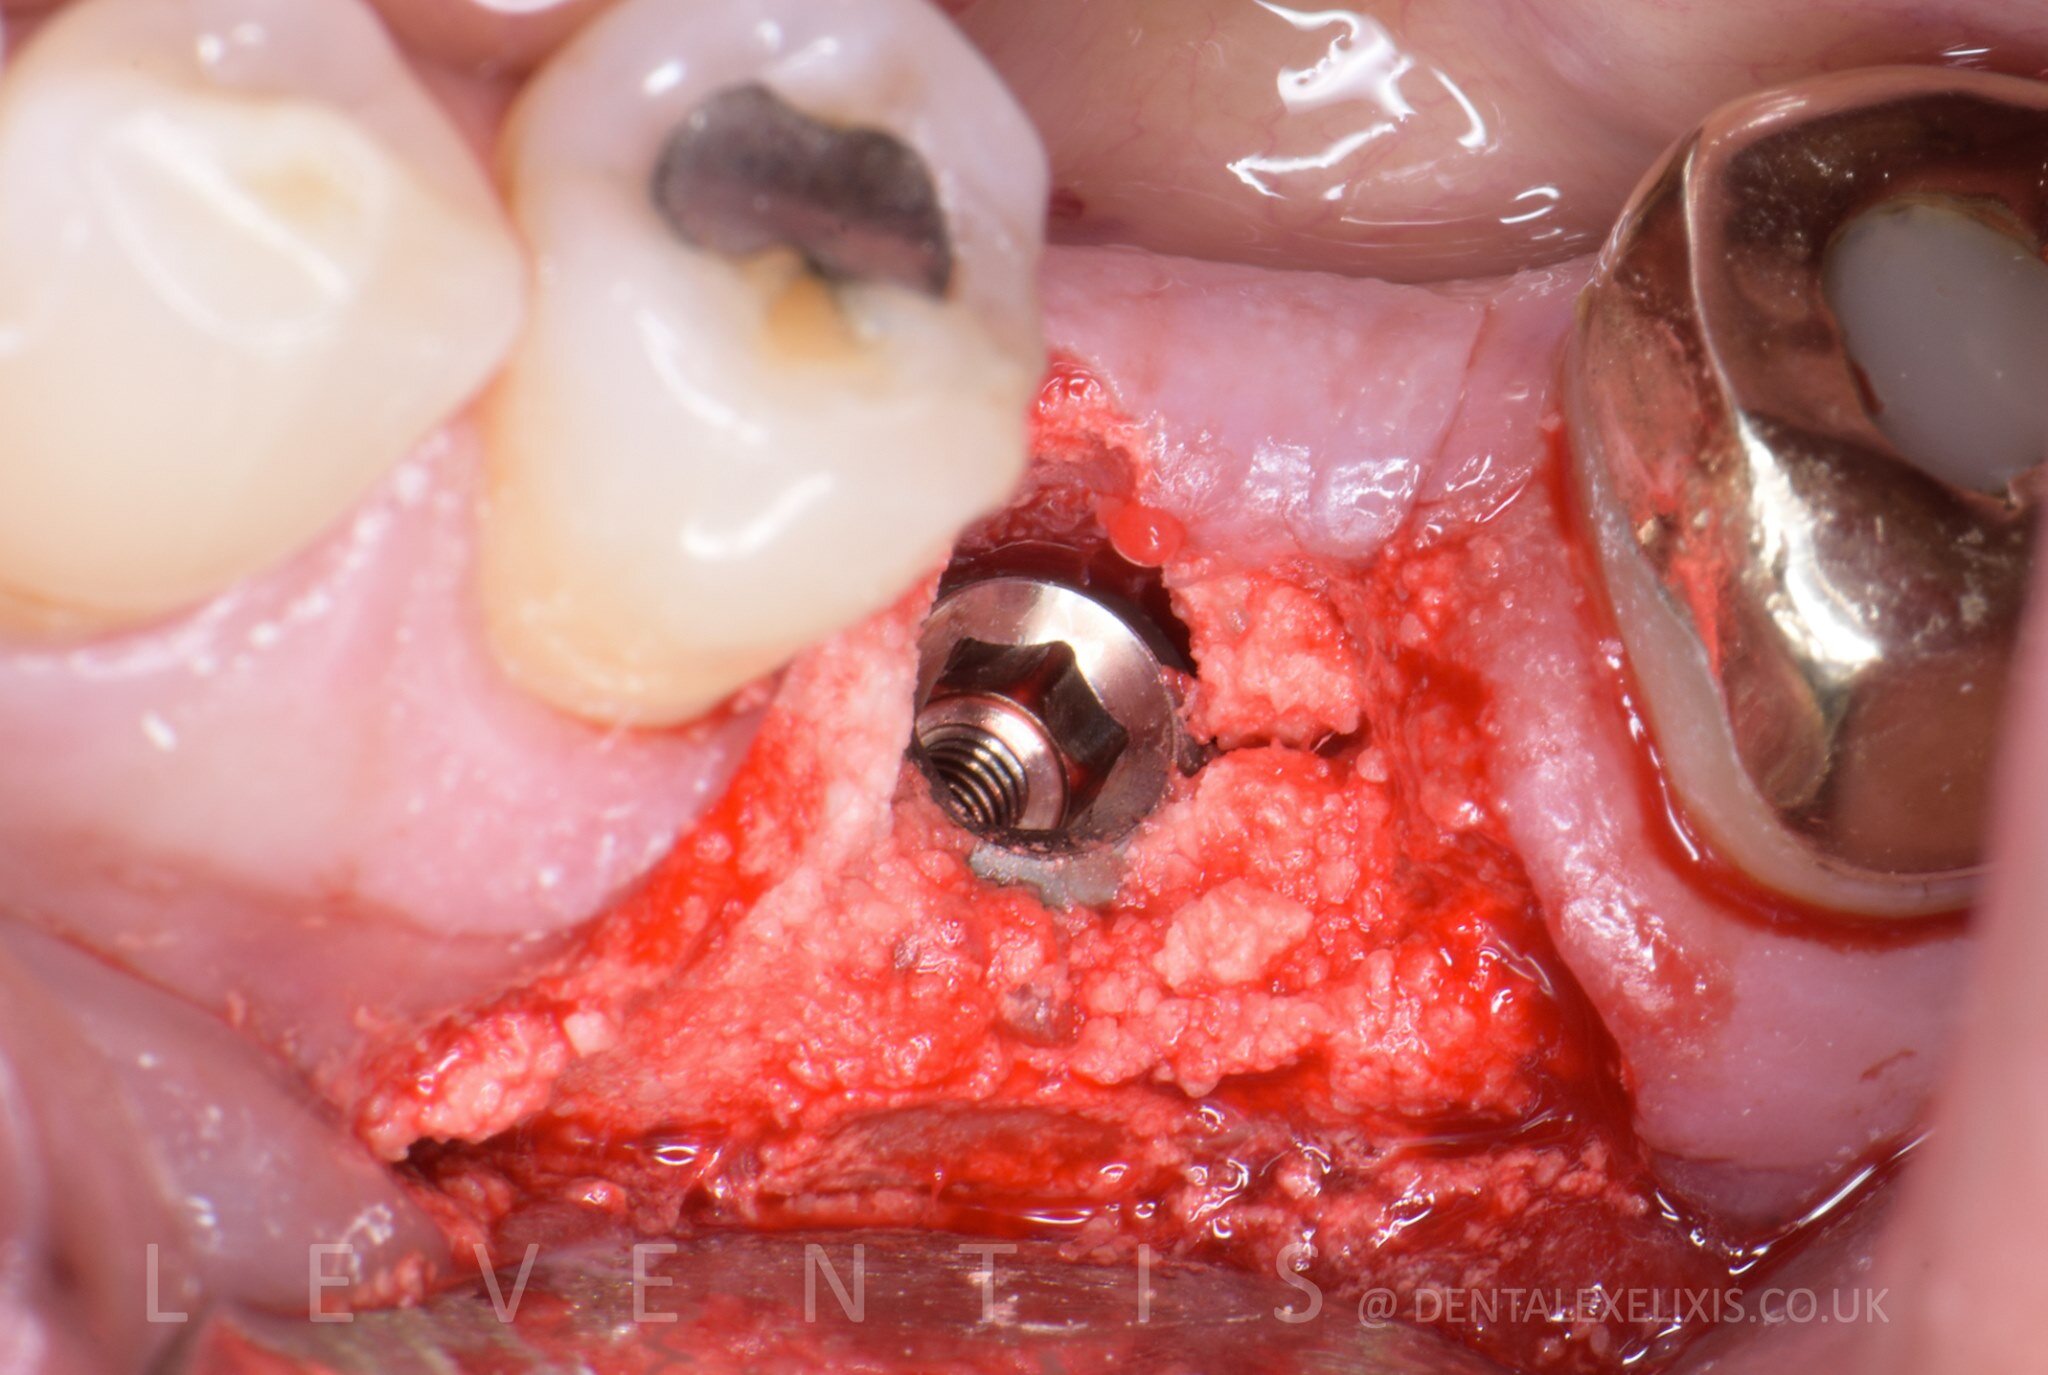
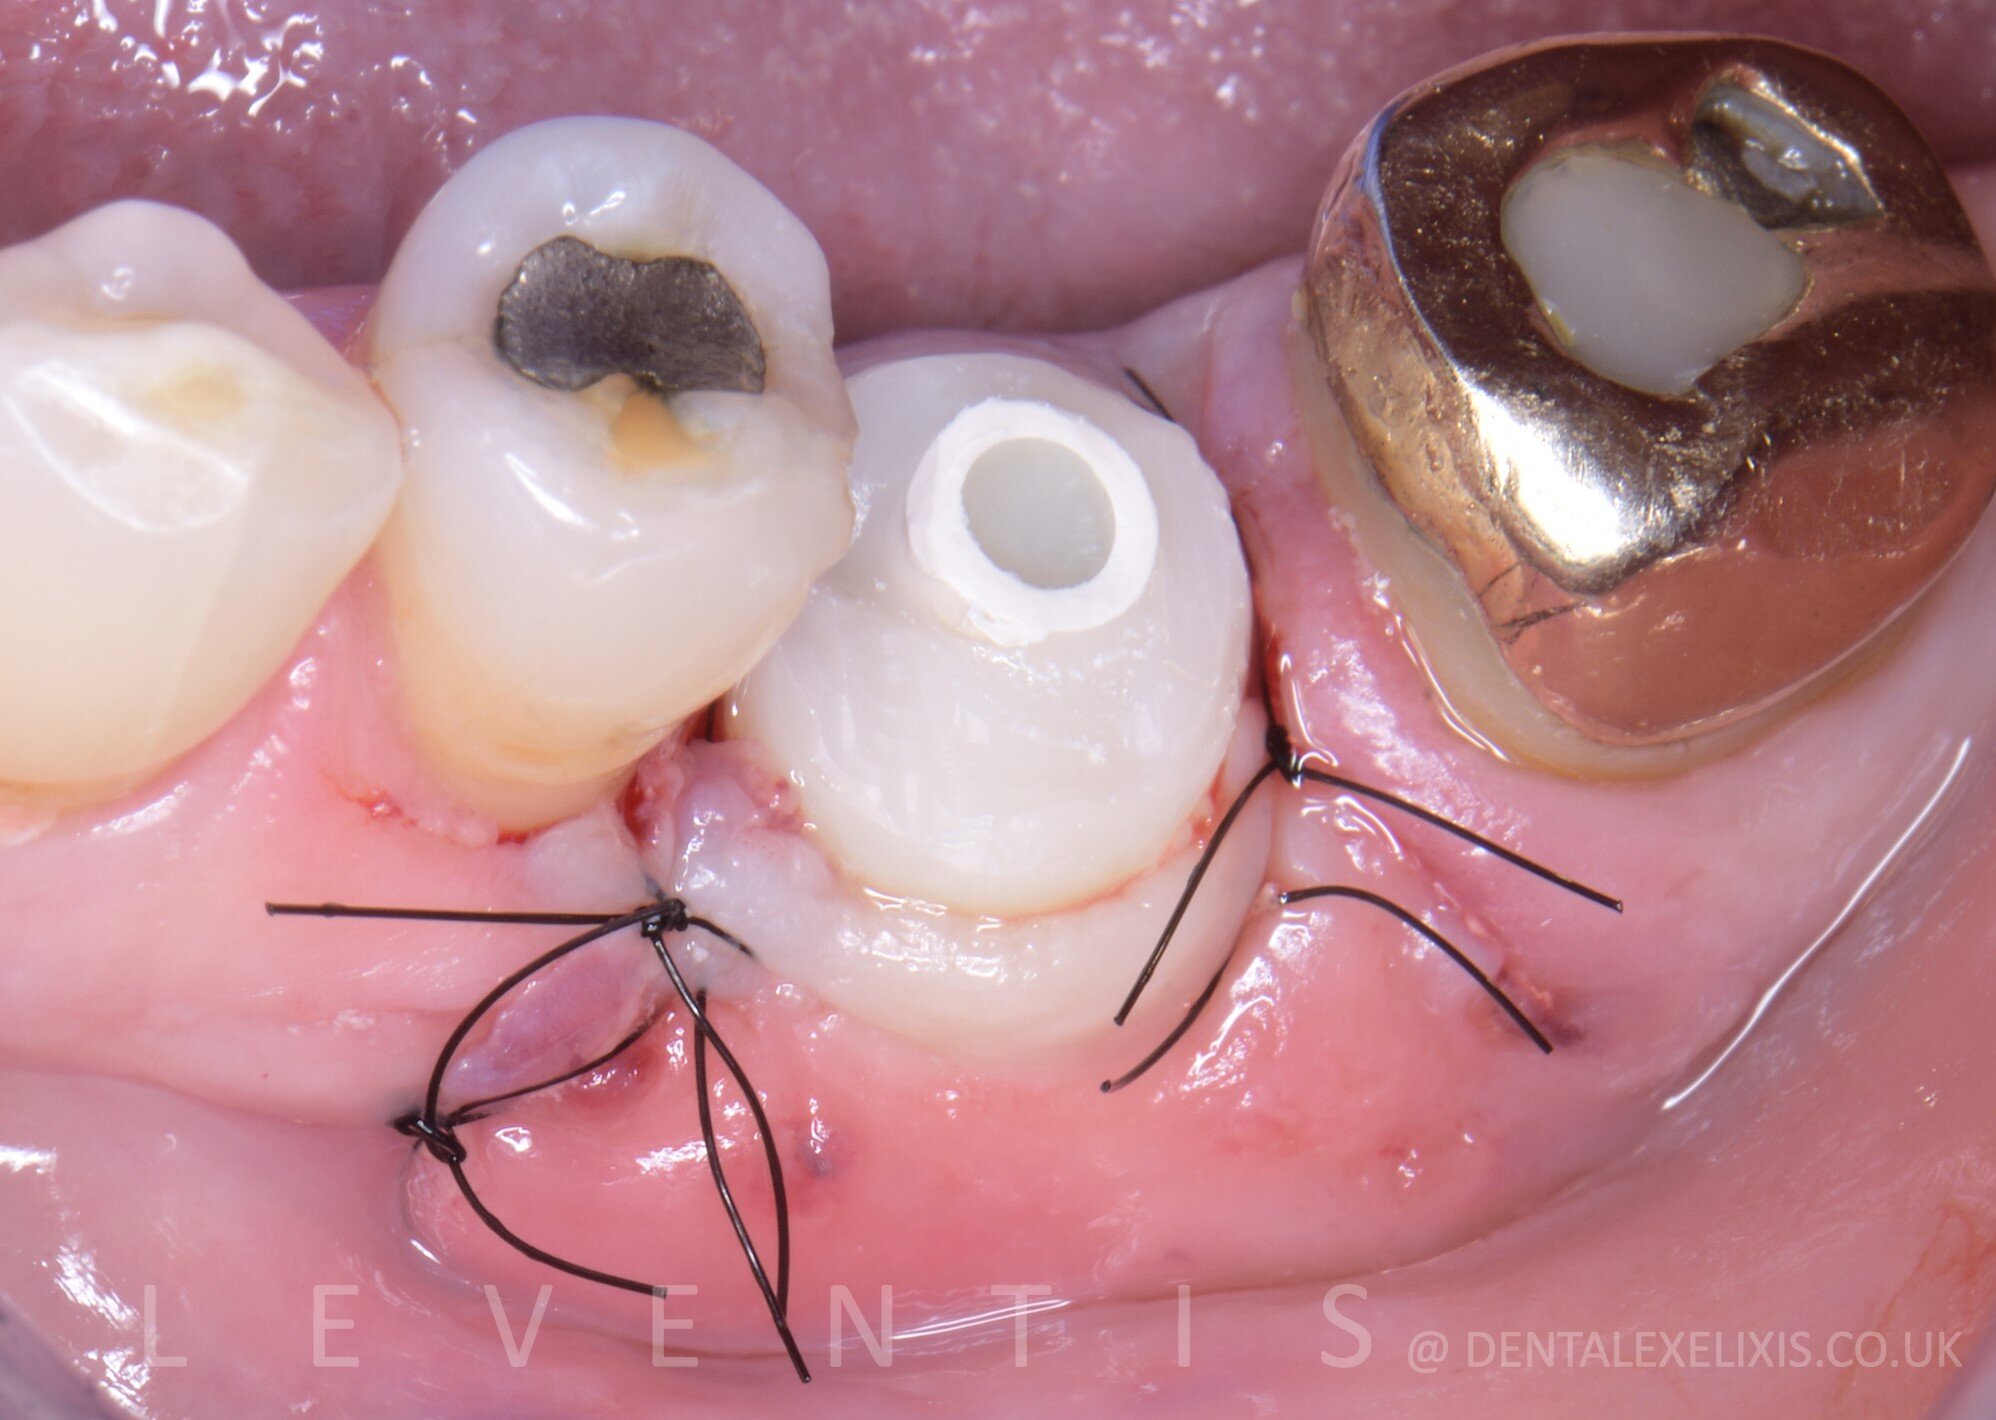
Where the idea comes from
After a molar extraction the socket is much wider than the implant placed into it. Conventionally the gap is grafted, a membrane is placed, the flap is advanced for primary closure, and the site is reopened months later. Finelle and Lee (2017) described a different closure: a custom PEEK abutment, designed from a scan of the socket and milled before surgery, that plugs the socket over the graft like a lid. The socket is sealed by the abutment, the graft stays put, the flap is not advanced, and the tissue heals around a tooth-shaped profile instead of a round healing cap. Akin (2016) had described the same principle as an “anatomic harmony abutment”. Since then the sealing socket abutment has been compared with conventional healing abutments in controlled studies and reviewed in the periodontal and implant literature; the references are below.
What a sealing socket abutment does
- Seals the graft. The abutment covers the gap between implant and socket walls, so the biomaterial is protected without a membrane and without stretching the flap over it.
- Keeps the socket outline. The soft tissue heals against a shape that matches the cervical cross-section of the extracted tooth, so the buccal and interproximal contour does not collapse to a cylinder.
- Shapes the emergence profile from day one. By the impression appointment the tissue already holds the contour the crown needs; no second surgery, no tissue displacement at delivery.
- Transfers the shape to the lab. A duplicate impression post or scan body made to the same shape carries the healed profile to the restoration.
CAD/CAM or chairside
| CAD/CAM sealing socket abutment | Chairside with the Cervico Guide and Mold | |
|---|---|---|
| What you need | Intraoral scan or CBCT-based plan, design software, a mill or printer, PEEK or titanium blank, a lab or in-house workflow | Guide, Mold, a temporary abutment for your implant, flowable composite, a curing light |
| When it is made | Before surgery, from a virtual placement; the real position must match the plan | At the surgical appointment, after the implant is in, to the real depth and orientation |
| Shape | Designed per case from the socket scan | Chosen in the mouth from 12 anatomical profiles in 3 sizes, plus off-centre wells; adjusted with composite if needed |
| Time per abutment | Design and manufacturing lead time; the abutment is fitted in minutes | Under 5 minutes to make and fit |
| If the implant ends up elsewhere | The pre-made abutment may not fit; fall back to a stock healing cap | Pick the tab that matches the final position; off-centre wells cover a shifted implant |
| Cost per case | Design plus manufacturing fee on every case | Composite per case; the kit is reused for years |
| Implant systems | Depends on the lab’s library | Any: Essential Mold takes stock analogs, Premium uses a VPI insert per system |
Making it chairside, step by step
- STEP 01 · EVALUATE
Before extraction or right after, seat the Cervico Guide over the site. The anatomical tab that matches the socket outline is the profile; the cylindrical tabs confirm the space and mark the osteotomy.
- STEP 02 · PLACE AND GRAFT
Place the implant, read the depth with the caliper or depth gauge, and graft the gap between implant and socket walls according to your protocol.
- STEP 03 · FABRICATE
Thread the temporary abutment into the matching well of the Mold at the measured depth, fill with flowable composite, cure, unthread, trim and polish the tissue side to a high shine.
- STEP 04 · SEAL
Torque the abutment onto the implant. It closes the socket over the graft. Suture the flap around it; no advancement, no membrane in the published protocols.
At the impression appointment the same well makes the duplicate impression post, so the lab receives the profile the tissue healed into. The component-by-component protocol is on how Cervico works.
The sealing principle in documented cases
The cases below are early placement (four weeks after extraction) and a grafted edentulous site, not fresh-socket immediate placement; the abutment does the same job in each: it seals the graft and shapes the tissue at one surgery, without a membrane or a soft-tissue graft. At immediate placement the abutment is made the same way, at the same appointment.
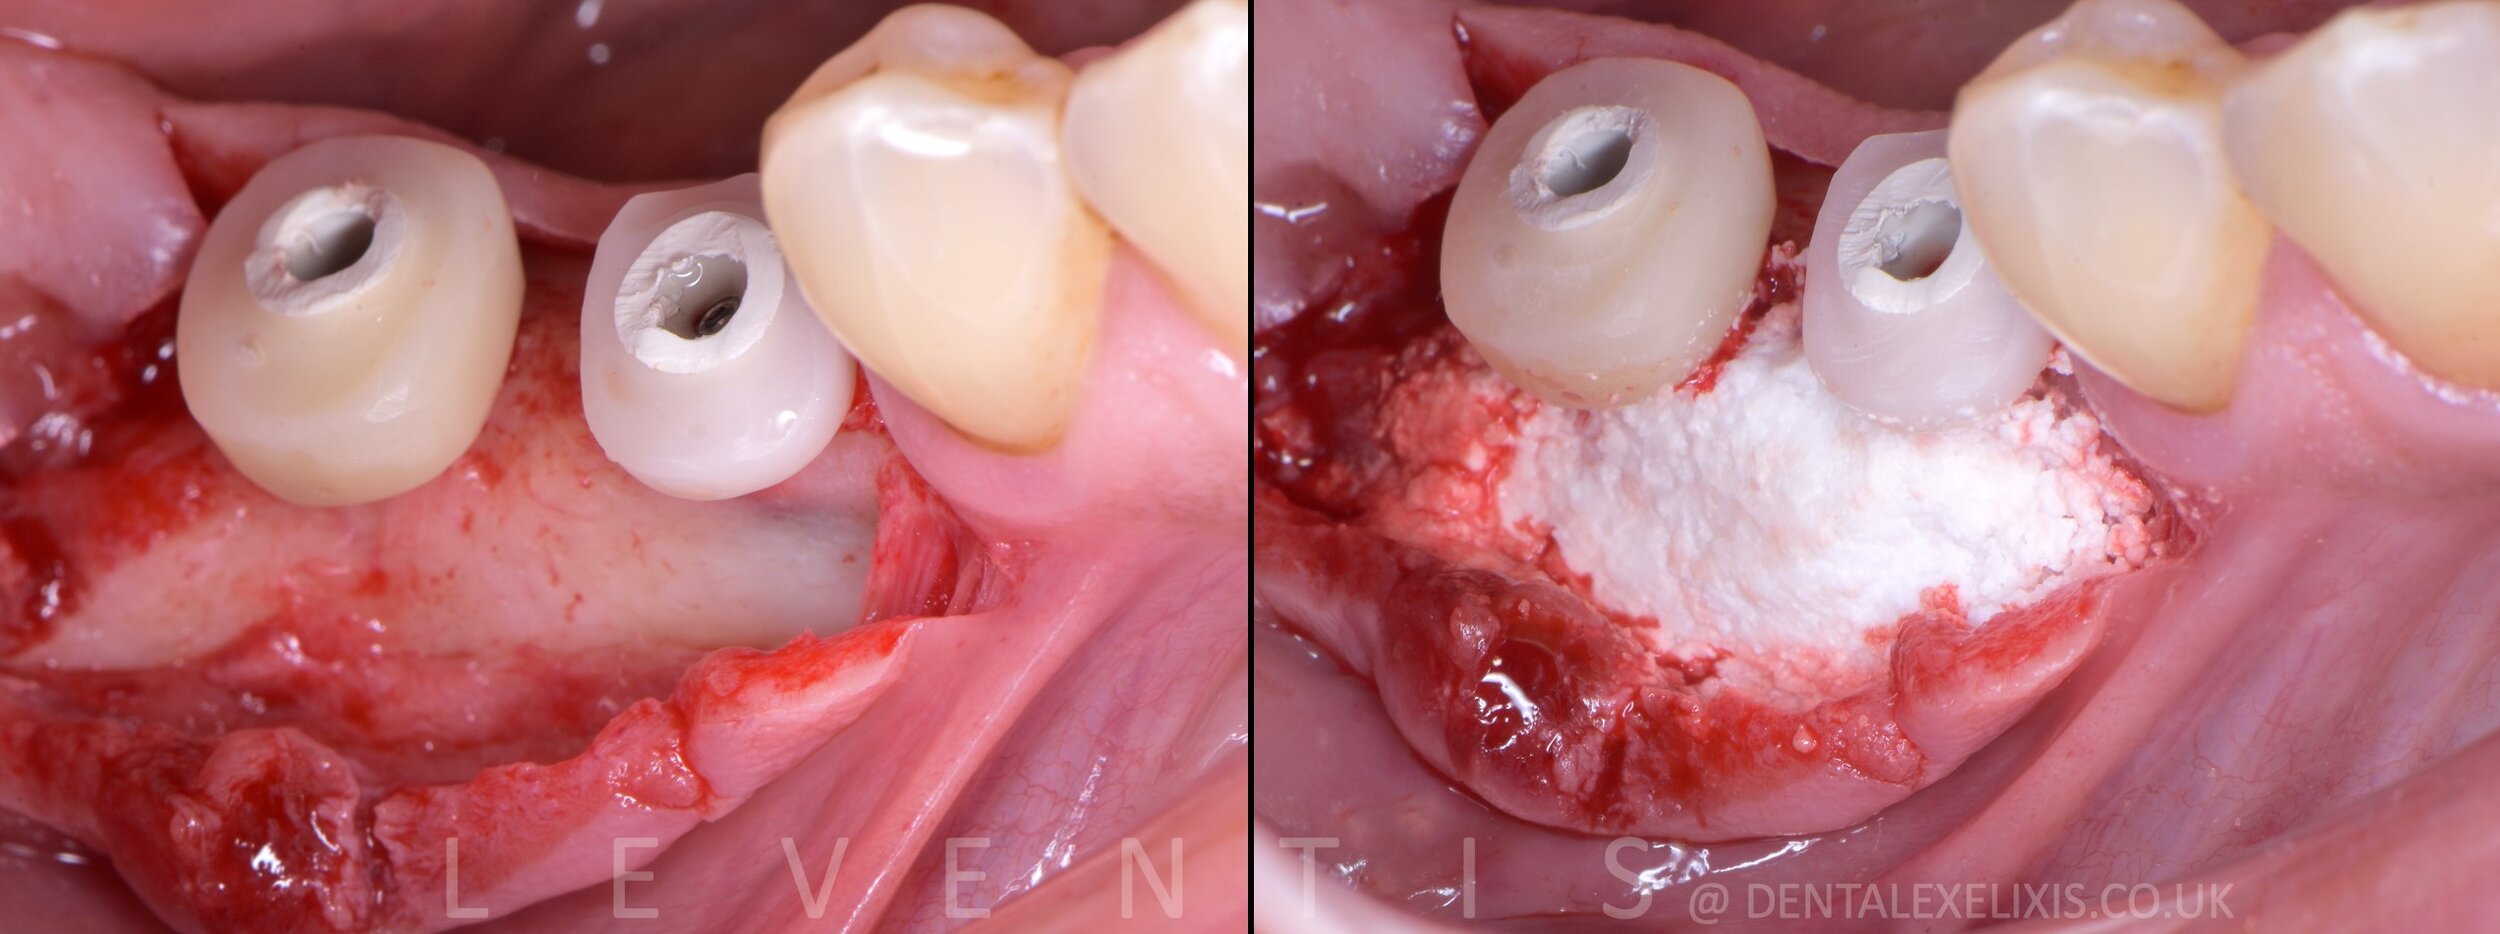
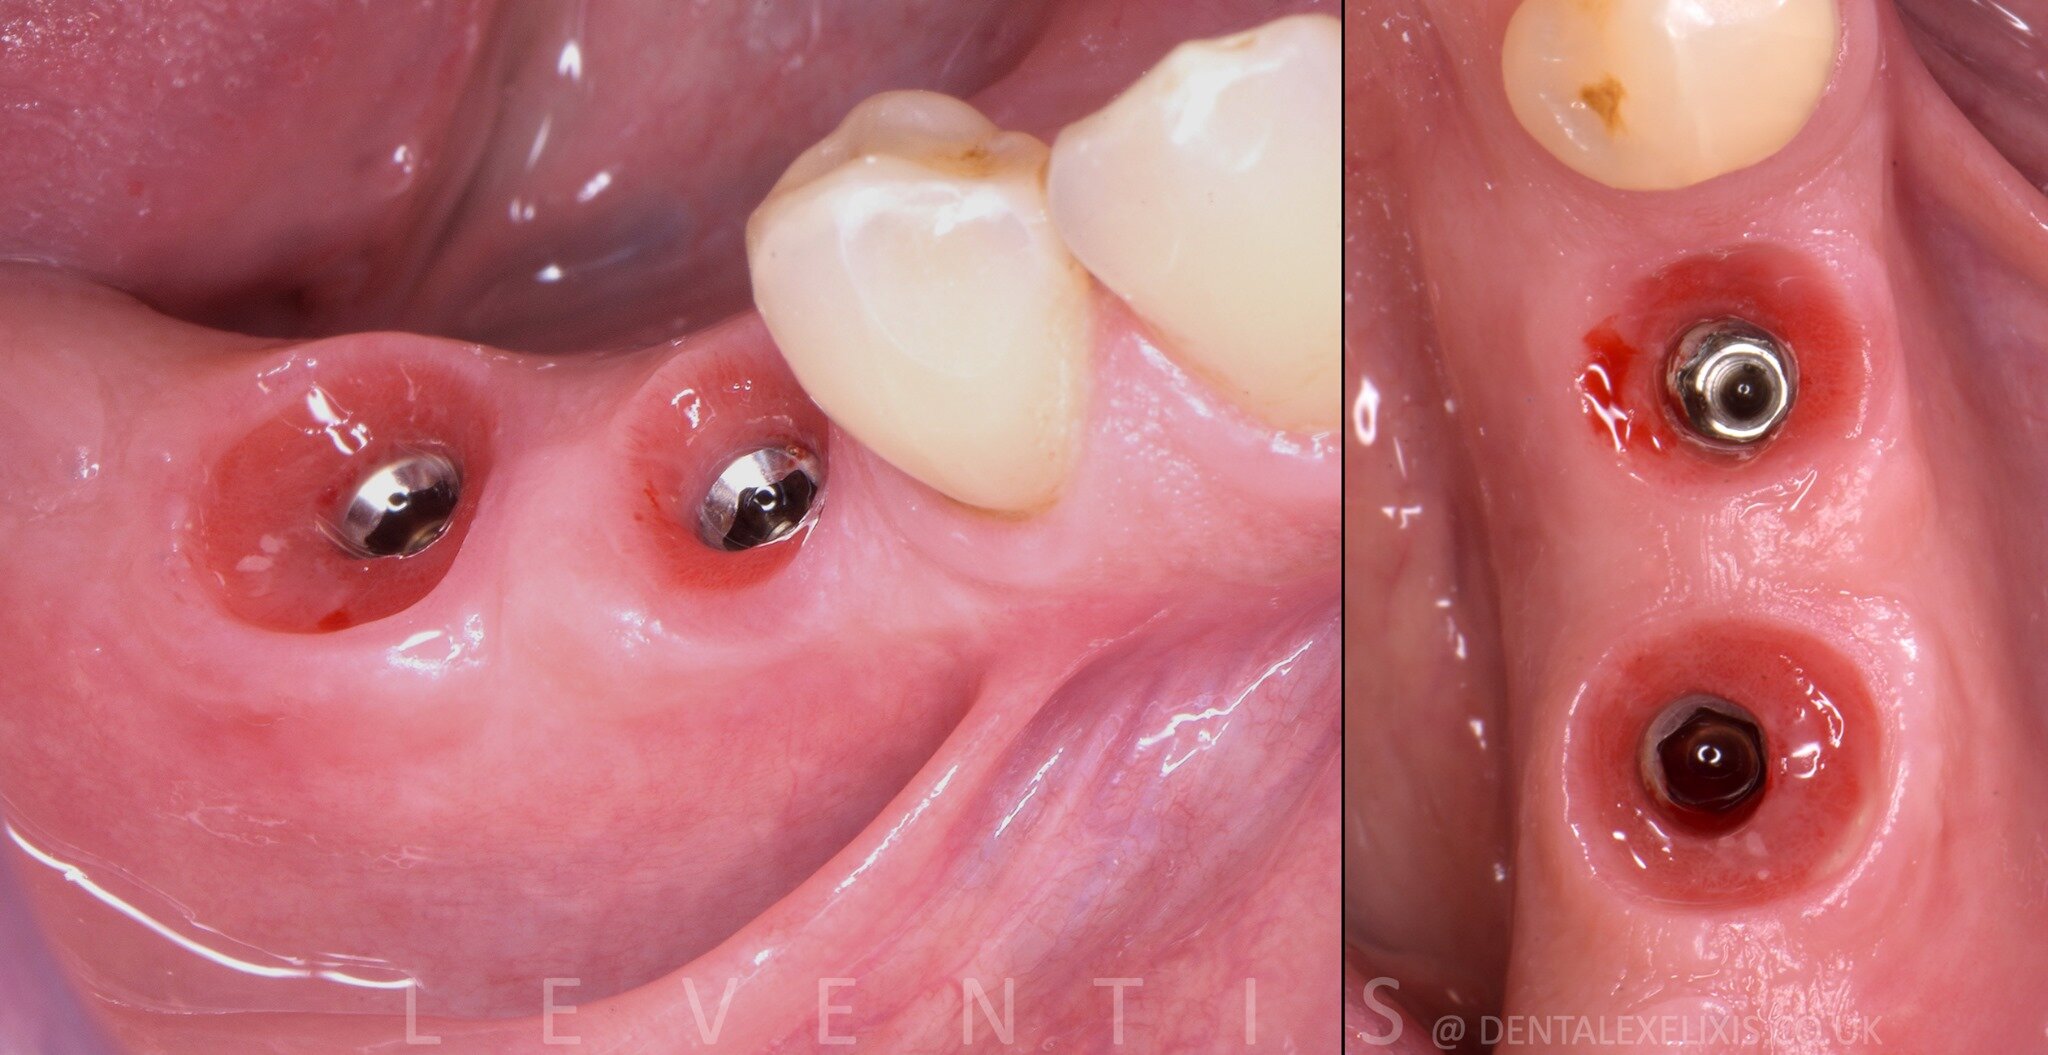
Also relevant: early placement in a lower molar at four weeks, with the custom abutment from the Essential Mold over a b-TCP graft.
References
- Finelle G, Lee SJ. Guided immediate implant placement with wound closure by computer-aided design/computer-assisted manufacture sealing socket abutment: case report. Int J Oral Maxillofac Implants 2017;32(2):e63–e67.
- Akin R. A new concept in maintaining the emergence profile in immediate posterior implant placement: the anatomic harmony abutment. J Oral Maxillofac Surg 2016;74(12):2385–2392.
- Sealing socket abutments after immediate molar implant placement: controlled clinical studies and reviews published 2024–2025 (PubMed Central PMC11645716, PMC11740560) and the ITI Forum Implantologicum feature article on the SSA and hard- and soft-tissue healing. Read the studies before adopting the protocol; the outcomes reported concern soft-tissue contour and graft protection, and the designs vary.
- Chairside fabrication of custom healing abutments. Continuing education course CE684, dentalcare.com.
A note on claims. Cervico is a guide and a mold. It makes a sealing socket abutment fast and repeatable; it does not change the biology. Read the SSA literature for the indications and limits of the technique itself.
Common questions
What is a sealing socket abutment?
A custom healing abutment placed at immediate implant placement whose shape matches the extraction socket. It closes the socket over the graft, keeps the soft tissue from collapsing, and shapes the emergence profile during healing. The name comes from Finelle and Lee’s 2017 report, which used a CAD/CAM PEEK abutment.
Does a sealing socket abutment replace a membrane?
In the published SSA protocols the abutment itself covers the graft, and no membrane or primary closure is used. Several Cervico cases on this site follow the same principle over a b-TCP graft. Whether that is appropriate is a decision for the treating clinician, case by case.
Can I make a sealing socket abutment without a scanner or a lab?
Yes. The socket-sealing shape is a cervical cross-section of the tooth that was extracted. The Cervico Guide has those cross-sections as tabs, and the Mold makes the abutment in flowable composite on a standard temporary abutment in under five minutes, at the surgical appointment.
Which sockets is it for?
The literature concentrates on molar and premolar sockets, where the implant sits in the middle of a wide socket and the gap around it needs to be grafted and covered. The same shape is used in anterior sites, where the profile also protects the buccal tissue.
How long does the sealing socket abutment stay in?
Until integration and tissue maturation, which the clinician judges from the case; the published protocols and the Cervico cases show three to four months in grafted molar sites. It is then swapped for the impression post, or built up into a provisional.
Is composite a suitable material for a sealing socket abutment?
Flowable composite on a titanium temporary abutment, highly polished, has been documented as a healing-abutment and provisional material for many years. Polish the tissue-contact surface, remove any unpolymerised resin and follow the composite manufacturer’s curing instructions. See why composite.