The Complete Guide
The Cervico System
Everything you need to know about chairside anatomical healing abutment fabrication. From clinical rationale, to step-by-step workflow, to implant compatibility.
Why the emergence profile matters
In implant dentistry, the transition from the implant platform to the restoration margin, the emergence profile, determines both the aesthetic outcome and the long-term health of the peri-implant soft tissue. A poorly shaped emergence profile leads to tissue recession, papilla loss, and compromised aesthetics that are difficult or impossible to correct after loading.
Traditional cylindrical healing abutments create round, flat tissue profiles that bear no resemblance to natural tooth anatomy. The result is a “cookie cutter” emergence that forces the restorative team to compensate at the prosthetic stage, often unsuccessfully. The soft tissue has already healed in the wrong shape.
The Cervico System solves this by enabling clinicians to fabricate custom anatomical healing abutments directly at the chairside, during the surgical appointment, without laboratory involvement. The abutment mirrors the cervical profile of the natural tooth it replaces, guiding the soft tissue into stable, anatomically correct contours from the moment of implant placement.

What this means clinically
The shape of the healing abutment determines how the peri-implant soft tissue heals. A stock cylindrical healing screw leaves the mucosa formed around a non-anatomical shape. At delivery, the final crown either rides over that tissue as a ridge-lap design, which traps plaque and food and is among the prosthetic factors most consistently linked to peri-implant inflammation, or it gets forced into the tissue under anesthesia, which displaces the mucosa that has been forming over the healing period.
An anatomical healing abutment carries the emergence profile of the tooth being replaced. The peri-implant soft tissue forms around it during osseointegration, while remodeling is still plastic, so by the impression stage the site already holds the contour the final crown will have. The Cervico system transfers that contour to the lab 1:1, whether you take a conventional open or closed tray impression or an intraoral scan. The prosthesis seats into tissue that has already been conditioned to receive it.
What's in the Cervico System
Two core components, the Guide and the Mold, work together to take you from diagnosis to a finished anatomical healing abutment.

The Cervico Guide
A reusable, autoclavable, multi-use intra-oral tool with 20 coded tabs: 12 anatomical tabs (small/medium/large for anteriors, premolars, upper molars, and lower molars) for cervical profile evaluation, and 8 cylindrical tabs (5-12mm) for osteotomy marking and mesio-distal space assessment. The clinician seats the guide over the implant site and selects the tab that best matches the cervical profile needed. The tab code maps directly to a well in the mold. The cylindrical tabs also let you quickly verify whether you have sufficient space for an implant, accounting for the 1.5mm minimum distance from adjacent teeth and 3mm between implants.
Includes: tray, 12 anatomical tabs, 8 cylindrical tabs, ergonomic handle, 4 positioning pins and 2 depth gauges.
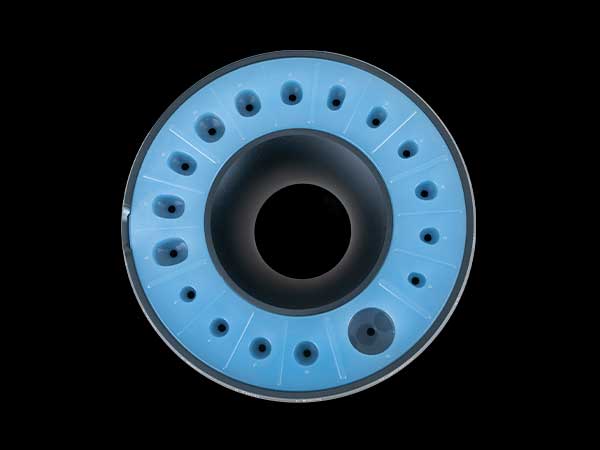
The Premium Mold
A medical-grade aluminum base with an interchangeable silicone insert. Contains 12 anatomical wells + 4 cylindrical wells + 1 duplication well. Uses VPI Prosthetic Connection Inserts to lock abutments in place for fixed buccal orientation (hex flat always facing buccal) and precise 1mm insertion depth control – critical for subcrestal placement protocols. This locking mechanism enables pre-fabrication of surgery-ready abutments by your assistant, and true 1:1 duplication onto impression posts for conventional open or closed tray impressions.
Includes the Off-Centered Silicone Insert (12 additional off-centered wells). Requires a VPI Insert for your implant system (sold separately).

The Essential Mold
A simplified mold that uses stock analogs from any implant manufacturer – no proprietary inserts needed. Contains 24 anatomical wells including both centered and off-centered shapes. A tear-shaped extrusion on each well provides a built-in buccal reference. Universal compatibility makes it ideal for multi-system practices.
Works with any stock analog you already have in your kit.
From Implant to Emergence Profile in 8 Steps
The entire process takes under 10 minutes and requires no laboratory involvement. Shown here with the Premium Kit.

Select the cervical profile
Position the Cervico Guide over the implant site or extraction socket. Try different tabs until you find the one that best matches the cervical cross-section of the tooth being replaced.
The tabs are split in 4 categories: Anteriors, Premolars, Square Molars (m1) and Elongated Molars (m2). Each category has 3 sizes (Small, Medium, Large).
Note the tab code (e.g., “m1L”).

Install the prosthetic connection insert
Place the VPI Prosthetic Connection Insert that came with your Premium Mold into the socket group that matches your implant placement depth:
- Sockets 1–12: crestal placement
- Sockets 13–24: 1 mm sub-crestal
- Sockets 25–33: 2 mm sub-crestal
- Sockets 34–36: 3 mm sub-crestal
Once installed, the insert stays in the mold. You only need to remove and reinstall it if your placement depth changes.
Optional. If you work at multiple depths with the same implant connection, purchase additional inserts and keep one pre-installed at each depth.

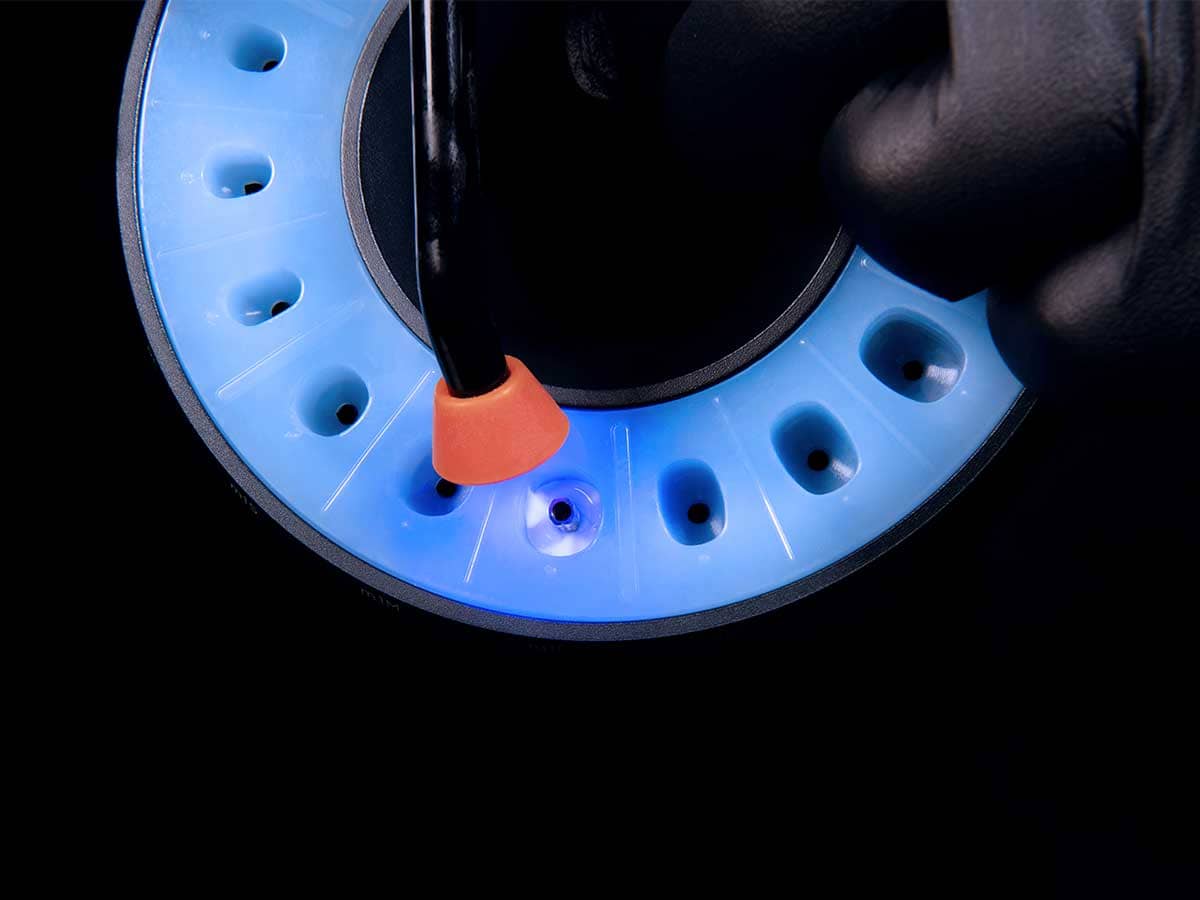
Thread into the matching well
Rotate the top ring to align the well matching your Guide tab code over your installed insert. Thread a temporary abutment through the well into the insert.

Dispense nano-hybrid flowable composite into the well around the abutment. You rarely need to fill the well more than halfway. Build height above the well rim if you want to prep the abutment as a temporary prosthesis.
Technique: Massage the silicone briefly before light curing to avoid air bubbles.
Light cure
Light cure according to the manufacturer’s specifications for your composite and curing lamp.
Technique: For larger wells, cure in increments.

Unthread, inspect, polish
Unthread the abutment from the mold. You now have a custom anatomical healing abutment with the exact cervical profile you selected. Cut any unnecessary excess of the temporary abutment using a cutting disc, then polish with the Cervico polishing brushes and paste for a smooth tissue-contact surface.

Install and let tissue shape
Torque the custom healing abutment onto the implant. The soft tissue will now begin maturation around the anatomical healing abutment. No lab costs, no waiting – the patient leaves with tissue shaping already underway.

Create the impression transfer post
When ready for the impression, fabricate a customized impression post in the same Cervico Mold well you used for the healing abutment. The post captures the exact emergence profile you created, and the lab receives a perfect copy of the tissue contour.
Premium vs Essential - Full Comparison
Both systems produce custom anatomical healing abutments. The difference is in the connection method and level of modularity.
| Feature | Premium Kit | Essential Kit / Mold |
|---|---|---|
| Cervico Guide included | ✓ (Kit only) | ✓ (Kit only) |
| Anatomical wells | 12 centered + 12 off-centered + 4 cylindrical (with included insert) | 24 shapes (centered + off-centered) |
| Duplication well | ✓ | ✓ |
| Implant connection method | VPI Prosthetic Connection Inserts (system-specific) | Stock analogs (universal) |
| Off-centered shaping | ✓ Included, Off-Centered Silicone Insert | ✓ Built into the mold |
| Insertion depth control | 1mm increments, ideal for subcrestal placement | Manual positioning by clinician |
| Fixed prosthetic orientation | ✓ Hex flat always faces buccal | Manual orientation by clinician |
| Pre-fabrication by assistant | ✓ Consistent, repeatable, surgery-ready | Requires clinician involvement |
| 1:1 impression duplication | ✓ Exact replica for open/closed tray | Best paired with intra-oral scanner |
| Buccal reference | Automatic, hex flat locks buccally | Tear-shaped extrusion on each well |
| Sterilizable | ✓ autoclave 134°C | ✓ autoclave 134°C |
| Reusable | ✓ unlimited | ✓ unlimited |
| Multi-system practice? | Yes, swap inserts per system | Yes, use any analog |
| Price (Kit with Guide) | ||
| Price (Mold only) | Not available separately | $999.00 |
| Best for | Clinicians wanting pre-fabricated, surgery-ready abutments with full depth and orientation control, especially with conventional impressions | Clinicians wanting simplicity and universal compatibility, especially with digital/intra-oral scanning workflows |
Whichever system you use, there's a Cervico for you.
Cervico fits every implant workflow. The Premium Mold connects to all major systems via interchangeable VPI Inserts. The Essential Mold works with any stock analog you already have.
VPI Prosthetic Connection Inserts (Premium Mold only)
The Premium Mold works with all major implant systems via interchangeable inserts. Swap the insert to match your system and get fixed buccal orientation, precise 1 mm insertion depth control, and true 1:1 impression duplication.
Most popular:
Straumann
Nobel Biocare
Dentsply Sirona
Zimmer Biomet
BioHorizons
Osstem
Hiossen
MIS
Neodent
Megagen
Implant Direct
Camlog
Conelog
Bredent
New connection types are added regularly. Don’t see your system?
Essential Mold
Works with any implant system that has a stock analog available. No proprietary inserts, no compatibility tables to check. Thread a stock analog from any manufacturer directly into the well and start shaping. A good fit for multi-system practices and digital workflows with intra-oral scanning.
Common Questions
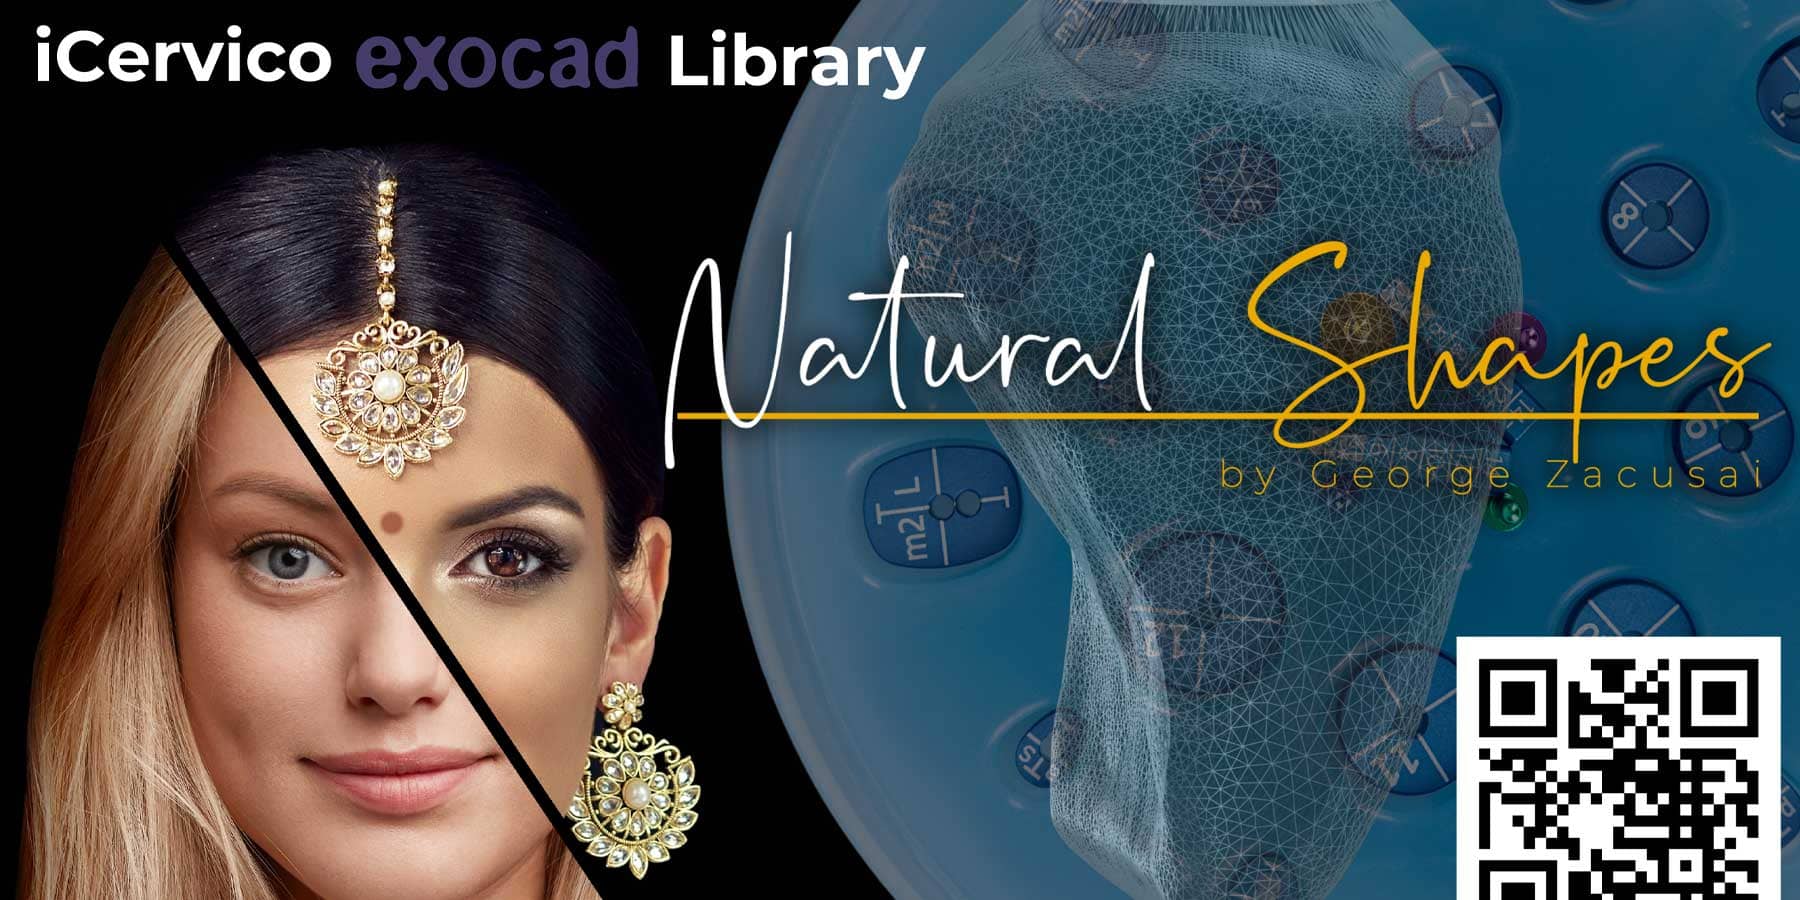
iCervico - teeth shape libraries for CAD/CAM
For practices using a fully digital workflow, the iCervico Teeth Libraries provide the same anatomical cervical profiles as digital files compatible with major CAD/CAM platforms. Design custom healing abutments and provisional restorations using the Cervico philosophy of anatomically guided tissue shaping – but do it entirely in software.
The libraries include pre-designed cervical contours that match the physical Guide tabs, enabling a seamless transition between analog and digital workflows. Use them for designing immediate provisionals, custom abutments, and screw-retained restorations where emergence profile control is critical.
What leading clinicians say
“Soft tissue development is the most critical and underappreciated component of implant site management. The Cervico system is an integral part of my daily armamentarium.”

Dr. Charles Schwimer
U.S.A.
“Cervico has changed how I communicate with my lab and deliver prosthetics at a higher standard for my patients . Any practicing implant dentist should be using this system.”
Dr. Mark Bishara
Canada
“The Cervico system is a very usefull device. It’s simple, original, practical and is long lasting! Should have been invented before! I use it whenever I can!”

Dr. Jorge Campos Aliaga
Spain
“I love the Cervico System due to its capability of creating a perfect emergence profile depending on my three dimensional implant position within minutes.”

Dr. Andreas Van Orten
Germany
“In situations of immediate implant placement, especially in posterior teeth, Cervico enables me to perfectly seal the socket and support the existing soft tissue architecture.”

Prof. Nitzan Bichacho
Israel
“In clinical implantology, stability of tissues begins with the healing abutment. Cervico provides this opportunity, effortless. I love to work with it.”

Dr. Dimitrios Spagopoulos
Greece
“Cervico is a life changing product that helps us master the emergence profile in a very easy and predictable way.”

Dr. Gustavo Peres Alves
Portugal
“The Cervico System is an absolute “must” for anyone placing and restoring implants. It improves implant placement accuracy, aesthetics, biology and patient satisfaction.”

Dr. Pamela Maragliano
U.S.A.
“Very helpful system assisting anything from an ideal implant positioning to development of a perfect emergence profile! Really well done!”

Dr. Gurien Demiraqi
Albania
“Cervico was the missing piece in the rehabilitation workflow on implants. It’s so naturaly integrated in our practice that we can’t work without it. When I’ve presented the system to my students and resident doctors, they’ve embraced it with enthusiasm. Starting this upcoming year we are going to integrate it in the normal curricula of the University. It’s natural!”

Prof. Marius Leretter
Romania
“Cervico by VPI allows me to perform an anatomic and natural emergence profile. Cervico is easy to use in my daily practice to obtain a nice Soft Tissue surrounding my implant.”

Dr. Benjamin Cortasse
France
“I would find it difficult to achieve ideal emergence profiles with sub-crestal implants. Now with Cervico, I’m able to achieve predictable aesthetic results in a simplified manner.”

Dr. Art Mirelez
U.S.A.
Ready to master the emergence profile?
Join the clinicians in 70+ countries already using Cervico to deliver predictable soft-tissue outcomes.