Clinical case · Lower molar · early placement
Early placement at four weeks, and the soft tissue redesigned without a graft
Dr. Minas Leventis
Lower left first molar, four weeks after extraction. A 5.0 × 8.0 implant placed 1 mm subcrestal, a customised Cervico healing abutment from the Essential Mold over a b-TCP / calcium sulfate graft, and a simplified approach to redesign the peri-implant soft tissue with no soft-tissue grafting.
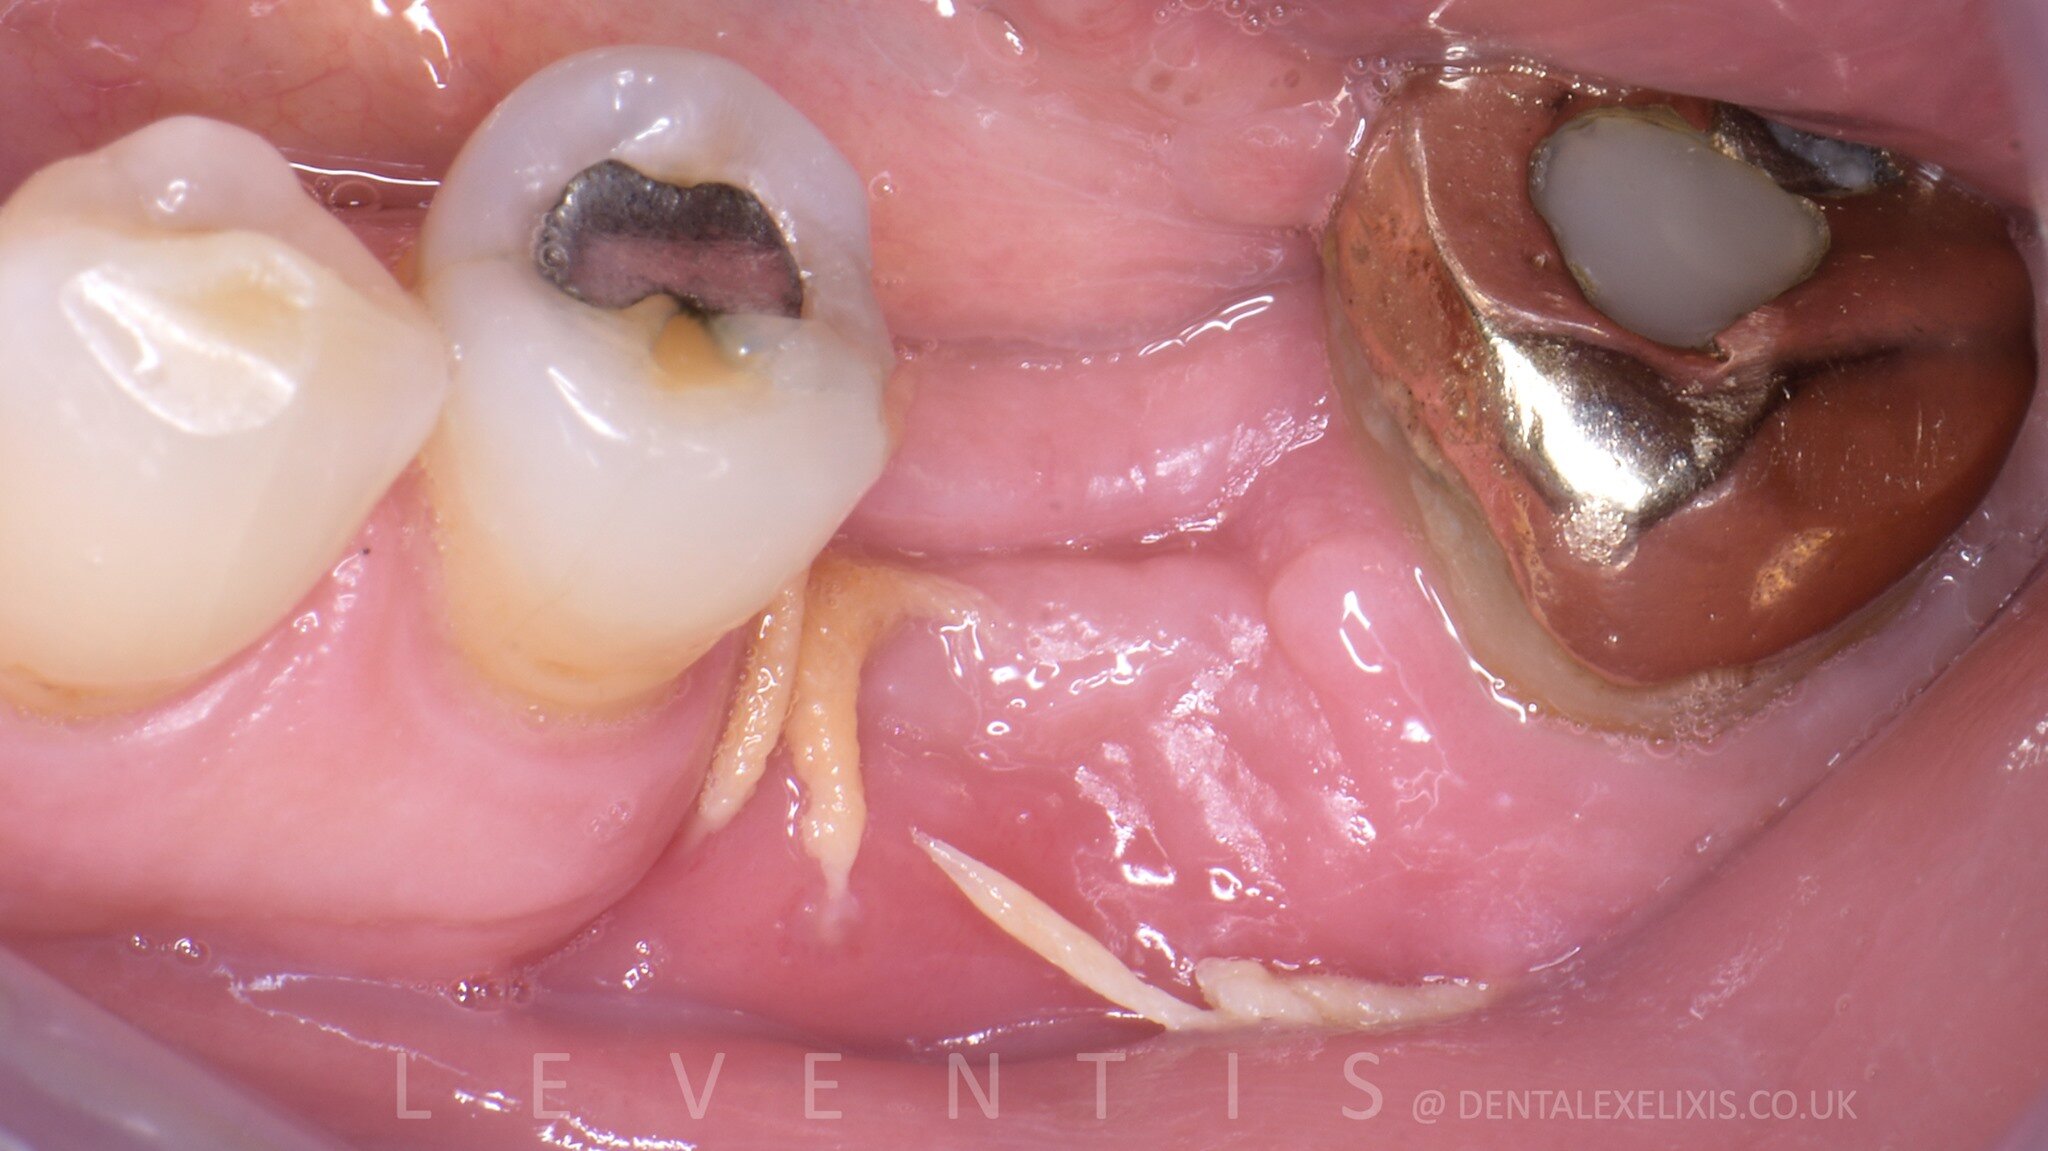
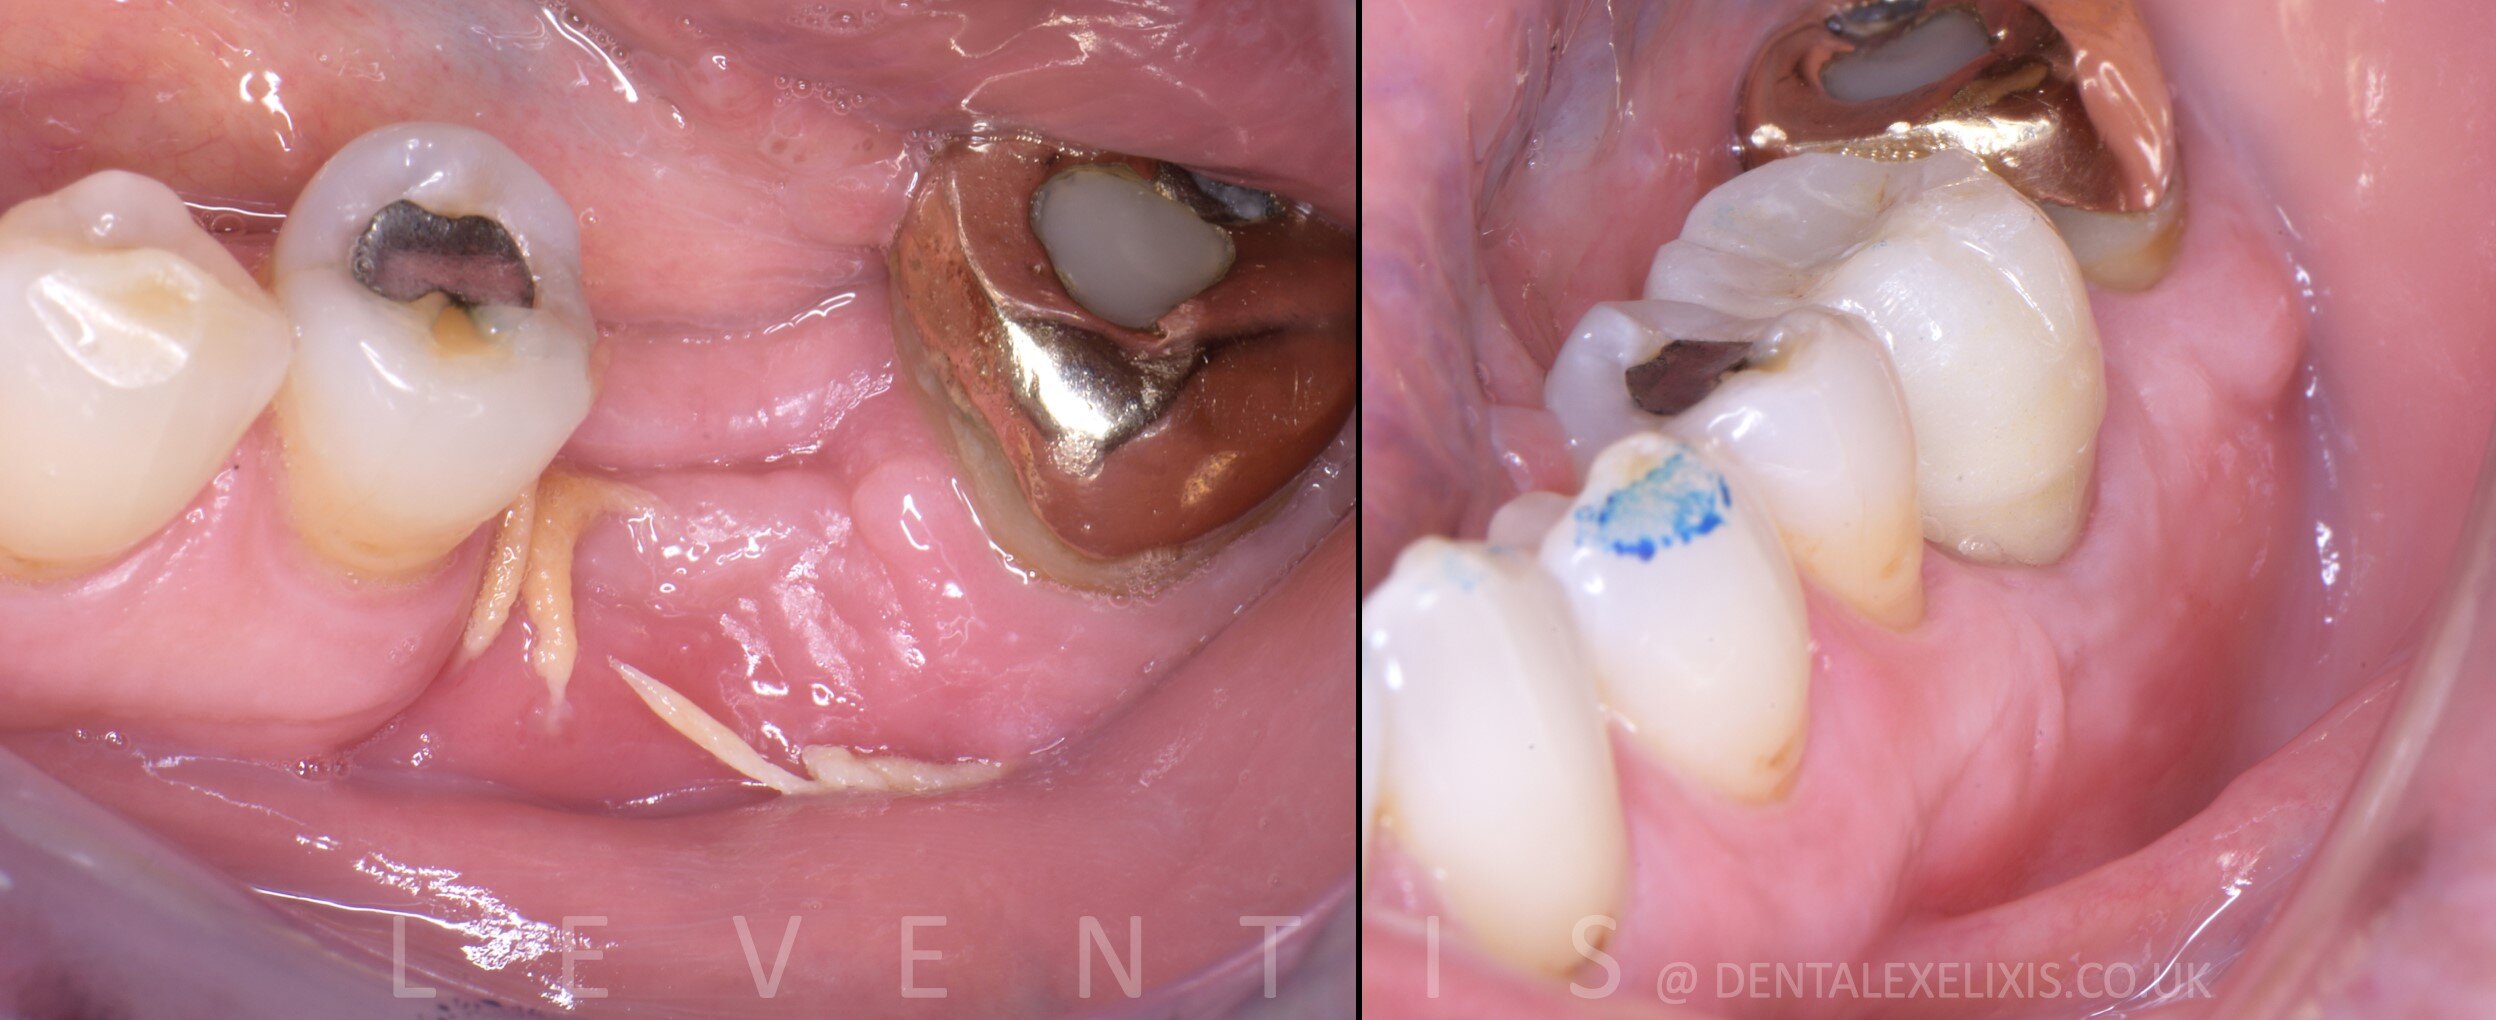
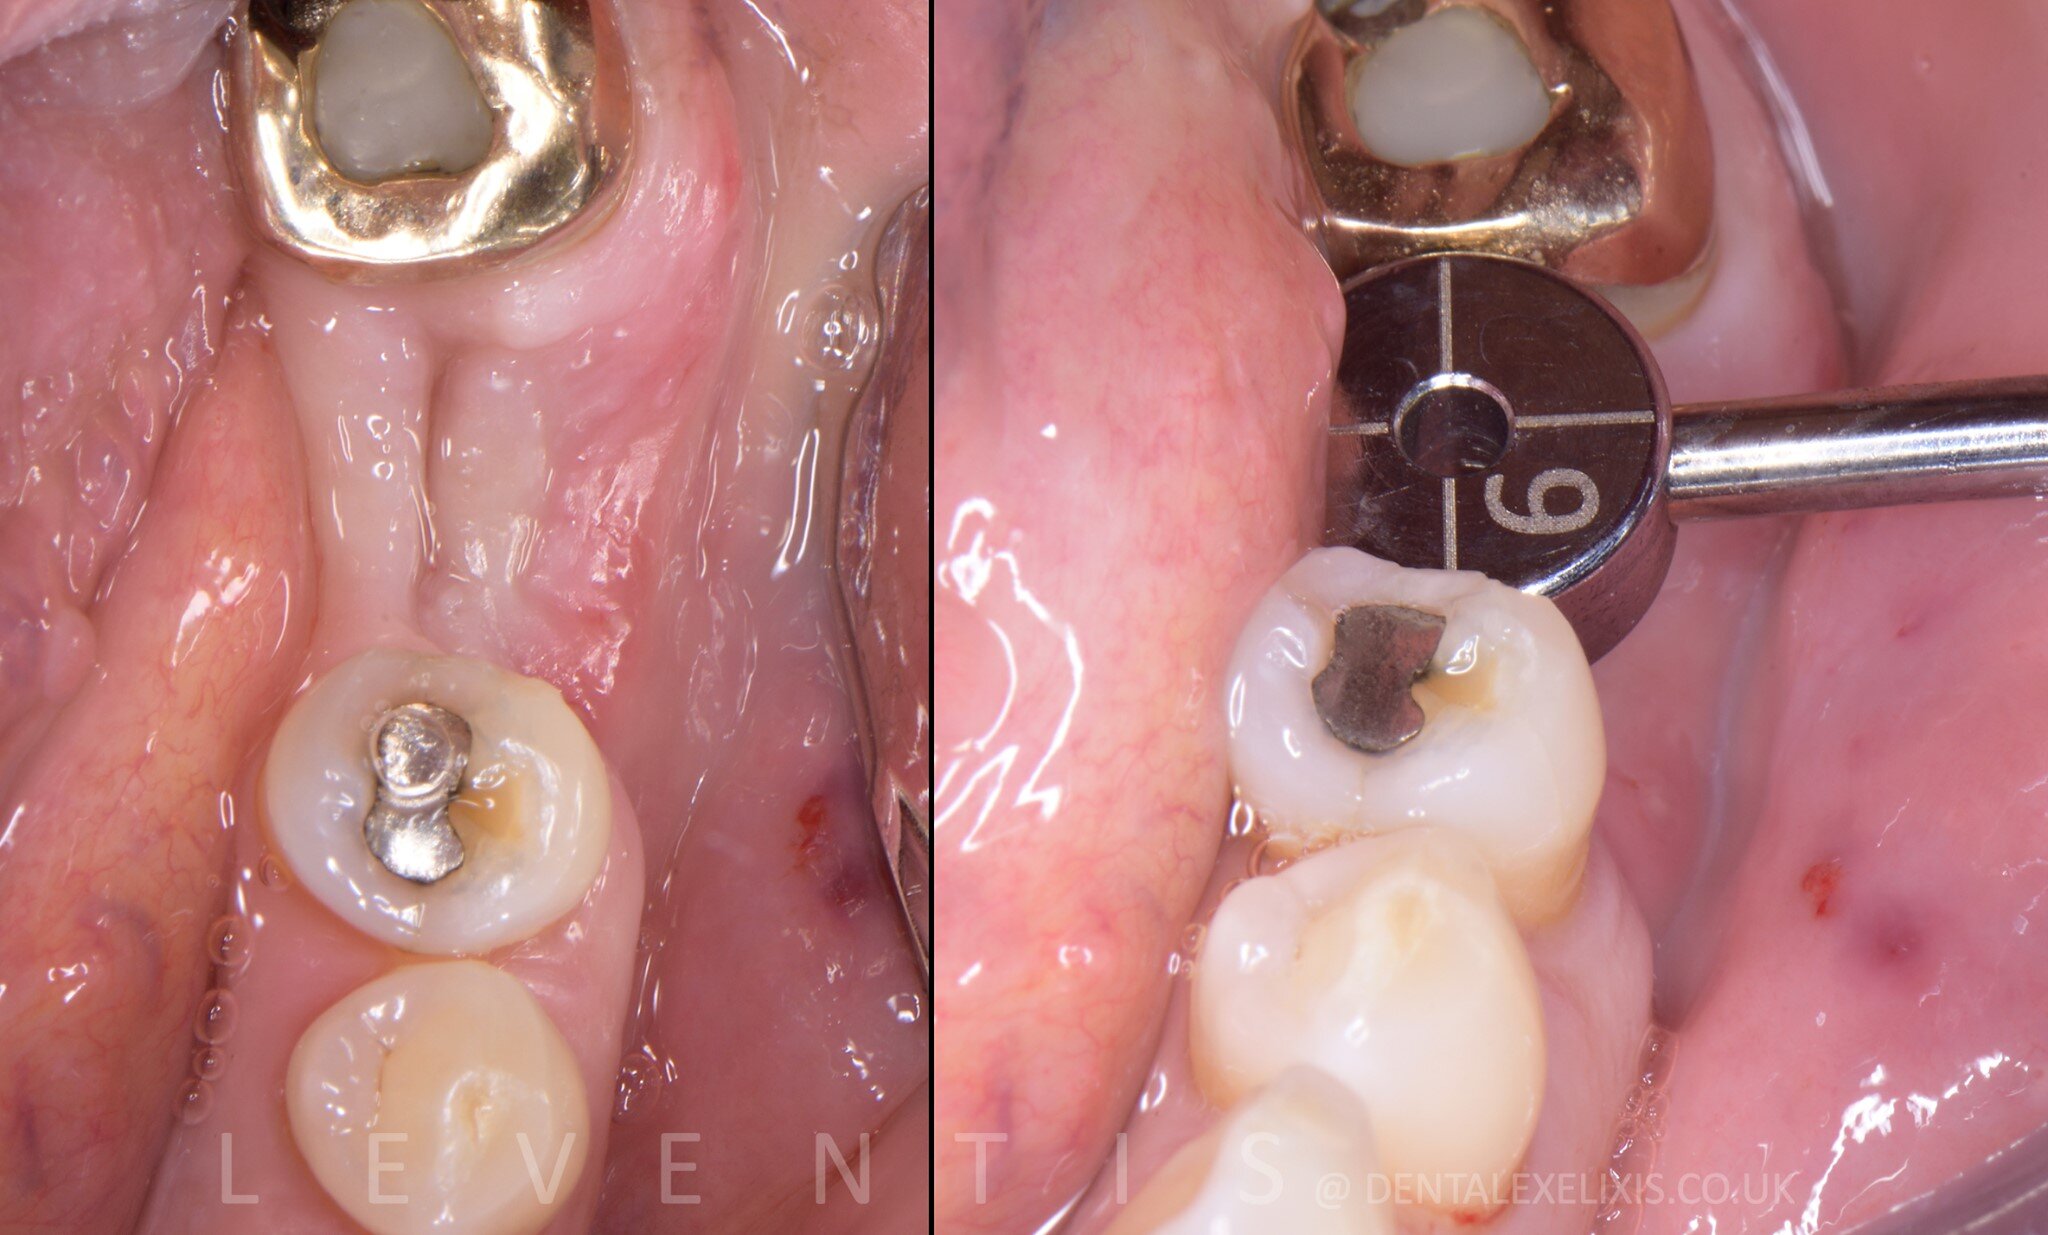
Lower left first molar, 4 weeks post-extraction
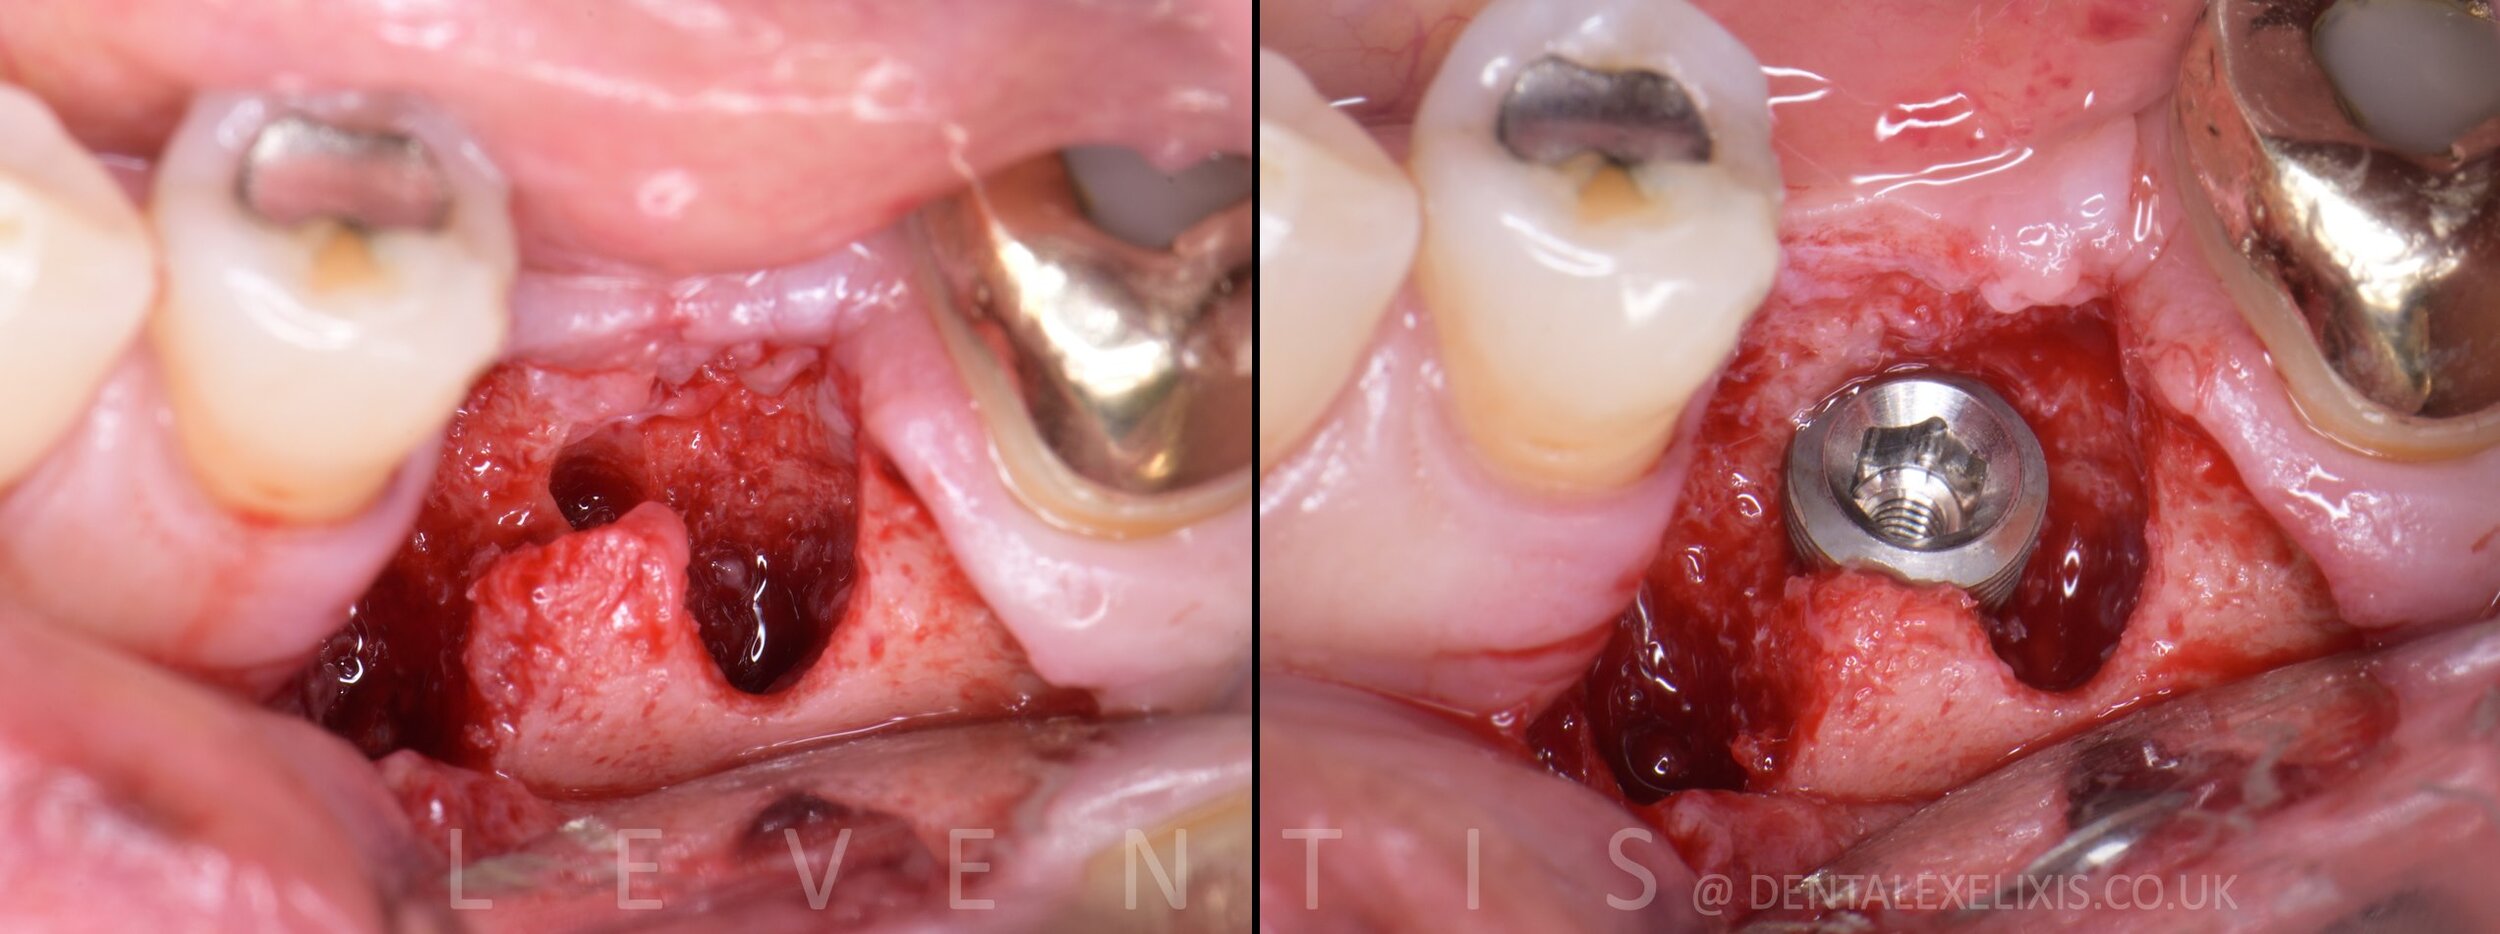
5.0 × 8.0 mm, placed 1 mm subcrestal, high initial stability
9 mm cylindrical tab: space measured, then used as the stent
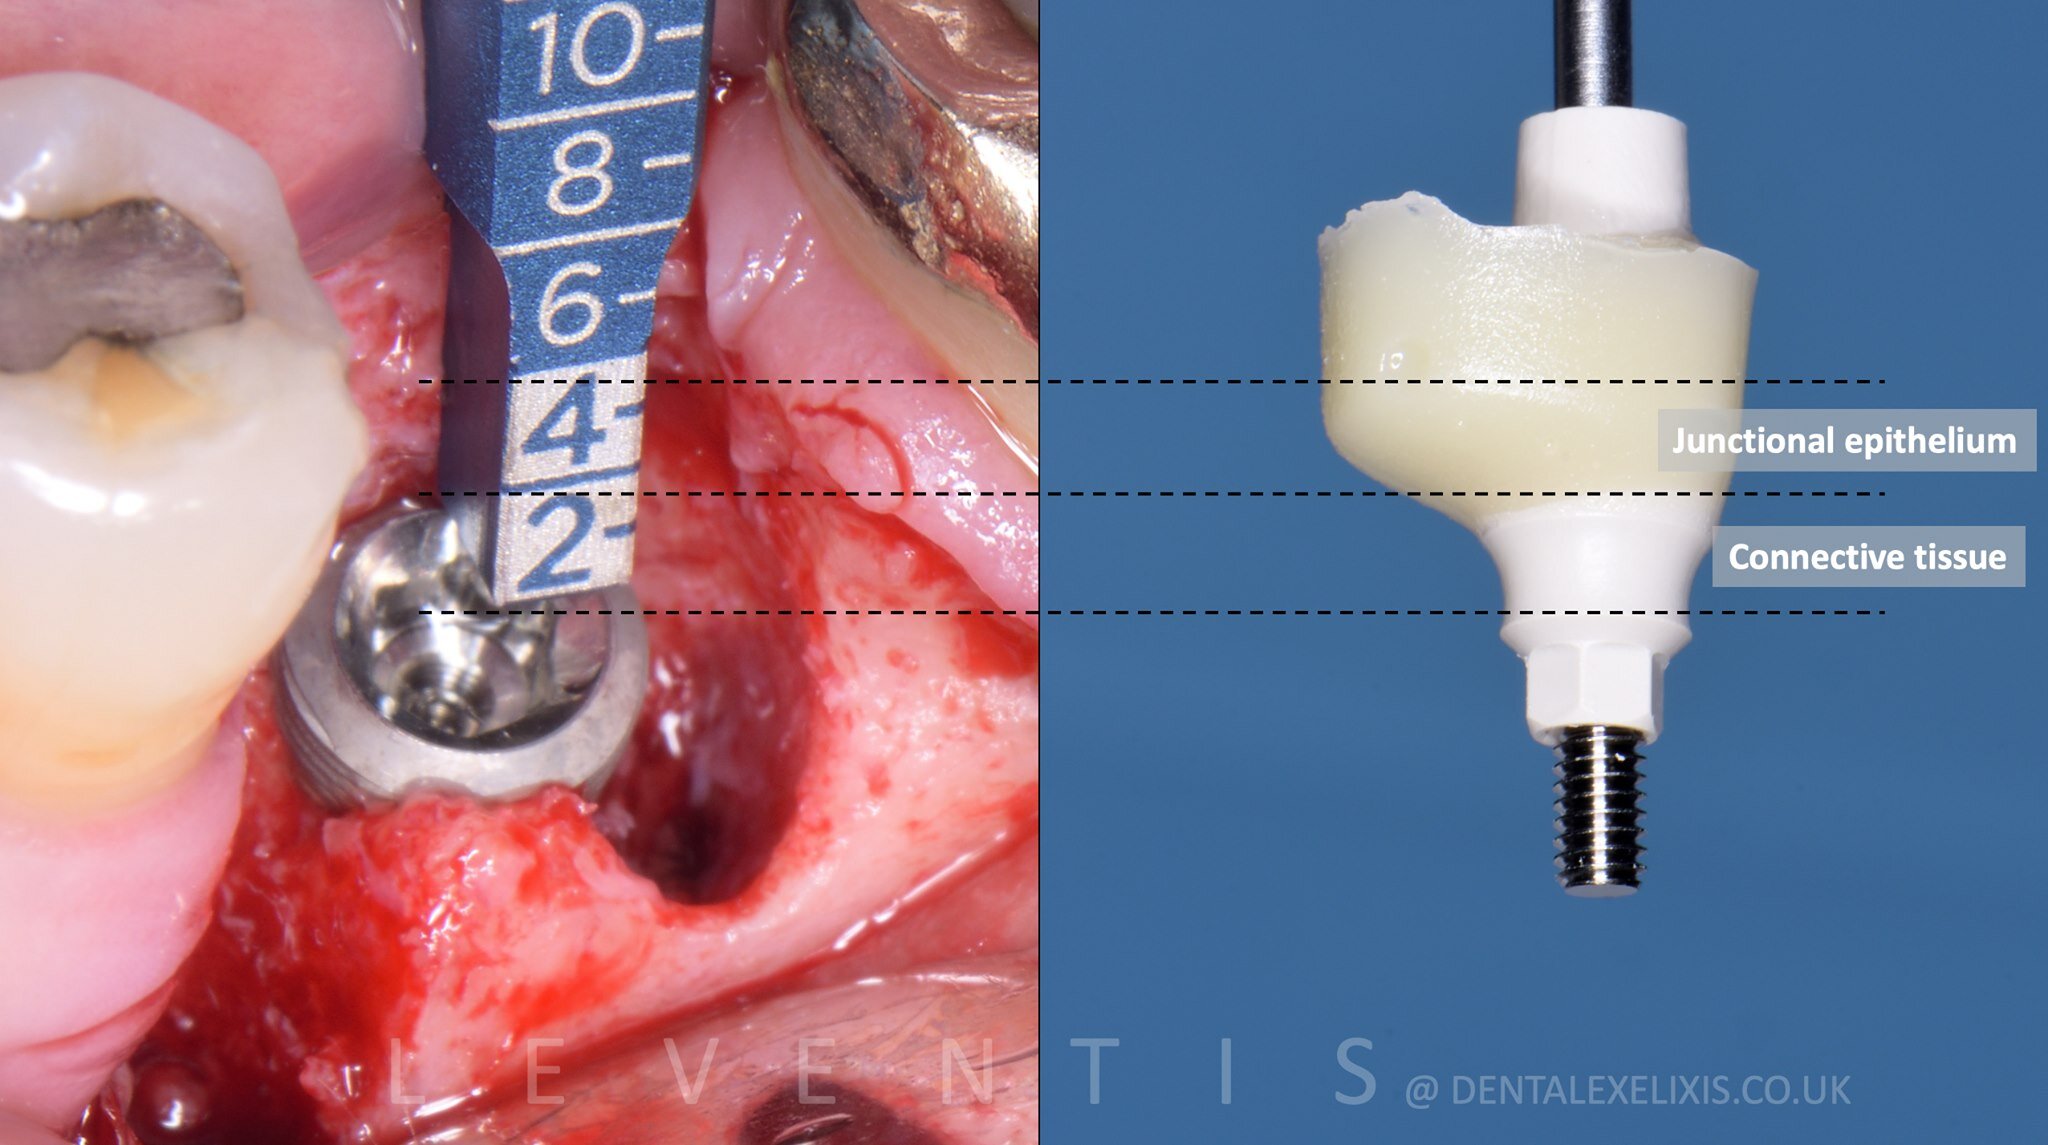
Customised Cervico healing abutment, Essential Mold
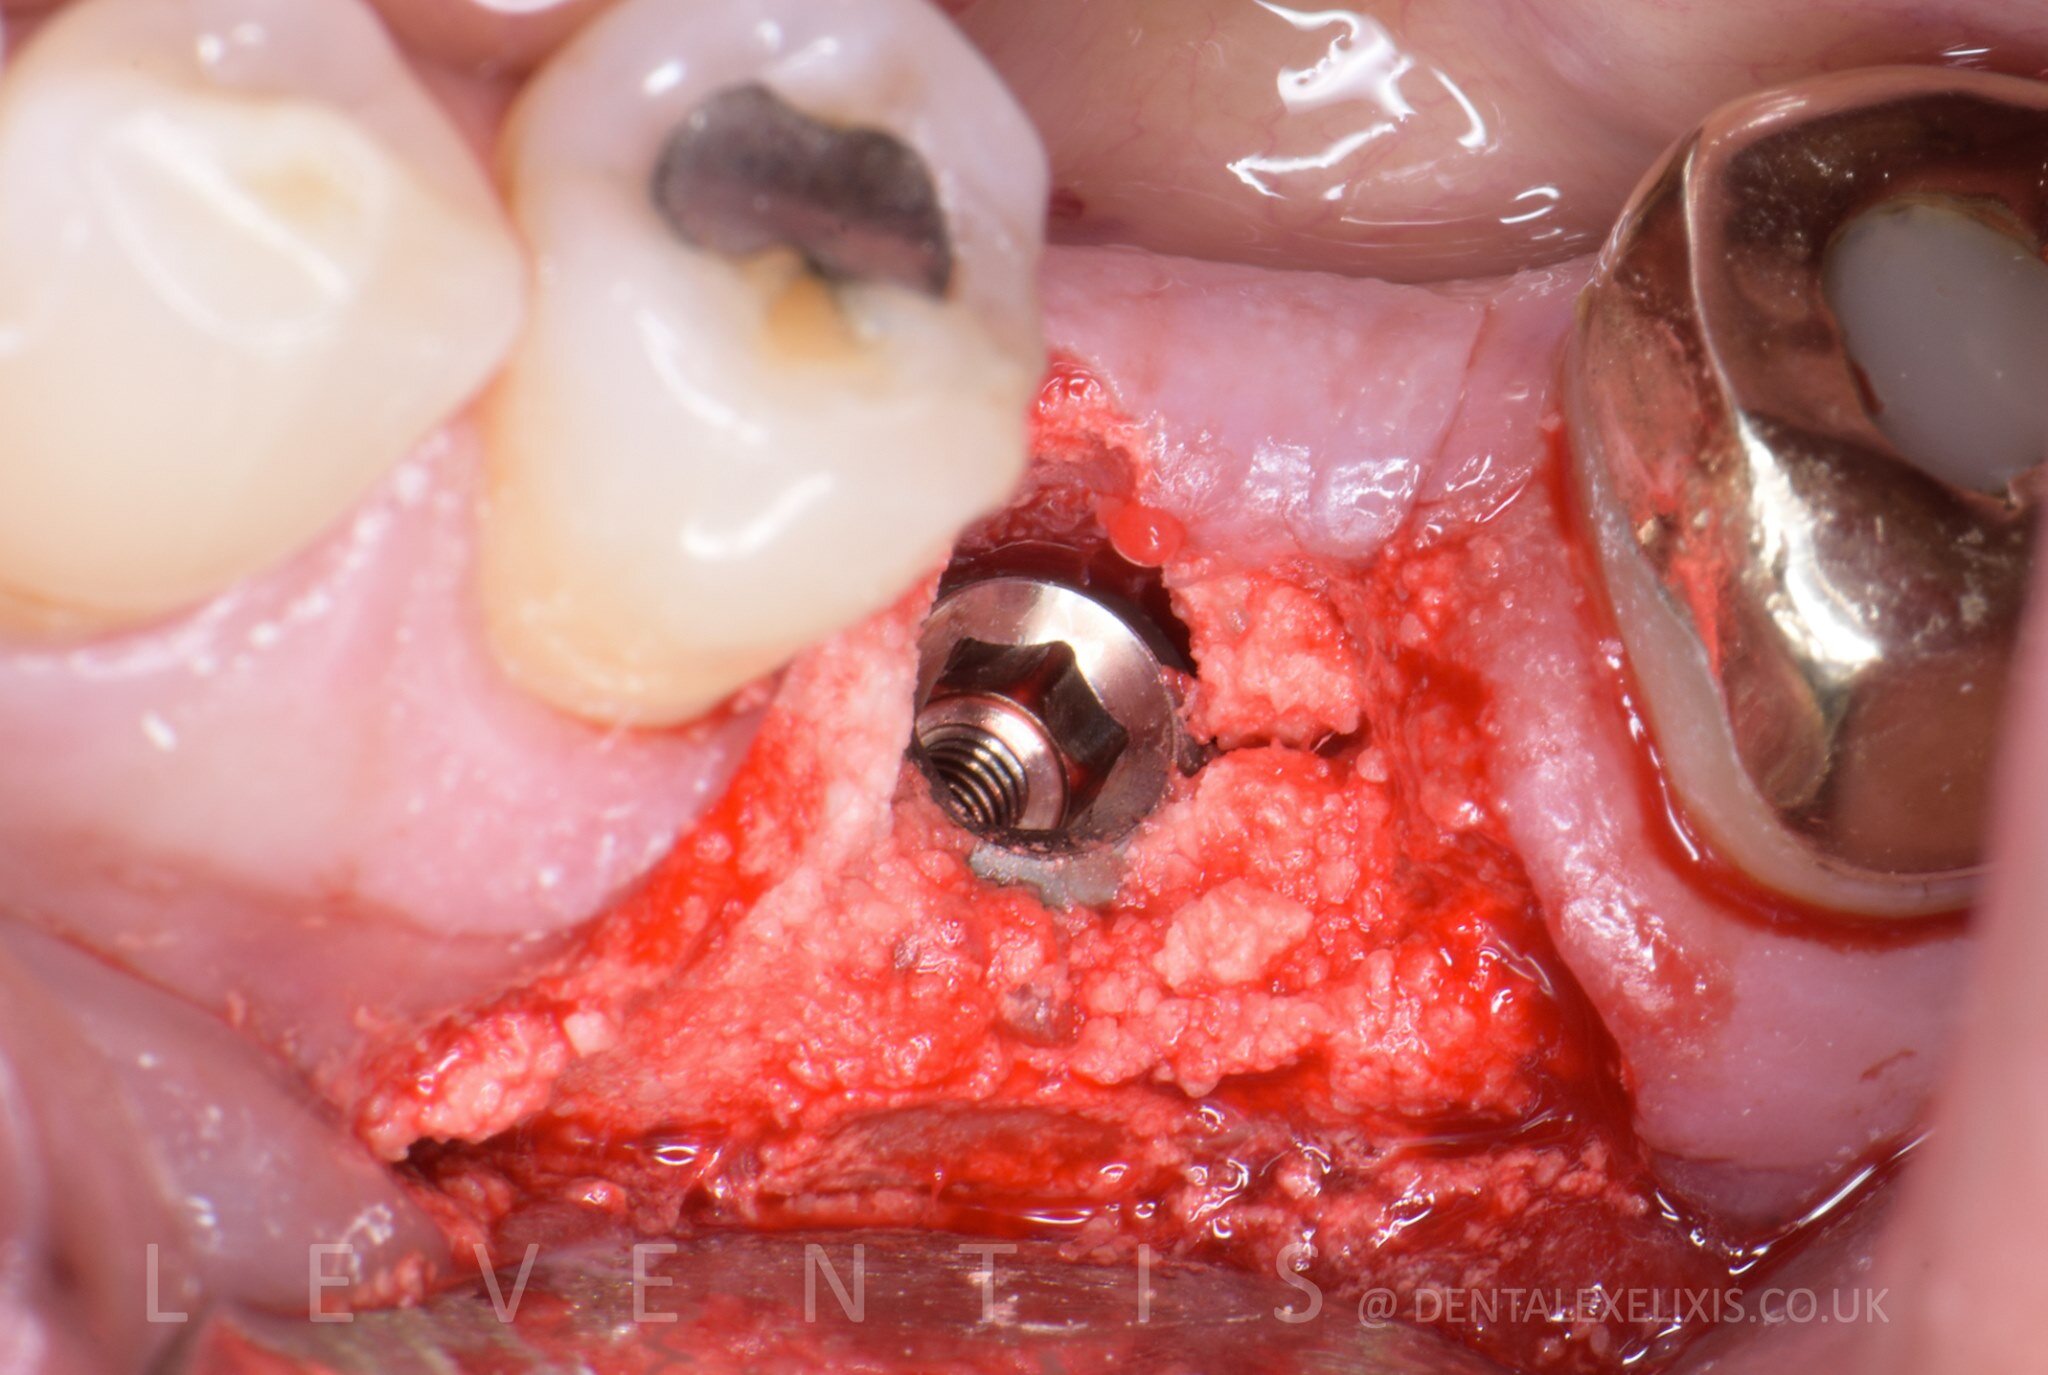
Synthetic b-TCP / calcium sulfate, no soft-tissue graft
5-0 monofilament SKD sutures; Bluem gel; SilverPlug in the canal
The protocol
-

STEP 01
A 9 mm cylindrical tab evaluates the site intraorally and measures the prosthetic space. The same tab then guides the initial trephination as a surgical stent.
-

STEP 02
Initial pilot trephination completed; a pin checks position and direction.
-

STEP 03
Full-thickness flap. A 5.0 × 8.0 implant placed with high initial stability.
-

STEP 04
The Cervico caliper reads placement depth and the thickness of the overlying soft tissue. The implant sits 1 mm subcrestal to leave room for every component of the future transmucosal complex. The custom abutment is made in the Essential Mold.
-

STEP 05
Grafting with synthetic b-TCP / calcium sulfate before the customised healing abutment is fitted.
-

STEP 06
Abutment fitted and sutured with 5-0 monofilament SKD. From this moment the transmucosal complex forms in parallel with osseointegration and hard-tissue regeneration.
-

STEP 07
A simplified contemporary approach to redesign the peri-implant soft tissue, without soft-tissue grafting.
-

STEP 08
With the correct emergence profile created, all the information transfers to the lab for a restoration that meets the functional, biological and aesthetic requirements.

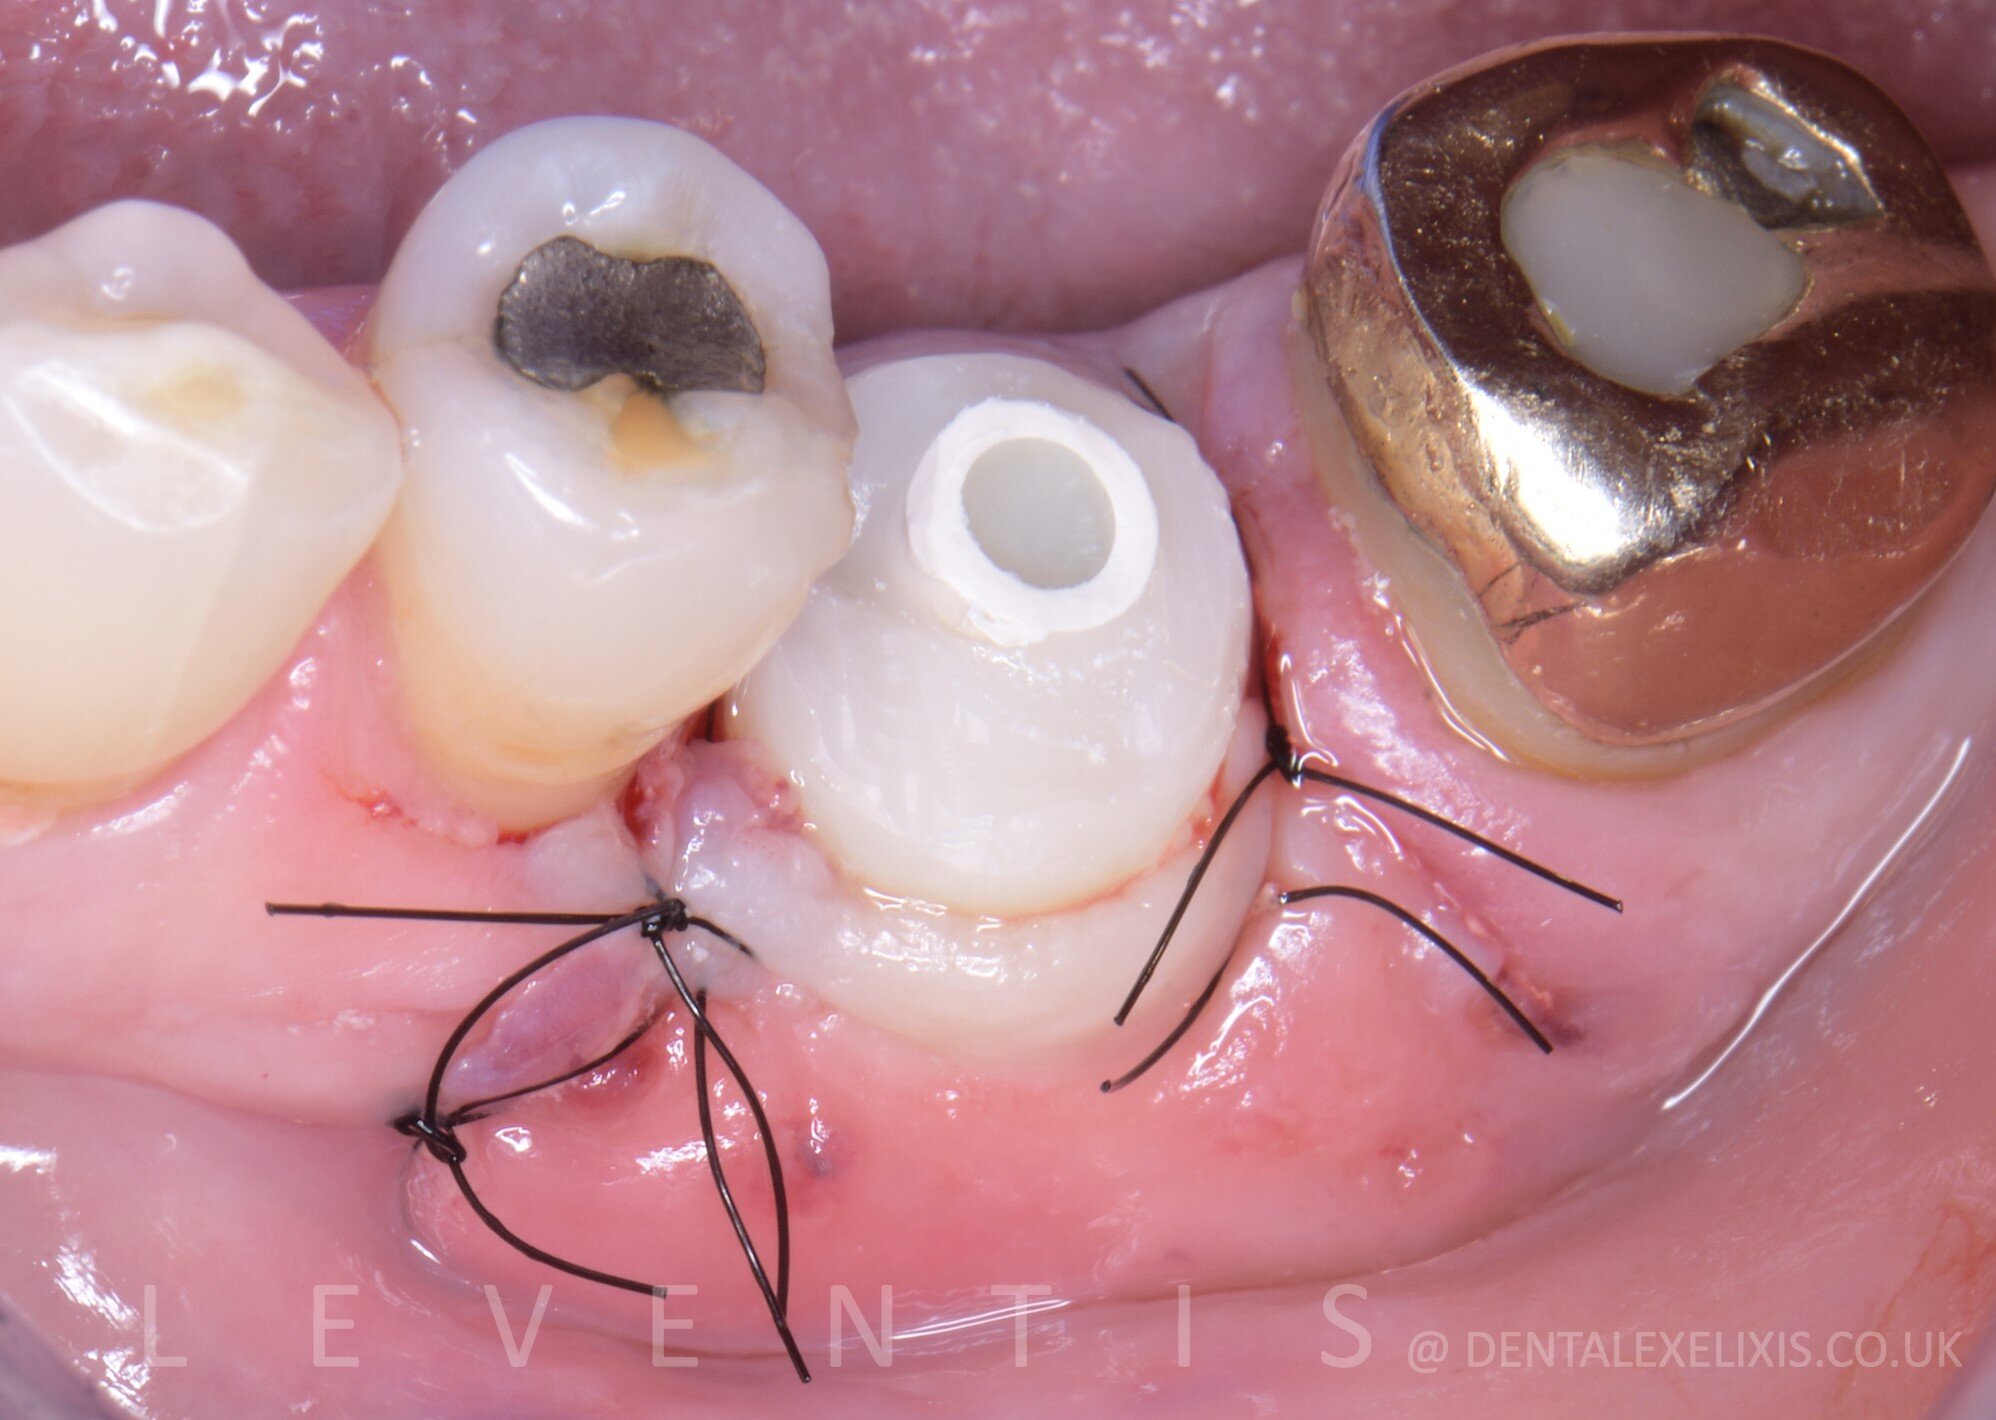
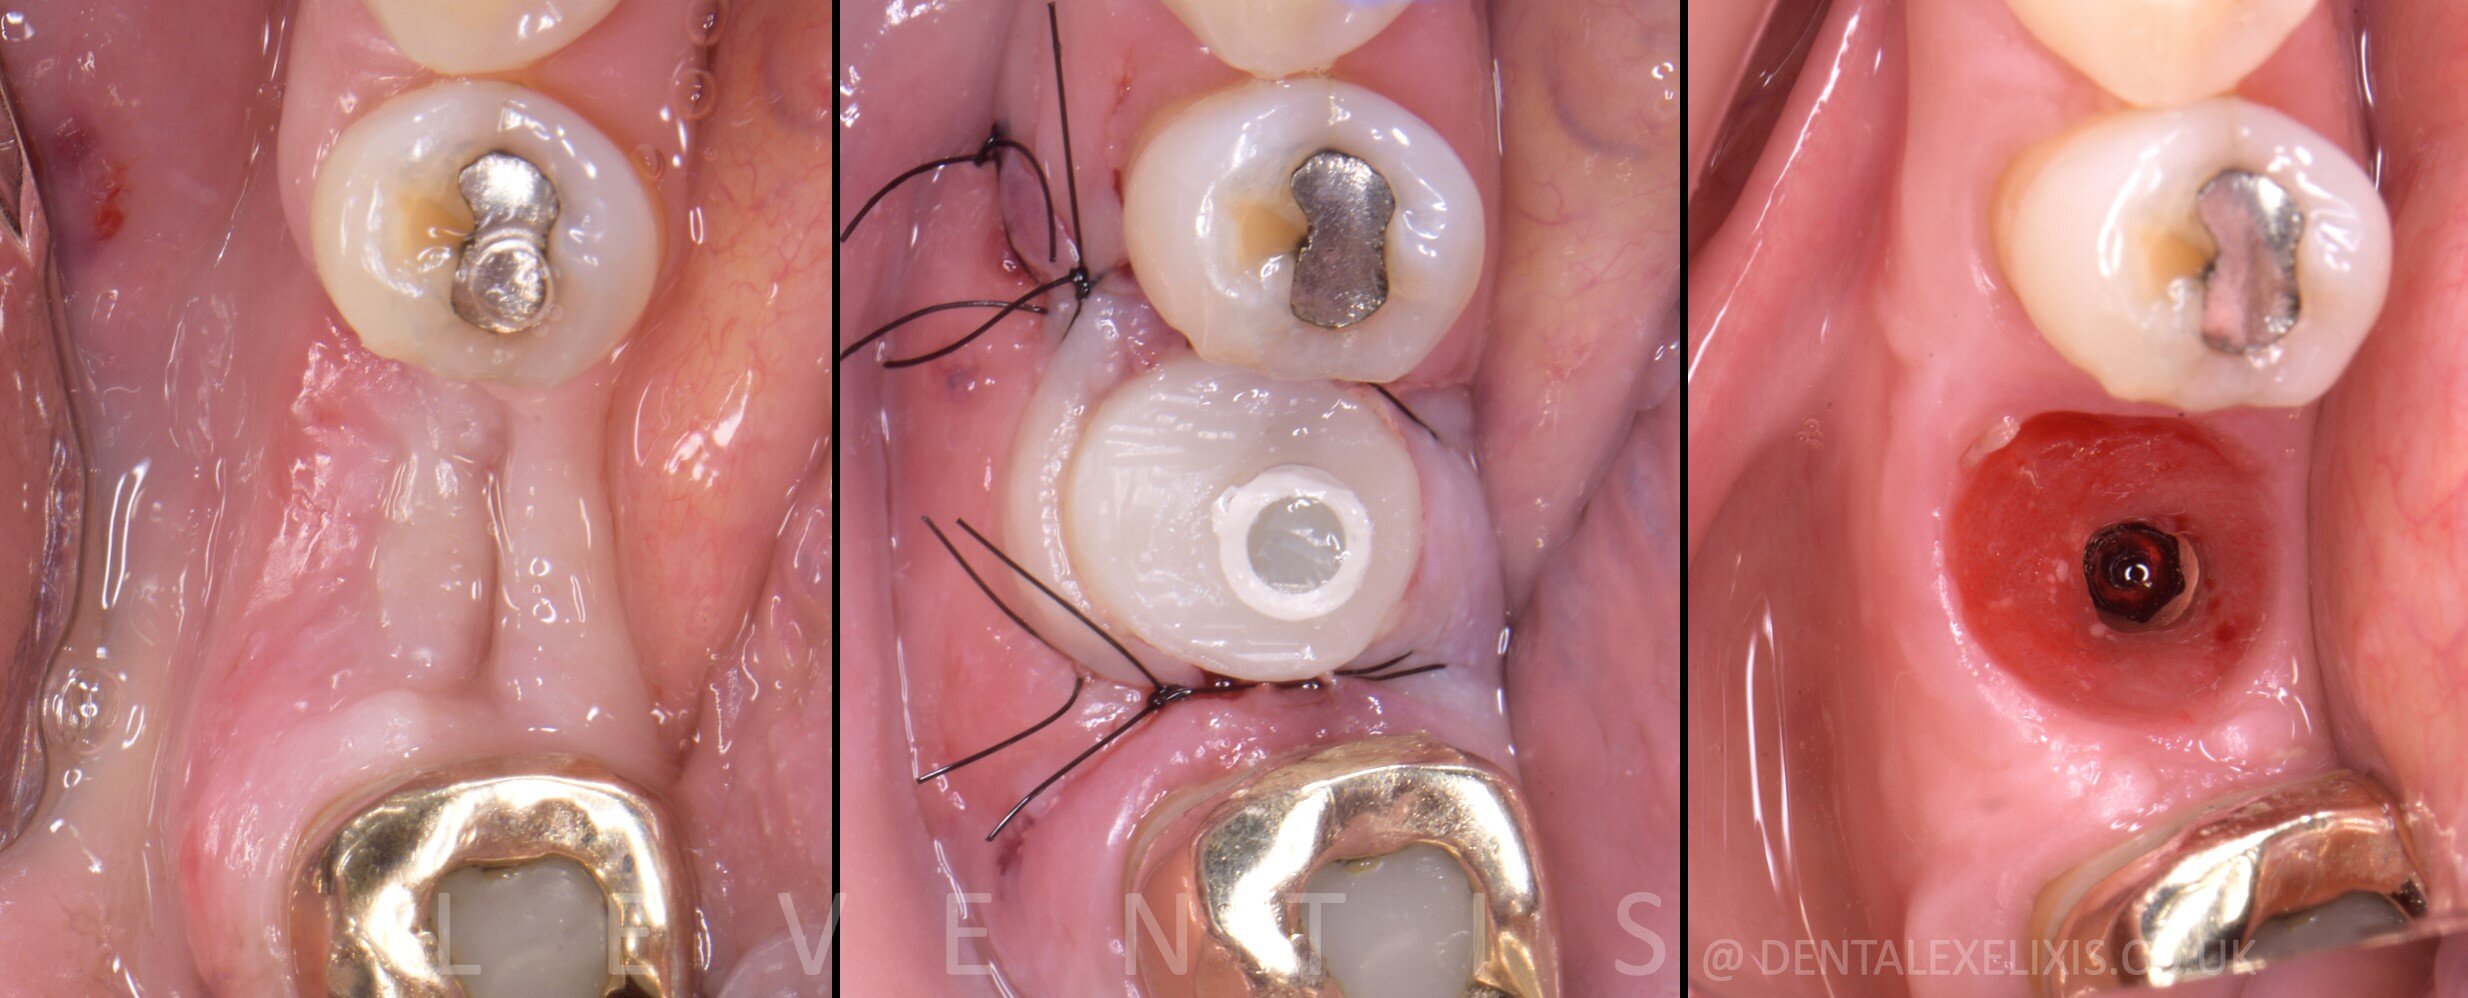
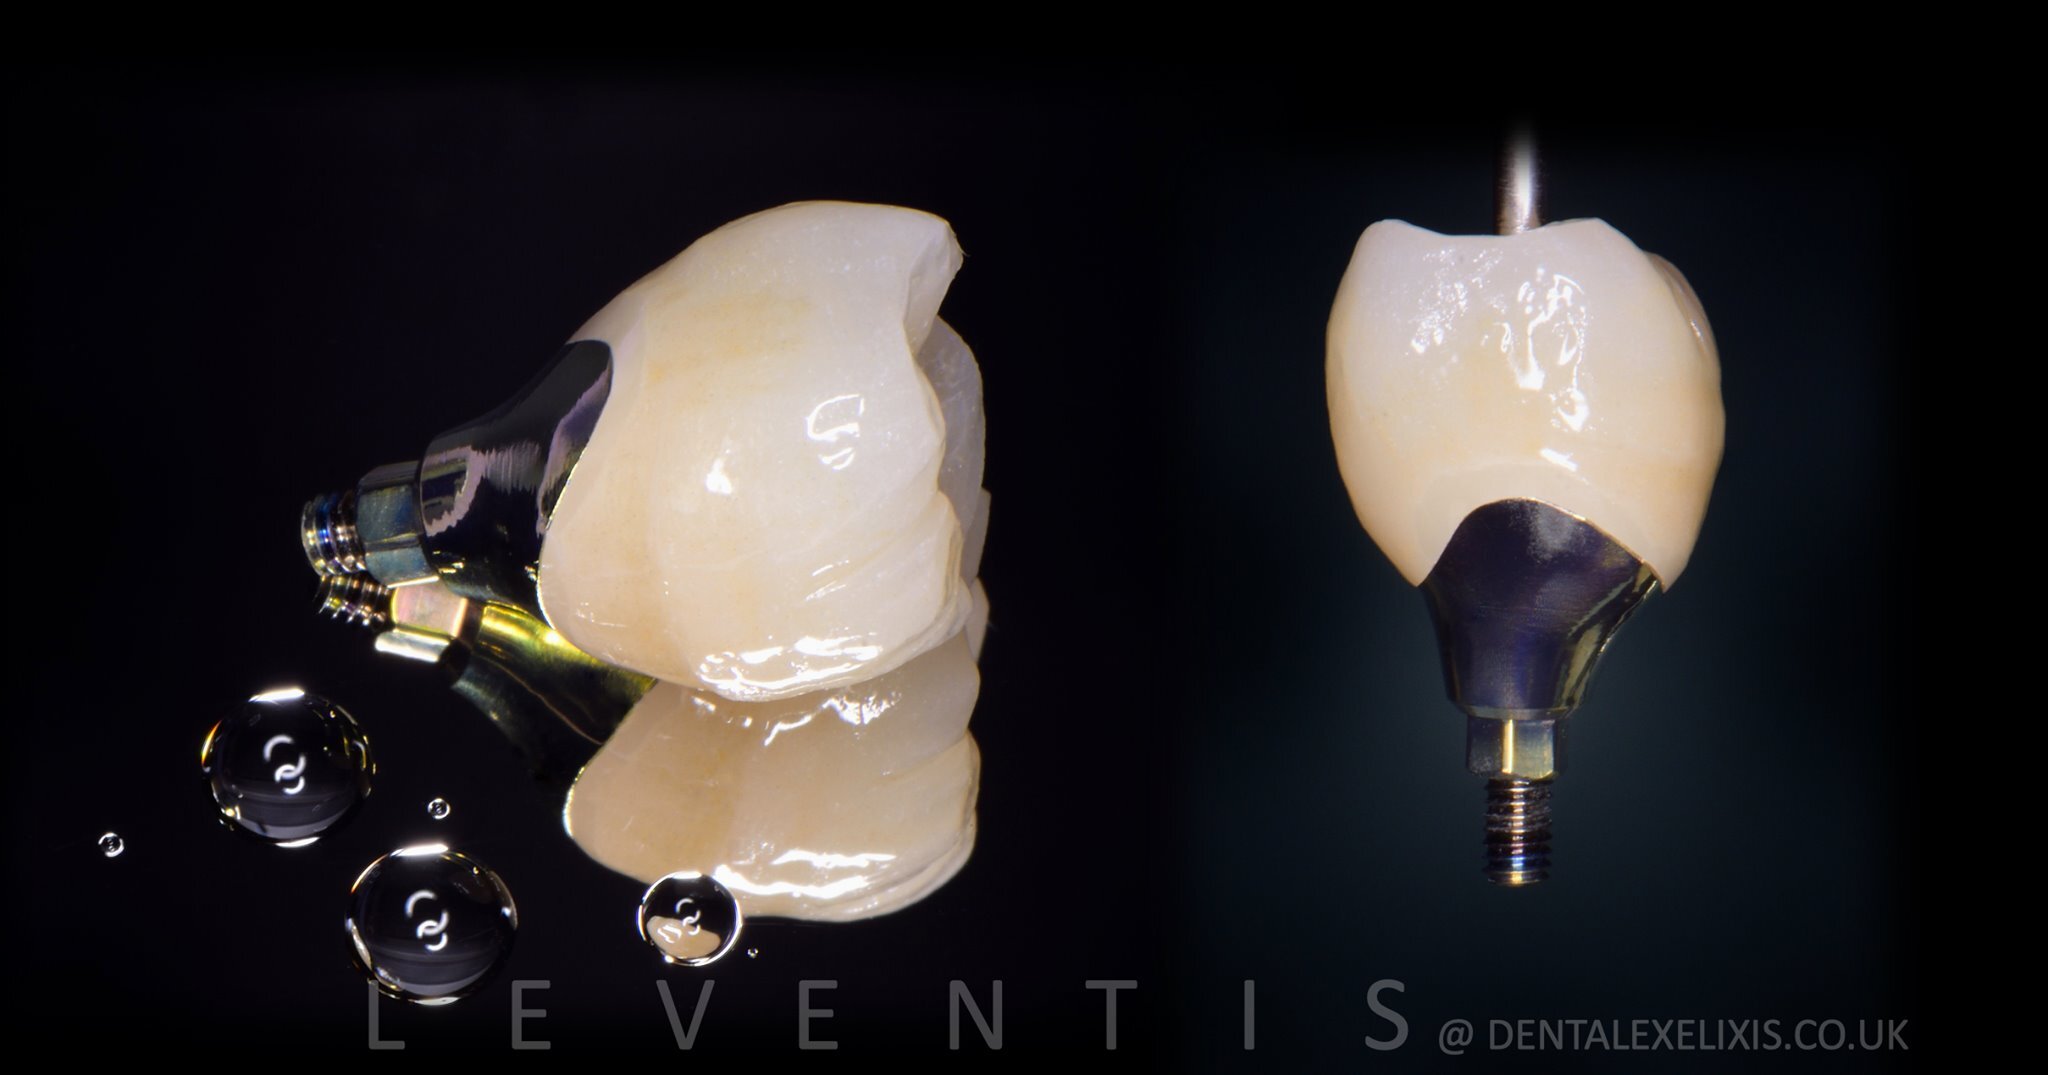
Early placement into a four-week socket, one surgery, no soft-tissue graft. The custom healing abutment sealed the graft and shaped the tissue at the same time, and the lab received the profile the tissue had actually healed into.
Materials: 5.0 × 8.0 implant · Cervico Guide, pin and caliper · Cervico Essential Mold · b-TCP / calcium sulfate · SKD monofilament 5-0 · Bluem gel · SilverPlug
Credit: Case and images: Dr. Minas Leventis · Laboratory: Phill Reddington, Beever Dental Laboratory. Full case as published by the clinician; patient details are not disclosed.