

Instructions for Use
Cervico Guide
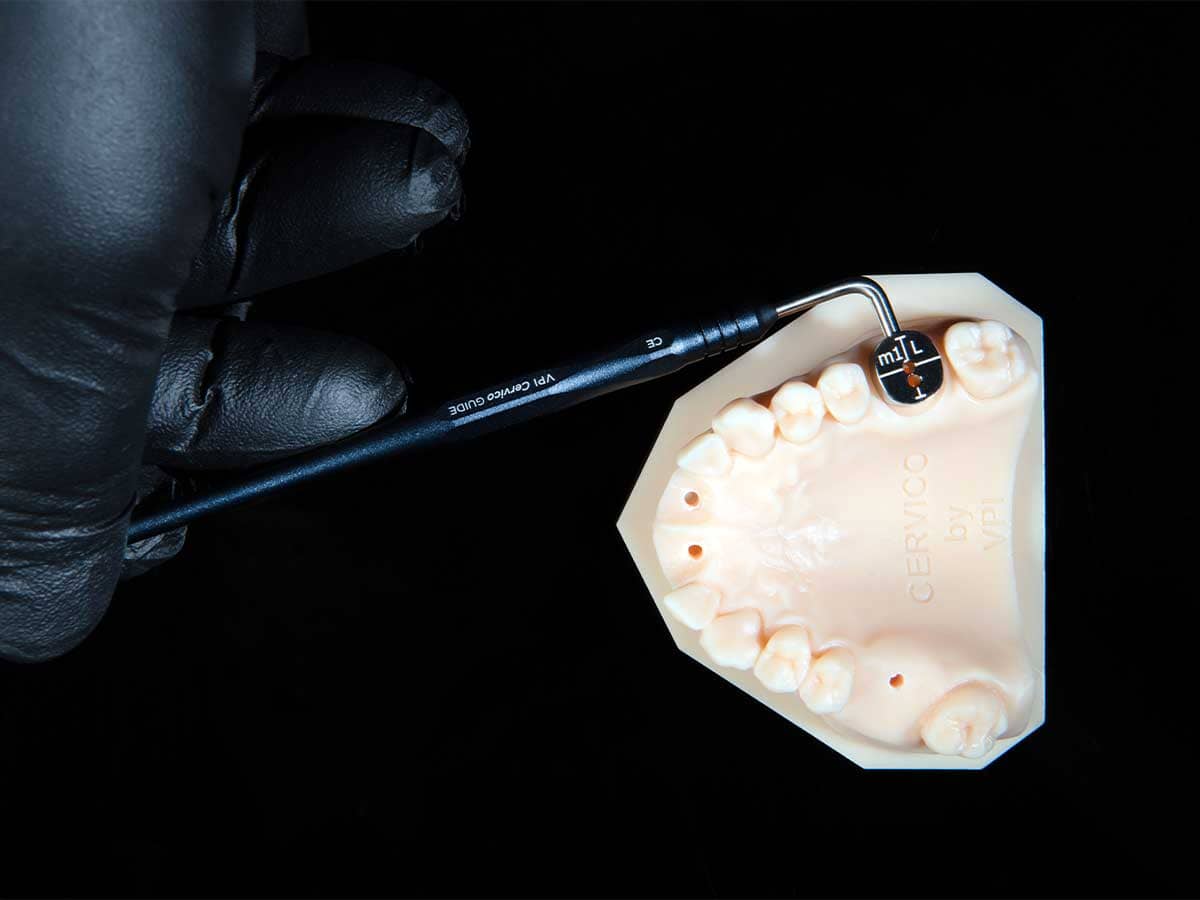
Reusable intra-oral evaluation instrument: anatomical and cylindrical tabs for profile selection, osteotomy marking and space assessment.
Document details VPI-IFU-G · rev 2.0
- REF
- 5213006650017
- Document
- VPI-IFU-G
- Revision
- 2.0
- Date of issue
- 2026-09-09
In the box
- Silicone case
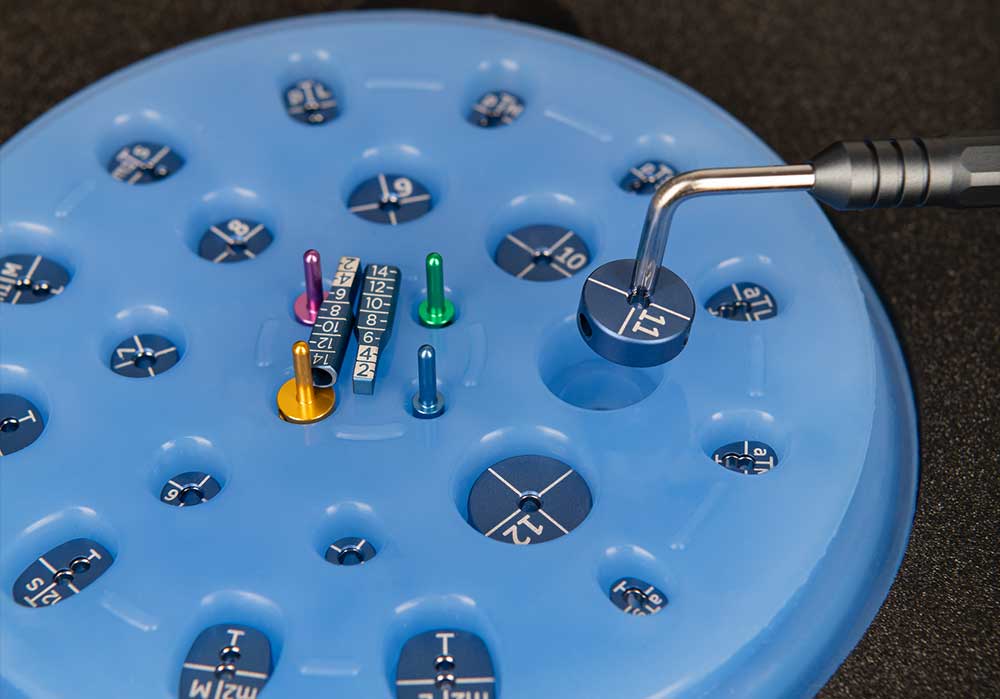
- 12 anatomical tabs (a, p, m1, m2 × S, M, L)
- 8 cylindrical tabs 5–12 mm
- 4 guide pins
- Magnetic retention handle
6 steps
Clean and sterilize first
Non-sterile on delivery. Ultrasonic clean 10 min at 50 °C, rinse, dry, pouch, autoclave 4 min at 134 °C, dry 30 min.
Tie floss through every part that goes in the mouth
Tabs and pins have a bore for it. No exceptions.
Pick the tooth group, start with M
Mount the medium tab, try it in the site, then S or L. Thick biotype: crown width. Thin: one size smaller.

Chart the code and the T-line direction
E.g. "pS, hex flat facing buccal". The code is the mold well; the T-line is where the implant connection reference must face.
Center the osteotomy
Largest cylindrical tab that touches both neighbours, central line on the occlusal line, pilot drill below 2.1 mm through the bore.
Check every drill with a pin and the tab
Pin in the osteotomy, tab on the pin, centered or off-centered. Correct at the next drill. Place the implant with its connection facing the T-line.
Never skip
- Loose part in the mouth: refer immediately, chest X-ray.
- Max 145 °C. No dry heat, no chemiclave.
- Not for patients allergic to aluminium or stainless steel.
After every patient
- Wipe wells with alcohol, take the silicone out of the base, tabs and pins off the handle.
- Ultrasonic clean 10 min at 50 °C, aldehyde-, phenol- and chlorine-free detergent. Rinse with purified water. Dry.
- Inspect. Pouch. Autoclave: 4 min at 132–134 °C pre-vacuum or 30 min at 121 °C gravity. Dry 30 min.
- Never above 145 °C. Never dry heat, chemiclave, EtO or plasma.
Full instructions
This card does not replace the Instructions for Use. Read VPI-IFU-G before first use: https://vpicervico.com/instructions-of-use/
VP INNOVATO HOLDINGS LTD · Poseidonos 4A, Aradippou 7101, Larnaca, Cyprus · +357 99 883 898 · info@vpicervico.com
REF 5213006650017 · Class I medical device, CE · Rx only (USA) · Non-sterile, sterilize before use · VPI-QSG-G rev 2.0, 2026-09-09
VP INNOVATO HOLDINGS LTD · Poseidonos 4A, Aradippou 7101, Larnaca, Cyprus · +357 99 883 898 · info@vpicervico.com
VPI-QSG-G revision 2.0, issued 2026-09-09. English (original). Latest version: https://vpicervico.com/instructions-of-use/
Device identification
- Trade name
- Cervico by VPI · Cervico Guide
- REF
- 5213006650017
- Description
- Reusable intraoral and extraoral evaluation instrument for selecting the cervical profile of a custom healing abutment and for centering the implant osteotomy.
Cervico Guide · REF 5213006650017
| Component | Qty | Material |
|---|---|---|
| Autoclavable silicone case (tray) | 1 | Medical silicone |
| Anatomical tabs: anteriors (a), premolars (p), square molars (m1), elongated molars (m2), each in S, M, L | 12 | Aluminium alloy 6082 with stainless steel AISI 304 insert |
| Cylindrical tabs 5–12 mm with 2.5 mm central bore | 8 | Aluminium alloy 6082 with stainless steel insert |
| Guide pins in four diameters matching the drill sequence | 4 | Aluminium alloy 6082 |
| Magnetic retention handle | 1 | Aluminium / stainless steel, magnet |
- Every anatomical tab carries a laser-marked code (e.g. pS) identical to the code of the matching well in the Cervico Molds.
- The T-line on the top of each anatomical tab shows the direction the implant's prosthetic connection reference (e.g. flat seat of the hex) should face.
- Each anatomical tab has two bores so it can be seated on a guide pin centered or off-centered.
- Each cylindrical tab has a central line to align with the occlusal line of the adjacent teeth and a lateral bore for floss.
Intended purpose, indications, contraindications
Cervico Guide
Intended purpose. The Cervico Guide is intended (1) to identify the optimum anatomical healing abutment in shape and size for a given edentulous site with the Cervico Guide tabs, so that the operator can then customize a stock temporary abutment and/or impression post chairside in a Cervico Mold, and (2) to guide the initiation of the osteotomy substantially centered in the mesio-distal dimension of single-implant edentulous sites.
Indications. Partially edentulous sites to be treated with endosseous dental implants, for selection of the cervical profile and for marking and monitoring the osteotomy position and inclination.
Contraindications.
- Complete edentulism (relative): the cylindrical tabs cannot reference adjacent teeth for osteotomy positioning.
- Known hypersensitivity to aluminium or stainless steel (intraoral parts).
- Patients for whom implant therapy is contraindicated.
Intended users
Licensed dental professionals (dentists, oral surgeons, prosthodontists) and, for the mold devices, trained dental assistants and dental technicians working under their direction. Users must be trained in implant dentistry and have read this document.
Patient population
Patients with partial edentulism undergoing implant therapy, with completed craniofacial growth (in general 20 years and above, no upper age limit). Use in pregnant or nursing women is not recommended.
Use environment
Dental clinic or dental laboratory. Place the device on a flat, clean, dry, non-slip surface with good lighting.
Clinical benefit
Selection of an anatomically correct cervical profile and its chairside transfer to a custom healing abutment supports peri-implant soft-tissue conditioning around the correct contour from placement onward, and the accurate recording of that contour for the definitive prosthesis; the Guide additionally assists centering of the osteotomy within the prosthetic space. Expected performance: complete, correctly oriented abutment shaped to the well within approximately 4 minutes.
Residual risks and undesirable side effects
- Aspiration or ingestion of a small part used intra-orally (Guide). Controlled by securing parts with floss or suture.
- Cross-contamination from inadequate reprocessing. Controlled by the validated reprocessing instructions.
- Malpositioned or mis-oriented healing abutment from a wrong well, orientation or depth. Controlled by the coding system, tear mark or VPI insert, and by clinical and radiographic verification at placement.
- Tissue irritation from incompletely cured or unpolished composite. Controlled by curing and polishing instructions and the composite manufacturer's IFU.
- Hypersensitivity to aluminium or stainless steel in patients with known metal allergy.
Warnings and precautions
Symbols on the label




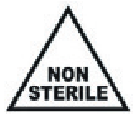


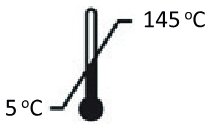


Symbols reproduced from the product label artwork (ISO 15223-1:2021). UDI and Rx only are typographic symbols.
Devices and materials used with this device
The following are not supplied by VP Innovato Holdings and must carry their own conformity marking. Use them according to their manufacturer's instructions.
| Item | Note |
|---|---|
| Temporary abutment | One- or two-piece, titanium or PEEK, from the implant manufacturer. Core of the custom healing abutment. |
| Stock impression post | Closed- or open-tray, from the implant manufacturer. Used for the conventional impression. |
| Dental floss or suture (Guide) | To secure tabs and pins intra-orally. |
| Pilot drill below 2.1 mm and implant surgical kit (Guide) | From the implant manufacturer. |
Before first use
- Check the package and contents against the components list. Do not use a device with a damaged package or missing or damaged parts; contact the manufacturer or distributor.
- Remove all packaging material. Note the LOT number in your instrument records.
- Clean and sterilize every part as described in "Reprocessing". The device is supplied non-sterile.
- Read the procedures below and watch the video guides at vpicervico.com/instructions-of-use.
Instructions for use: Cervico Guide
Secure every tab and pin with floss or suture through its bore before it enters the mouth.
Cervical profile evaluation
Consultation or surgeryIdentify the tooth group
Determine which tooth is being replaced: anterior, premolar, square (lower) molar or elongated (upper) molar.
Mount the medium tab
Push the tip of the retention handle into the side bore of the medium tab of that group; it holds by magnet and friction. Pass floss through the bore and tie it.

Evaluate in the site
Place the tab in the edentulous space, intra- or extra-orally on a model, and judge whether its outline is the cervical profile to be generated. Repeat with the small or large tab until the best fit is found. Thick biotype: width equal to the future crown at the cervix. Thin biotype: one size smaller.
Chart the code
Write the tab code (e.g. pS) in the patient chart. It names the mold well the assistant will use.
Chart the orientation
Note the direction the T-line faces. The engaging feature of the implant's prosthetic connection should face the T-line at placement (see the Prosthetic Connection Orientation Guide for your implant brand).
Osteotomy positioning and control
SurgeryChoose the cylindrical tab
Select the largest cylindrical tab that fits the space in light contact with both neighbours, or, with several teeth missing, the one matching the mesio-distal width of the tooth to be replaced. Tie floss through its lateral bore and mount it on the handle.
Mark the entry point
Align the central line on the tab with the occlusal line of the adjacent teeth. Pass a pilot drill (tip below 2.1 mm) through the central bore and mark the osteotomy entrance on the ridge. This is easiest before flap elevation; a flapless approach is also possible.
Drill and check with a pin
After each drill, insert the pin of matching diameter into the osteotomy, secured with floss through its bore. Seat the charted anatomical tab on the pin, centered or off-centered, and check the position and inclination of the osteotomy against the profile to be generated. Correct at the next drill.
Note centered or off-centered
The pin bore that gives the best tab position tells you which mold well family to use: centered (c) or off-centered (o).
Place the implant
Orient the prosthetic connection so its reference feature faces the T-line direction of the tab.
Reprocessing: cleaning, disinfection, sterilization
All Cervico instruments are supplied NON-STERILE and must be cleaned and sterilized before the first use and before every subsequent use. Thorough cleaning is a precondition for effective sterilization. The user is responsible for using validated equipment and for complying with local regulations and the hygiene policy of the facility.
Point of use
- Immediately after use, wipe composite residue out of the silicone wells with a cotton tip soaked in alcohol. Do not let composite cure inside a well.
- Disassemble fully: silicone insert out of the mold base, VPI Prosthetic Connection Inserts out of their sockets, Guide tabs and pins off the handle and out of the case.
- Keep the parts moist until cleaning; do not allow soil to dry on.
Automated cleaning (preferred)
- Prefer a validated washer-disinfector (EN ISO 15883) with a program suitable for dental instruments and adequate rinsing cycles.
- Use a mildly alkaline or enzymatic detergent approved for dental instruments and compatible with aluminium and silicone.
- Final rinse with purified or deionized water (max. 10 CFU/ml, 0.25 EU/ml). Dry with filtered air.
- Service, inspect and calibrate the washer-disinfector according to its manufacturer.
Manual cleaning
- Ultrasonic bath, 10 minutes at 50 °C, in an aldehyde-, phenol- and chlorine-free cleaning concentrate for dental instruments, all parts fully immersed.
- Rinse thoroughly with purified or deionized water. Manual cleaning is less effective than automated cleaning; always inspect.
- Dry completely before packaging.
Do not use
- Strong alkalines (pH above 9) or strong acids (pH below 4)
- Phenols, iodophors, halogenated hydrocarbons
- Strong oxidizers, peroxides, organic solvents
- Metal brushes or steel wool on any part
- Dry heat, radiation, formaldehyde, ethylene oxide or plasma sterilization
- Immediate-use (flash) sterilization as the routine method
Inspection and maintenance
After cleaning, inspect every part for residue, corrosion, cracks, deformation, torn or hardened silicone and wear of the tear-shaped orientation marks. Re-clean if soiled. Do not use damaged parts: replace the silicone insert or the part, or contact the manufacturer.
Packaging
Package dry parts in sterilization pouches or a cassette conforming to local standards and rated to at least 141 °C with adequate steam penetration. Size the pouch so it seals without strain.
Steam sterilization, minimum parameters
| Item | Gravity displacement | Dynamic air removal (pre-vacuum) | Drying |
|---|---|---|---|
| Cervico Guide (case, tabs, pins, handle) | 30 min at 121 °C (250 °F) | 4 min at 132–134 °C (270–273 °F) | 30 min minimum |
| Cervico Premium Mold (base, silicone insert, VPI inserts, screwdriver) | 30 min at 121 °C (250 °F) | 4 min at 132–134 °C (270–273 °F) | 30 min minimum |
| Cervico Essential Mold (base, silicone insert) | 30 min at 121 °C (250 °F) | 4 min at 132–134 °C (270–273 °F) | 30 min minimum |
- Steam sterilization only: fractionated pre-vacuum (dynamic air removal) or gravity displacement, in a sterilizer conforming to EN 13060 / EN 285 or ANSI/AAMI ST55 / ST8, validated to EN ISO 17665-1 or ANSI/AAMI ST79.
- Never exceed 145 °C. The magnetic retention handle of the Guide must not be exposed to more than 145 °C.
- Allow parts to dry and cool completely before handling. Sterilizers with an automatic drying program are recommended.
- Use only purified or deionized feed water and maintain the sterilizer per its manufacturer.
Storage after sterilization
Store sterilized, wrapped parts dry, dust-free and out of direct sunlight in the clean zone, with sterilization status marked, separated from non-sterile instruments. Unsterilized devices are stored in the original box at normal office conditions.
Reuse and service life
The devices are reusable without a fixed limit of cycles. Service life depends on frequency of use, care and correct reprocessing. Silicone inserts are wear parts: replace when wells are torn, deformed, hardened or no longer release the abutment cleanly. Inspect before every use; the user is responsible for not using damaged or soiled parts.
Troubleshooting
| Observation | Likely cause | Action |
|---|---|---|
| Tab or pin comes loose in the mouth | The part was not secured before intraoral use | Always pass floss or suture through the bore on the part and tie it before the part enters the mouth. If a part is lost and cannot be retrieved, refer the patient immediately for evaluation including a chest radiograph. |
| Pilot drill will not pass through the cylindrical tab | Drill tip wider than the 2.5 mm central bore | Use a pilot drill with a tip under 2.1 mm. Do not force a wider drill through the tab. |
| No cylindrical tab fits the space | Adjacent teeth closer than the smallest tab, or the site is fully edentulous | Choose the tab nearest the mesio-distal width of the tooth being replaced. With no adjacent teeth the cylindrical tabs cannot reference the site; position the osteotomy by other means. |
Manufacturer, regulatory information and reporting
- Manufacturer
- VP INNOVATO HOLDINGS LTD
Poseidonos 4A, Aradippou 7101, Larnaca, Cyprus
+357 99 883 898 · info@vpicervico.com
https://innovatoholdings.com - SRN
- CY-MF-000036072
- Basic UDI-DI
- 521300665VPICW
- REF
- Cervico Guide: 5213006650017
- Classification (EU)
- Class I, Rule 1 (non-invasive devices), Annex VIII, Regulation (EU) 2017/745. Conformity assessment per Annex II and III; CE marked under the manufacturer's sole responsibility. EU Declaration of Conformity available on request.
- Nomenclature
- EMDN Q010603 (non-active, non-implantable dental instrument)
- Quality system
- ISO 13485:2016, HEALTH CERT P.C. certificate 0252024MDM0054, valid to 25/06/2027
- USA
- FDA establishment registration 3014837662, owner/operator 10058387, device listing D329255, product code NDP (accessories, implant, dental, endosseous). Rx only. Caution: Federal law restricts this device to sale by or on the order of a licensed dentist or physician.
- Reporting (EU)
- Report any serious incident to the manufacturer (above) and to your national competent authority. Cyprus: Cyprus Medical Devices Competent Authority, Medical and Public Health Services, Ministry of Health, Corner of Prodromou 1 & Chilonos 17, 1449 Nicosia, Cyprus, +357 22 605 572, cymda@mphs.moh.gov.cy.
- Reporting (USA)
- Report adverse events to the manufacturer and through FDA MedWatch (www.fda.gov/medwatch).
- Disposal
- Clean and sterilize before disposal. Aluminium, steel and silicone parts are recyclable; dispose of them according to local regulations for contaminated instruments. No special hazards.
- Warranty and service
- Contact the manufacturer or your distributor. Do not attempt repairs; no user-serviceable parts other than the replaceable silicone insert.
VP INNOVATO HOLDINGS LTD · Poseidonos 4A, Aradippou 7101, Larnaca, Cyprus · +357 99 883 898 · info@vpicervico.com
VPI-IFU-G revision 2.0, issued 2026-09-09. English (original). Latest version: https://vpicervico.com/instructions-of-use/
A video guide for the Cervico Guide is in production. In the meantime see the kit videos on the portal or the Cervico YouTube channel.