Clinical case · Limited mesio-distal space
Six millimetres, a 3 mm platform, and a plan from the Guide
Dr. Ioannis Vergoullis
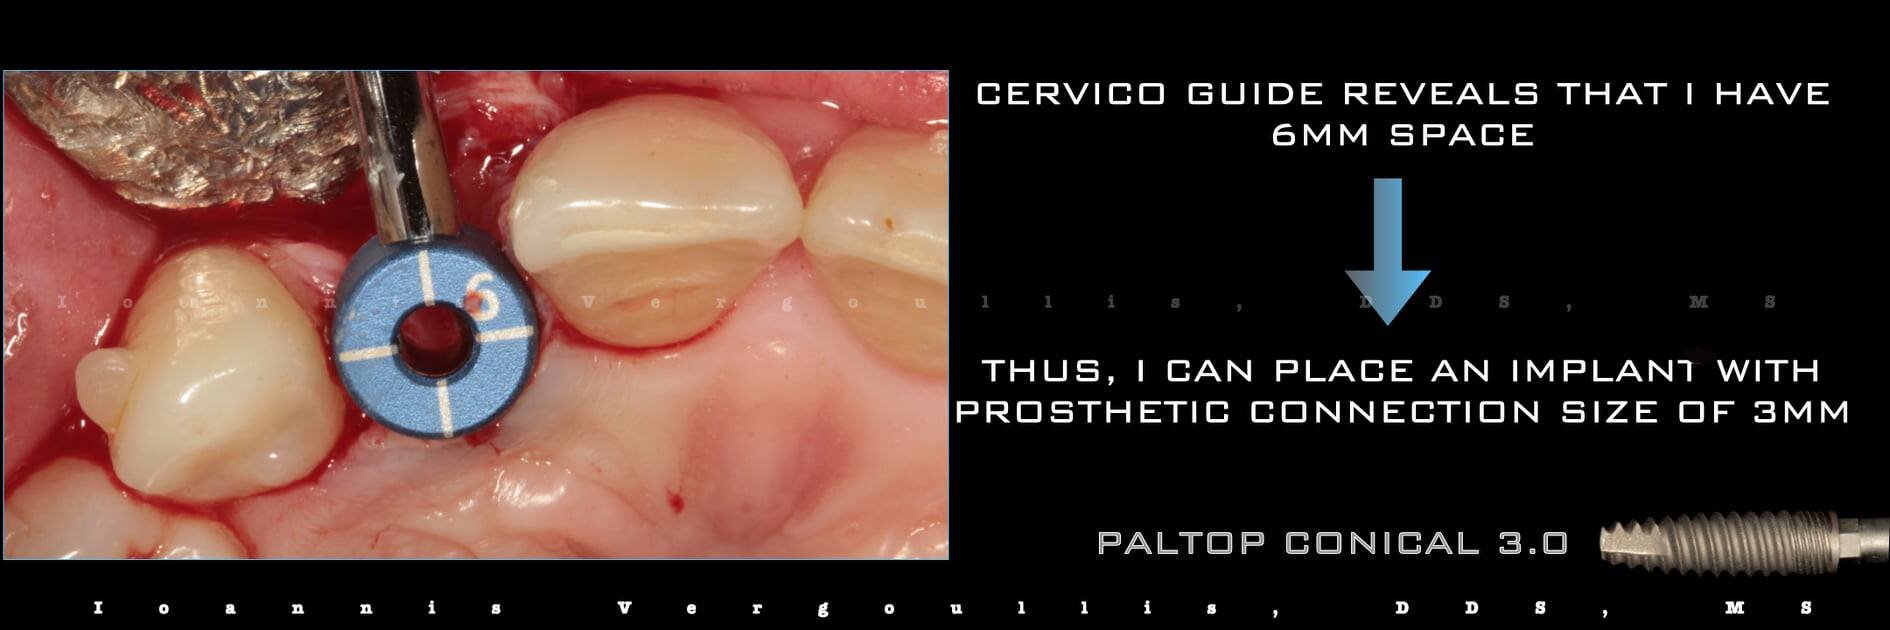
Referred after orthodontics to replace congenitally missing lateral incisors with implants. The Cervico Guide measured 6 mm of mesio-distal space, so a 3 mm prosthetic platform could be placed within the safety-zone principle. The same tabs then centred the osteotomy, checked the angulation, chose the healer and set the depth.
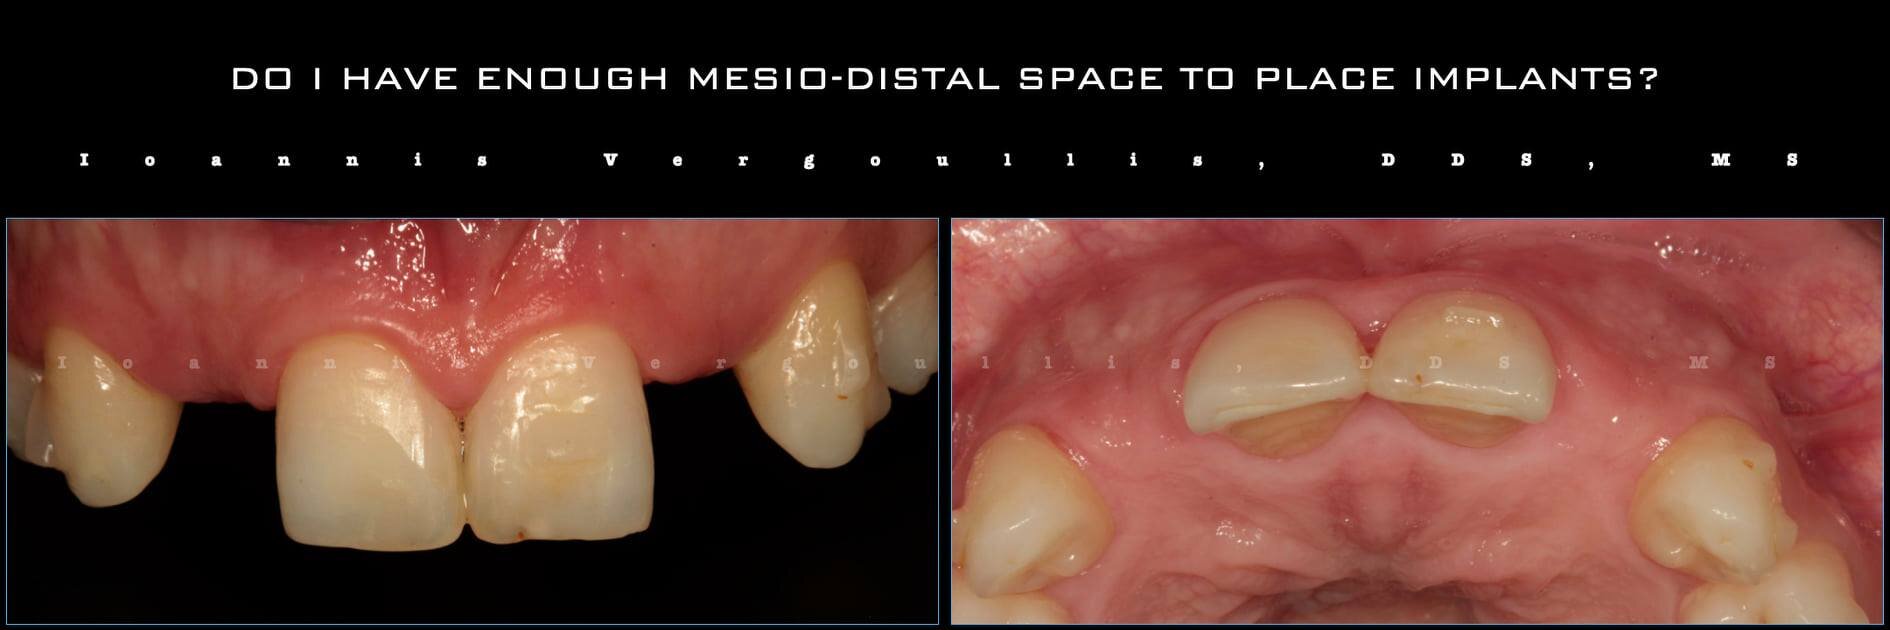
Congenitally missing lateral incisors, post-orthodontic
6 mm mesio-distal, measured with the cylindrical tabs
3 mm prosthetic connection, within the safety zone
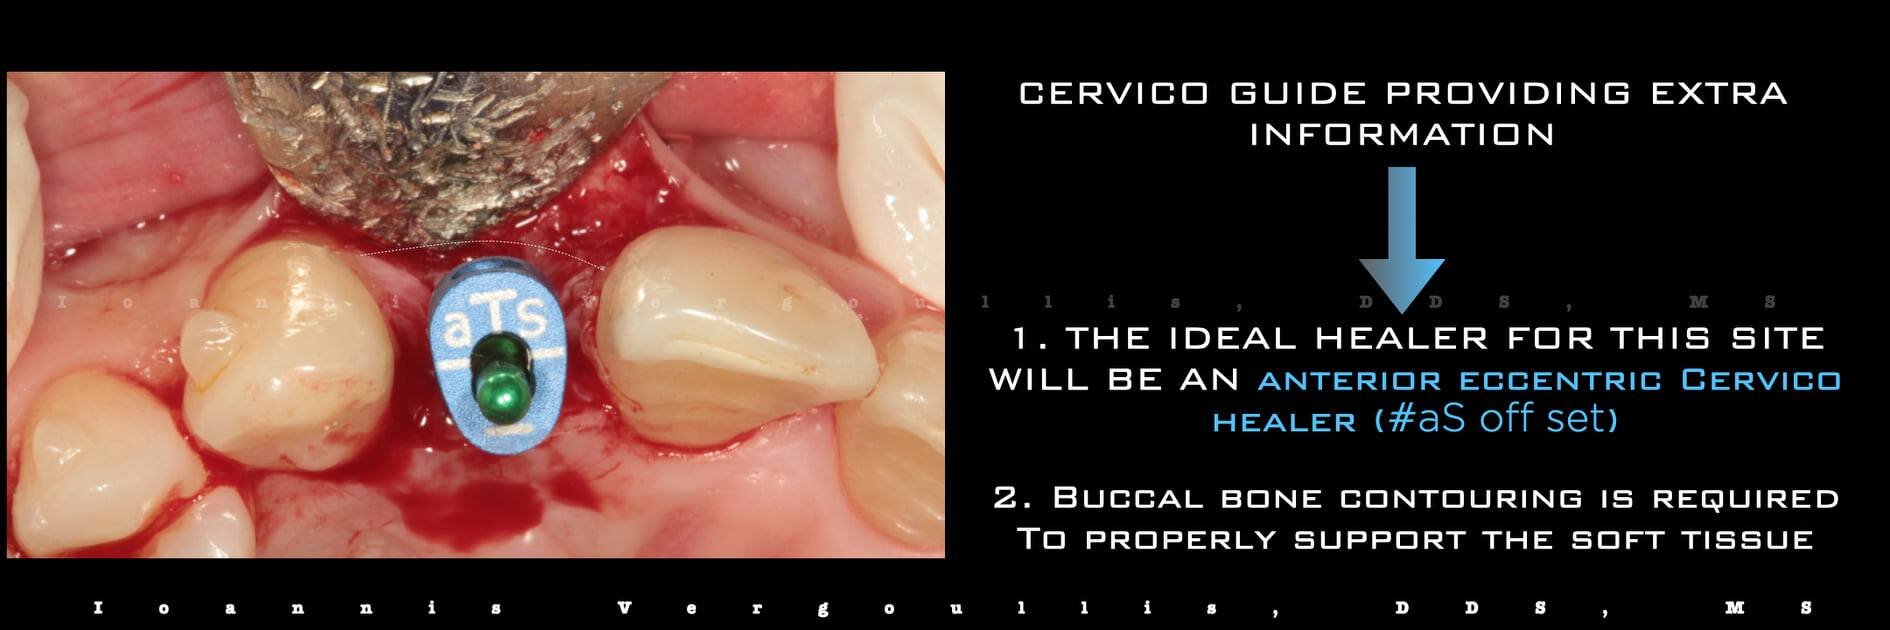
aS, anterior small, off-centre
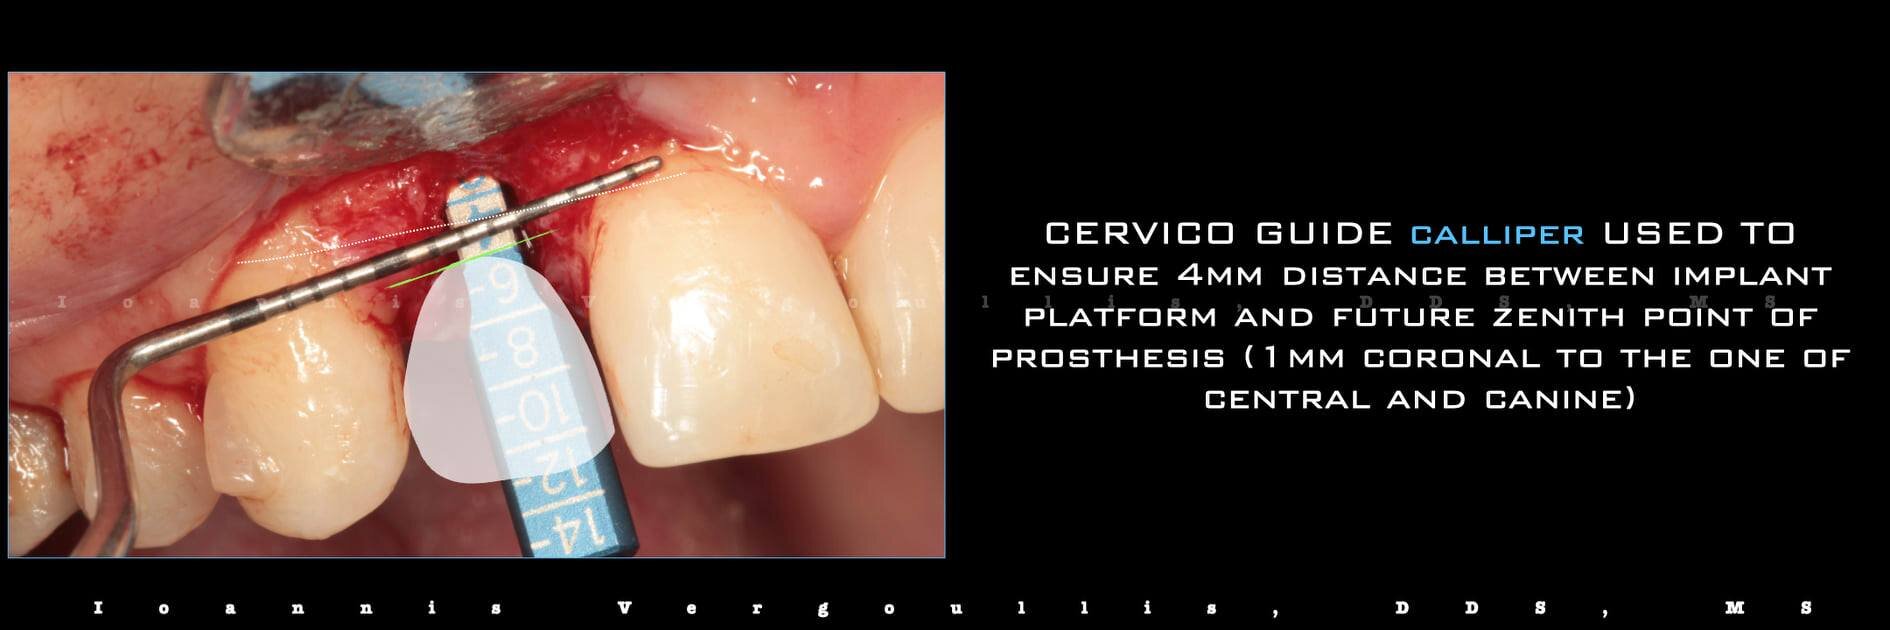
4 mm apical to the zenith of the future prosthesis, CEJ as reference
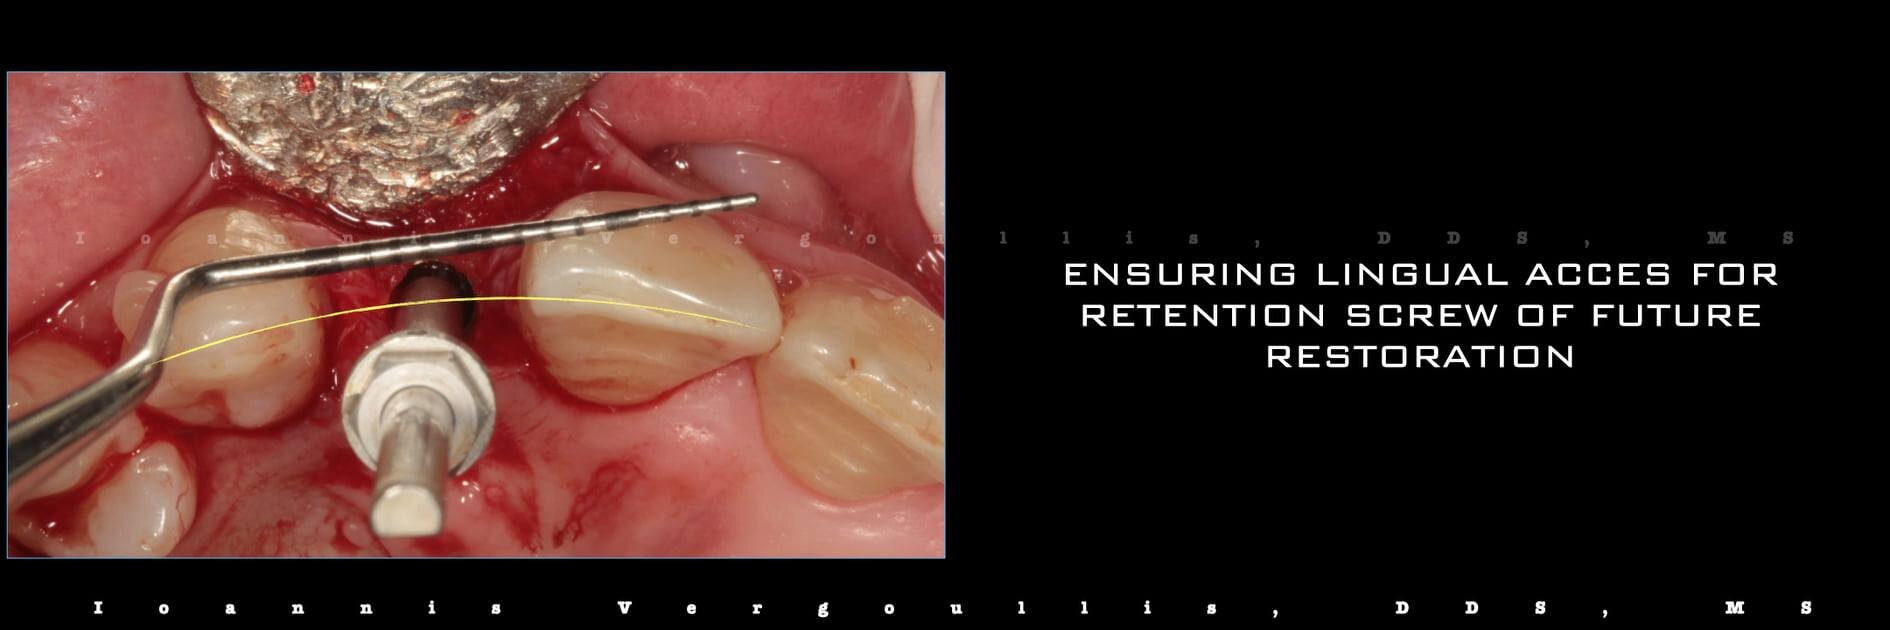
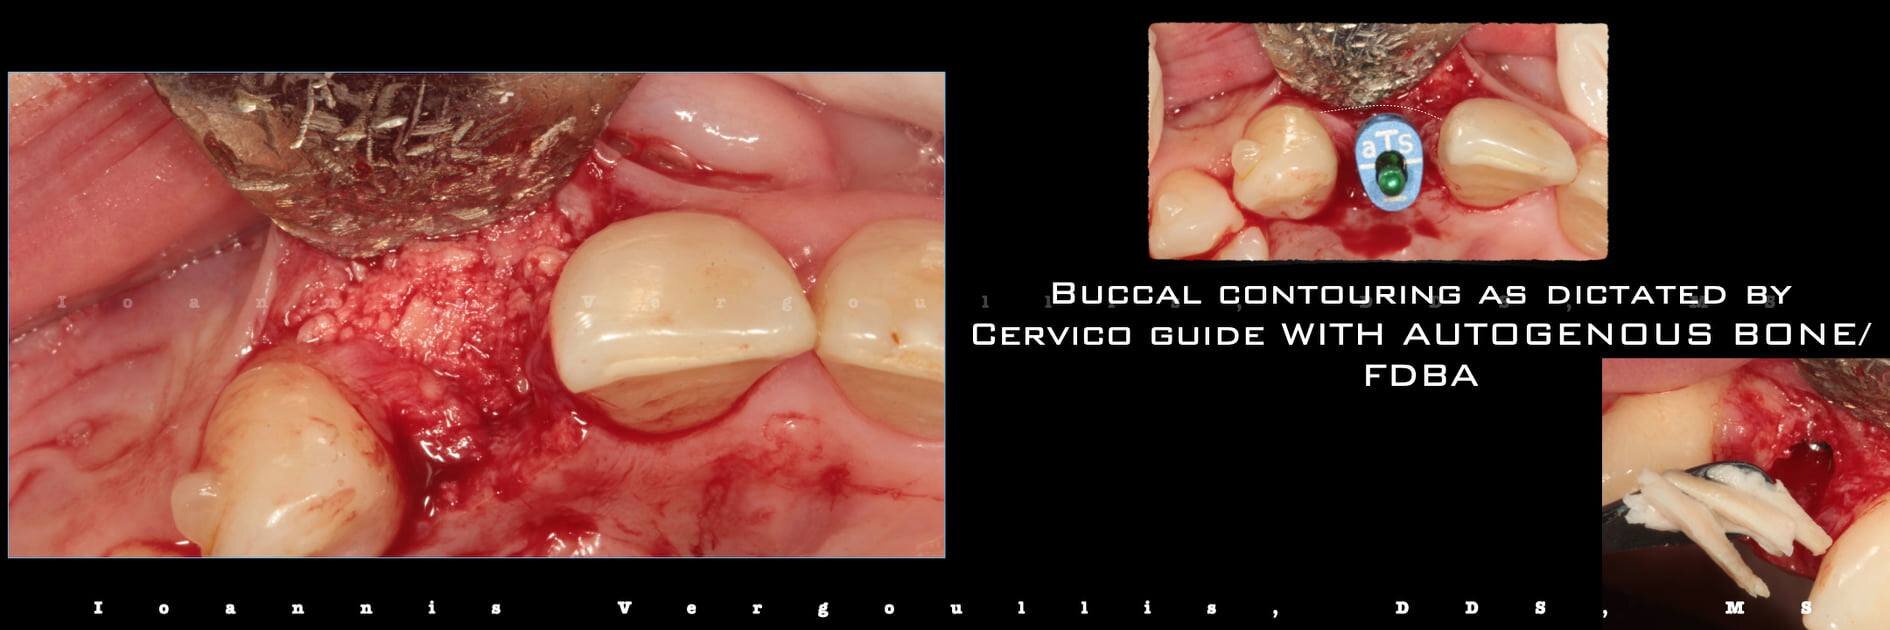
Buccal autogenous bone / FDBA, lingual access kept for the screw
Planning with the Guide, in the mouth

STEP 01
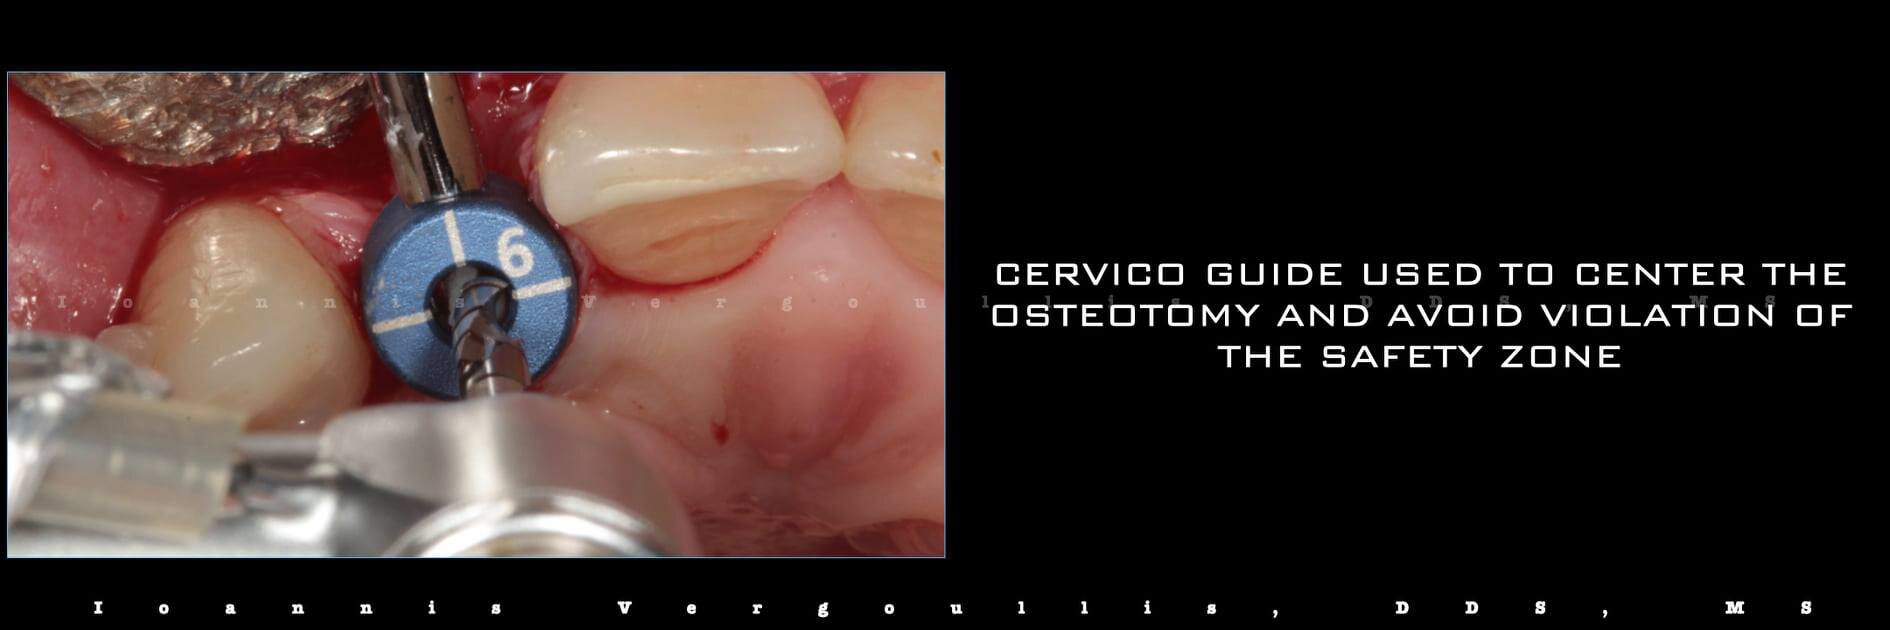
The cylindrical tabs reveal 6 mm of space: an implant with a 3 mm prosthetic platform can be placed without violating the safety zone.
STEP 02
The same 6 mm tab is used as the surgical guide so the osteotomy starts at the centre of the prosthetic space, with the implant tray’s pilot drill.
STEP 03
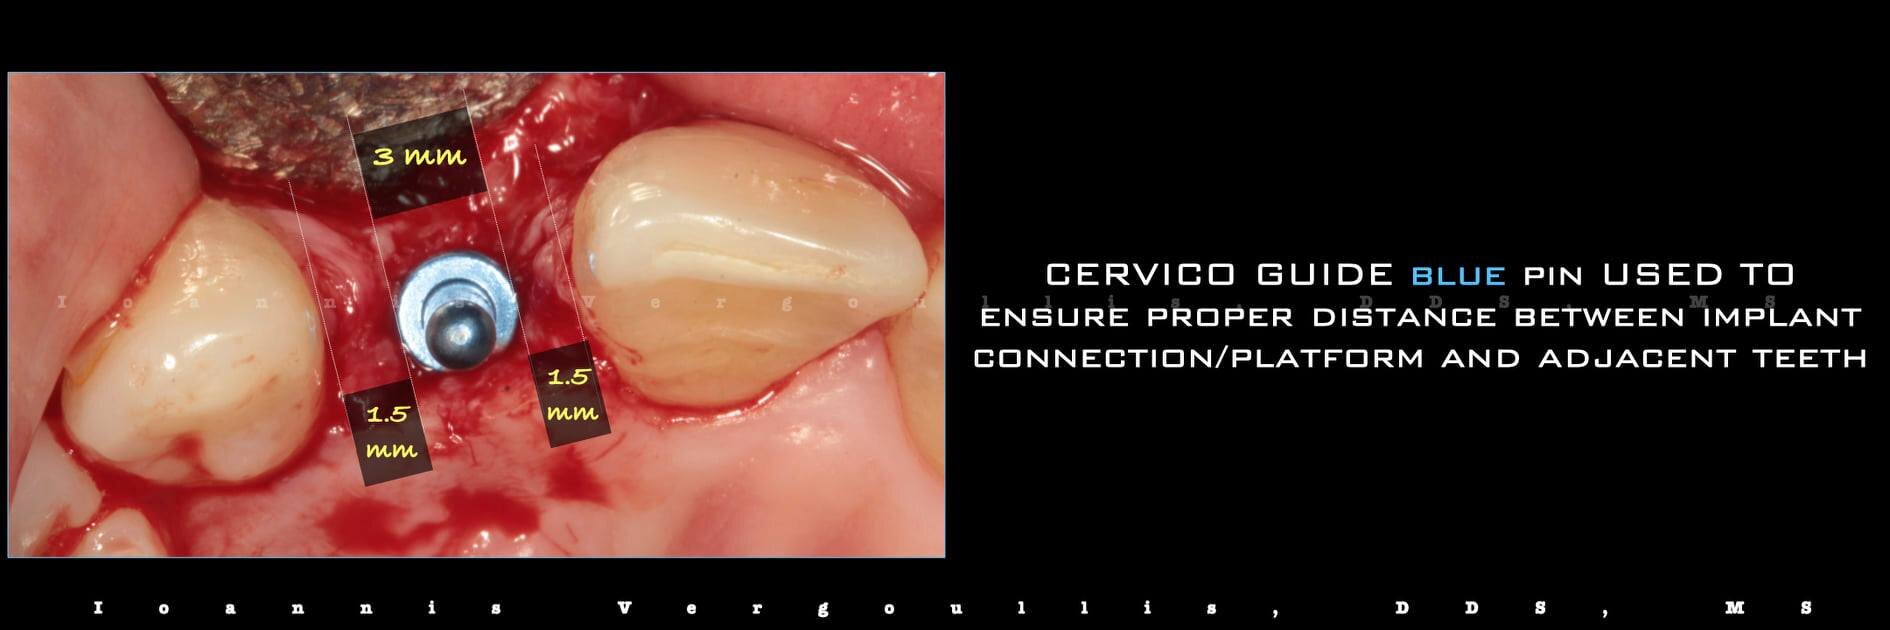
The blue Guide pin checks position and angulation. Its 3 mm ring stands in for the platform, showing the open space to the adjacent roots.
STEP 04
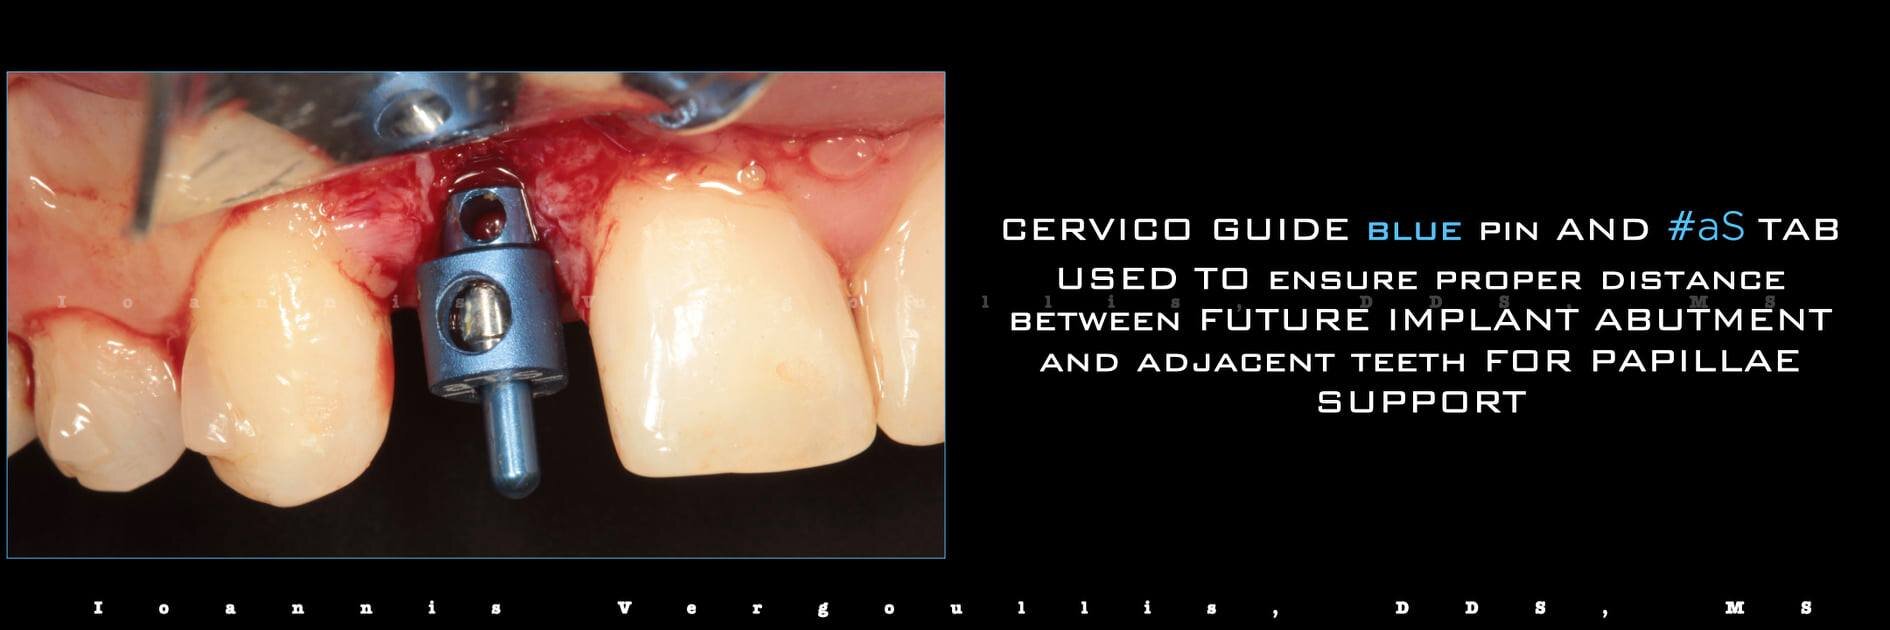
The aS anatomical tab on the pin: adequate space between the tab’s lateral walls and the adjacent roots, so the aS healer needs no modification.
STEP 05
Occlusal view: the tab’s anterior border must match the cervical border of the future crown. Here the off-centre position is chosen, so an off-centre aS healer.
STEP 06
Implant placed. The Cervico caliper sets the depth 4 mm apical to the zenith of the future prosthesis, using the CEJ of the adjacent teeth.
STEP 07
Lingual access for the retention screw of the future restoration is confirmed.
STEP 08
Buccal contouring as dictated by the Guide, with autogenous bone and FDBA, then flap replacement.
In a 6 mm space there is no room for a guess. The Guide answered every planning question intraorally before the drill: space, centre, angulation, healer size and position, depth. The healer then arrives at surgery already chosen.
Materials: Cervico Guide, cylindrical tabs, pin and aS anatomical tab · Cervico caliper · aS off-centre Cervico healer · Autogenous bone / FDBA
Credit: Case and images: Dr. Ioannis Vergoullis. Full case as published by the clinician; patient details are not disclosed.