Clinical case · Maxillary molar · one-stage protocol
Beautiful, bread-and-butter dentistry
Dr. Ioannis Vergoullis
A single maxillary molar, start to finish with the Cervico Guide and an m2S healing abutment: evaluate the space, centre the osteotomy, choose the healer on the pin, place, torque, seal, and four months later take the impression with the duplicate post. With the pro tips that make it routine.
Maxillary molar, single implant
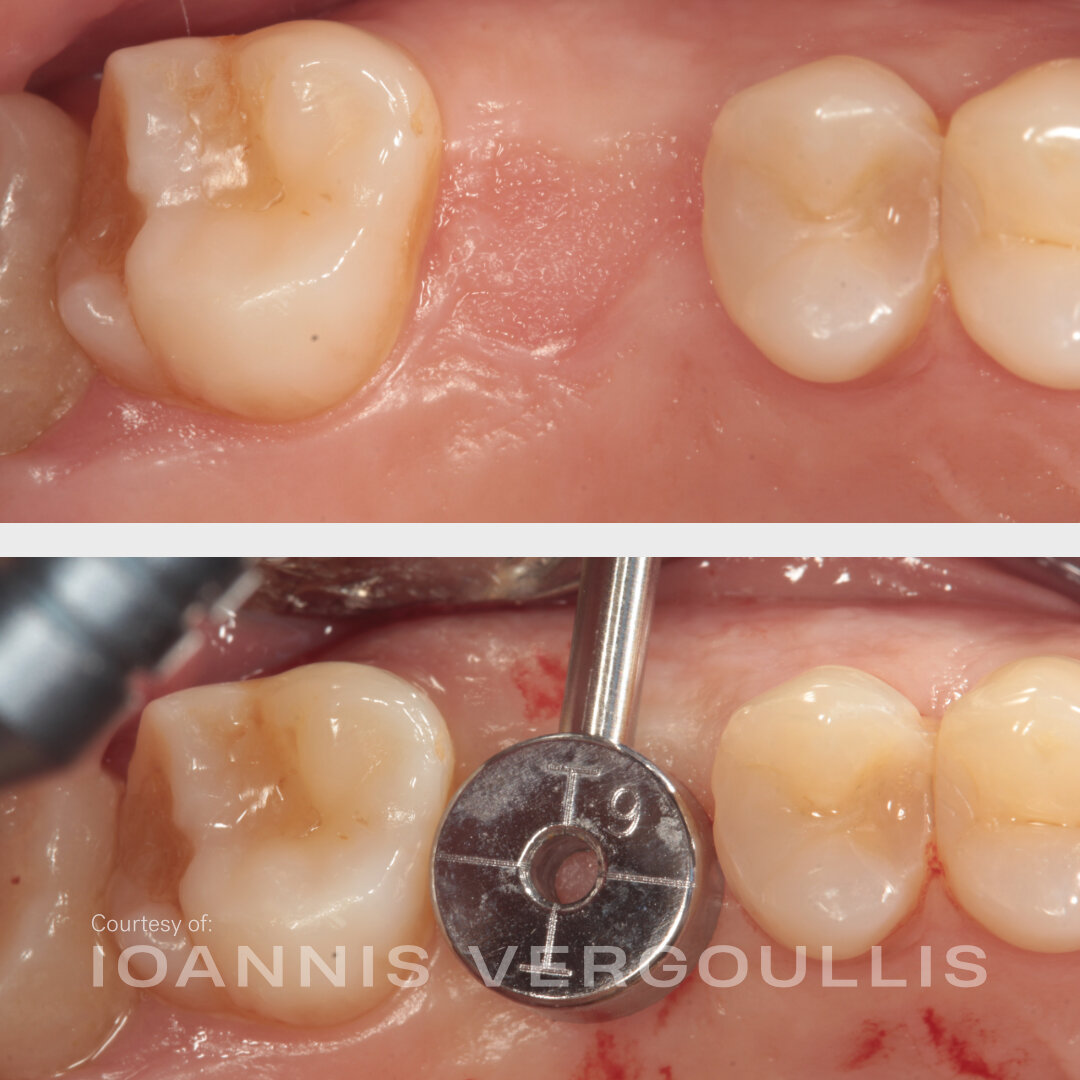
Cylindrical tab #9: the engraved number is its diameter in mm
1.5 mm from platform to adjacent teeth
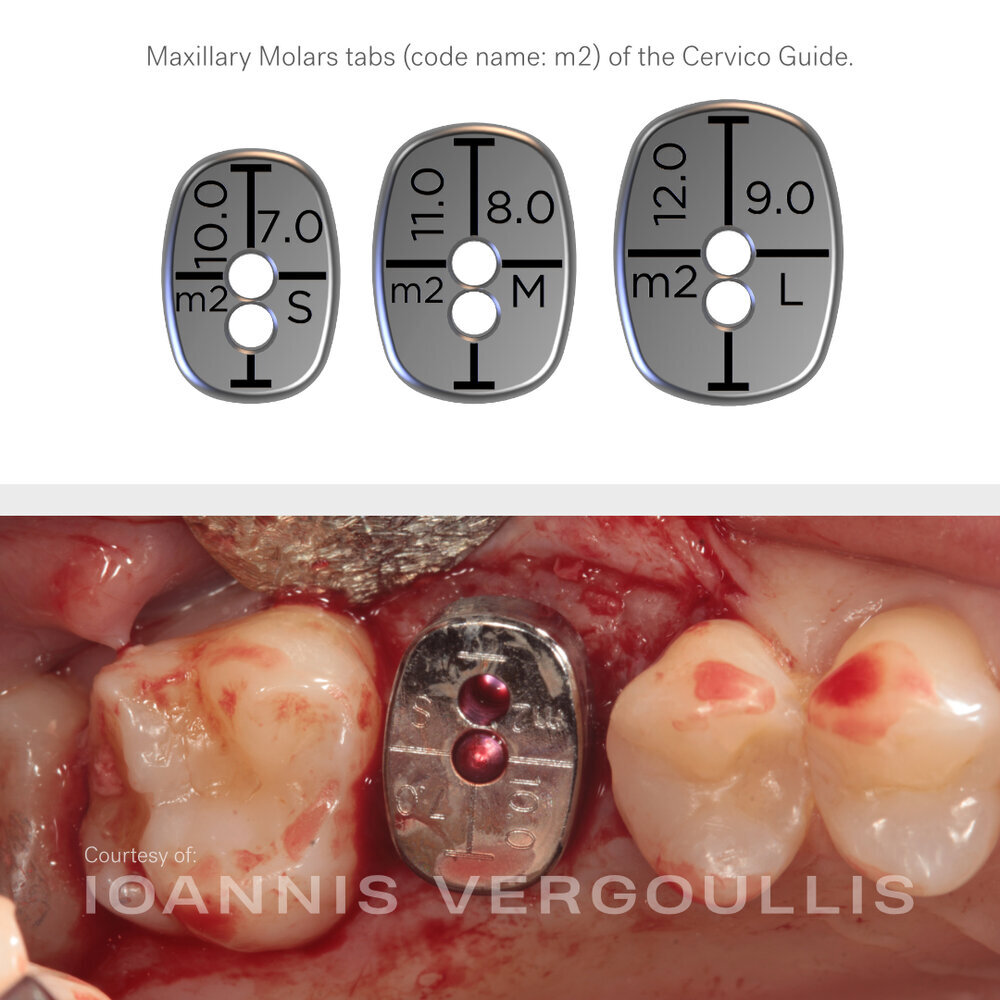
m2S, maxillary molar small, chosen on the pin
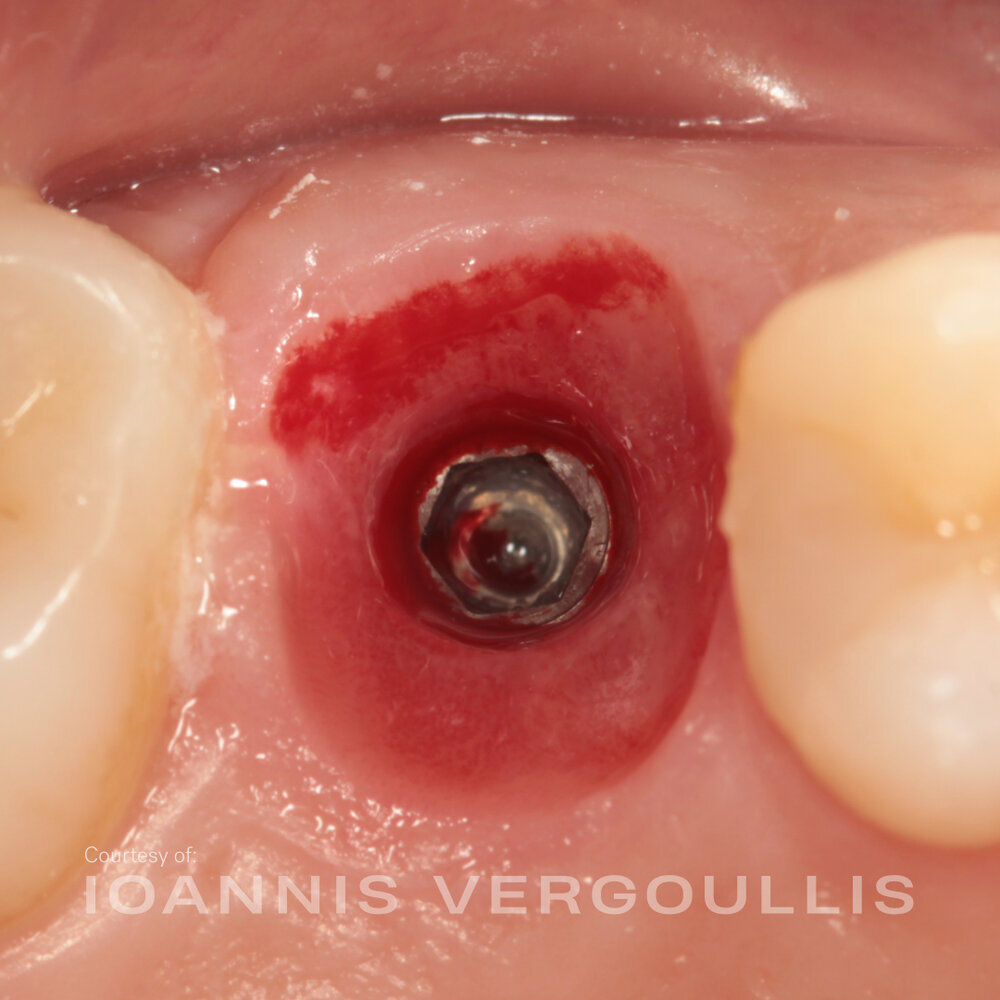
One-stage: healer torqued at placement, screw access sealed
Duplicate Cervico impression post at 4 months; optional 1FPT
The routine, with pro tips

STEP 01
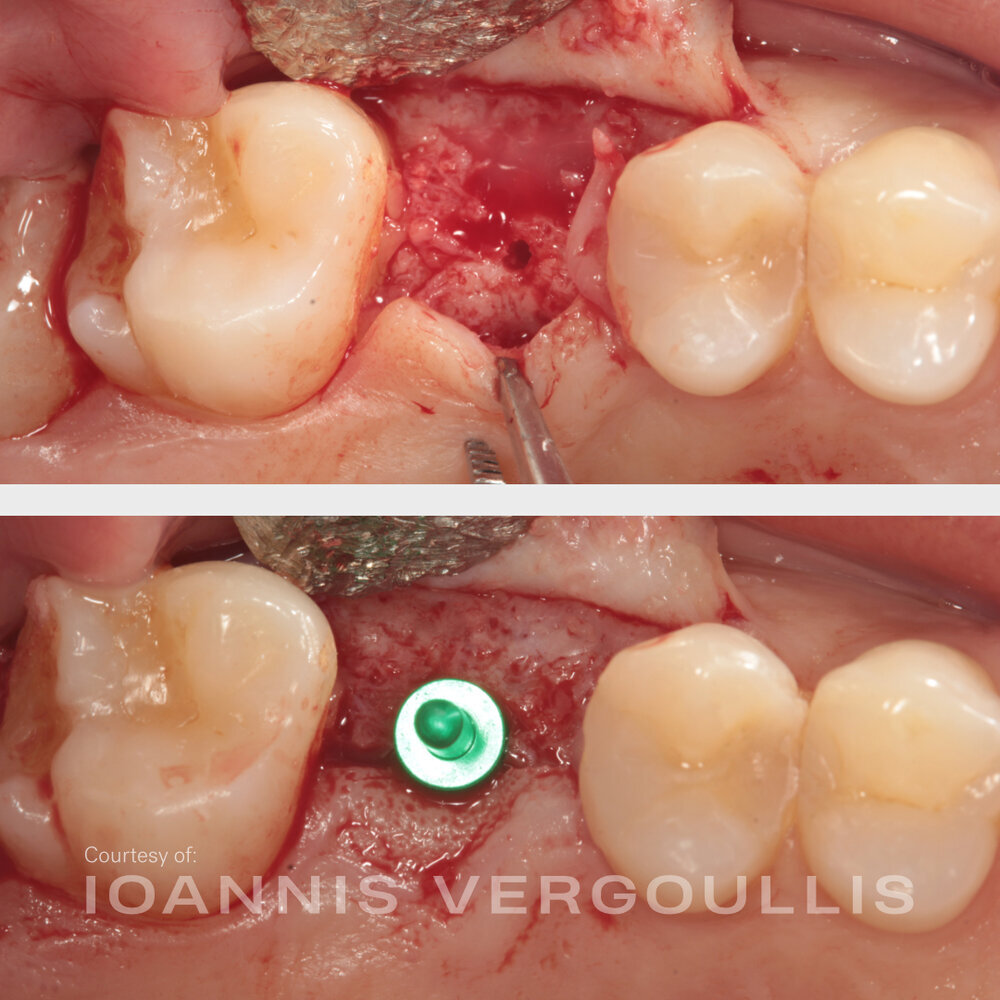
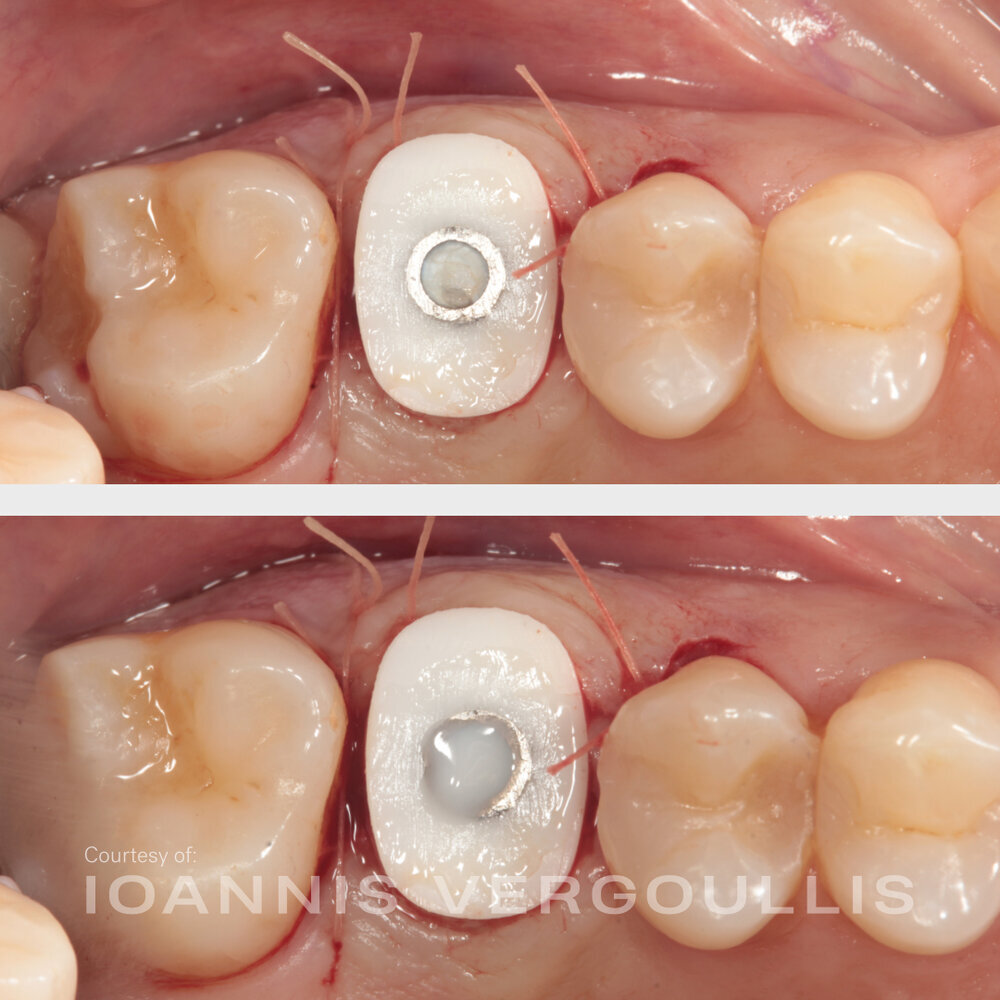
Evaluate with the cylindrical tab. The engraved number is its diameter in mm, so it tells you which platform fits with 1.5 mm to each neighbour.
STEP 02
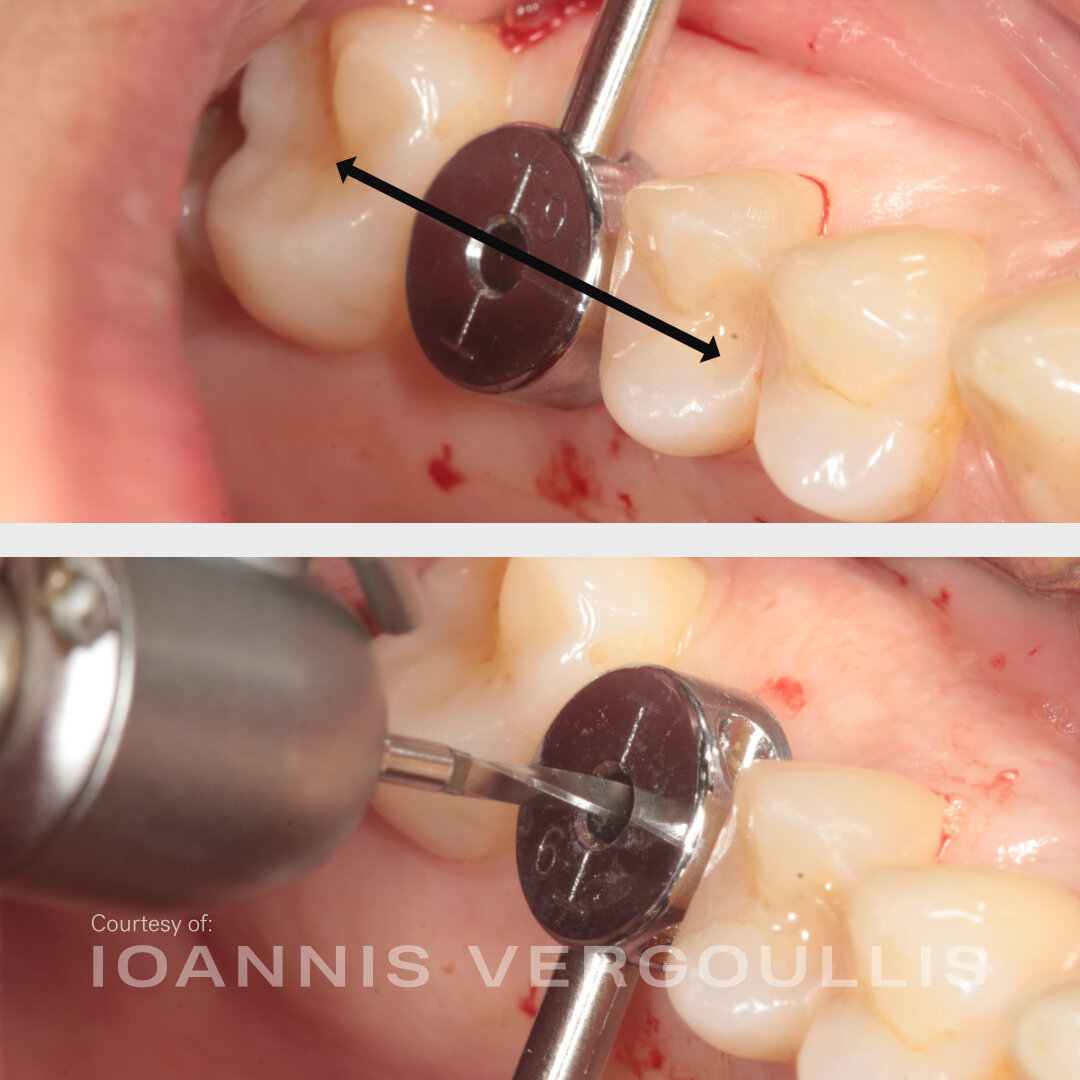
The tab that fits in light contact with the adjacent teeth centres the osteotomy. Align its engraved line to the occlusal line of the neighbours. Tip: flapless, with a 2 mm drill or narrower.

STEP 03
Flap or flapless: seat the Guide’s surgical pin in the osteotomy and check the inclination.
STEP 04
Install the anatomical tab on the pin to choose the healer’s size and shape. Any of the three sizes for that tooth type can be tried; here m2S fits inside the future cervical margins.
STEP 05
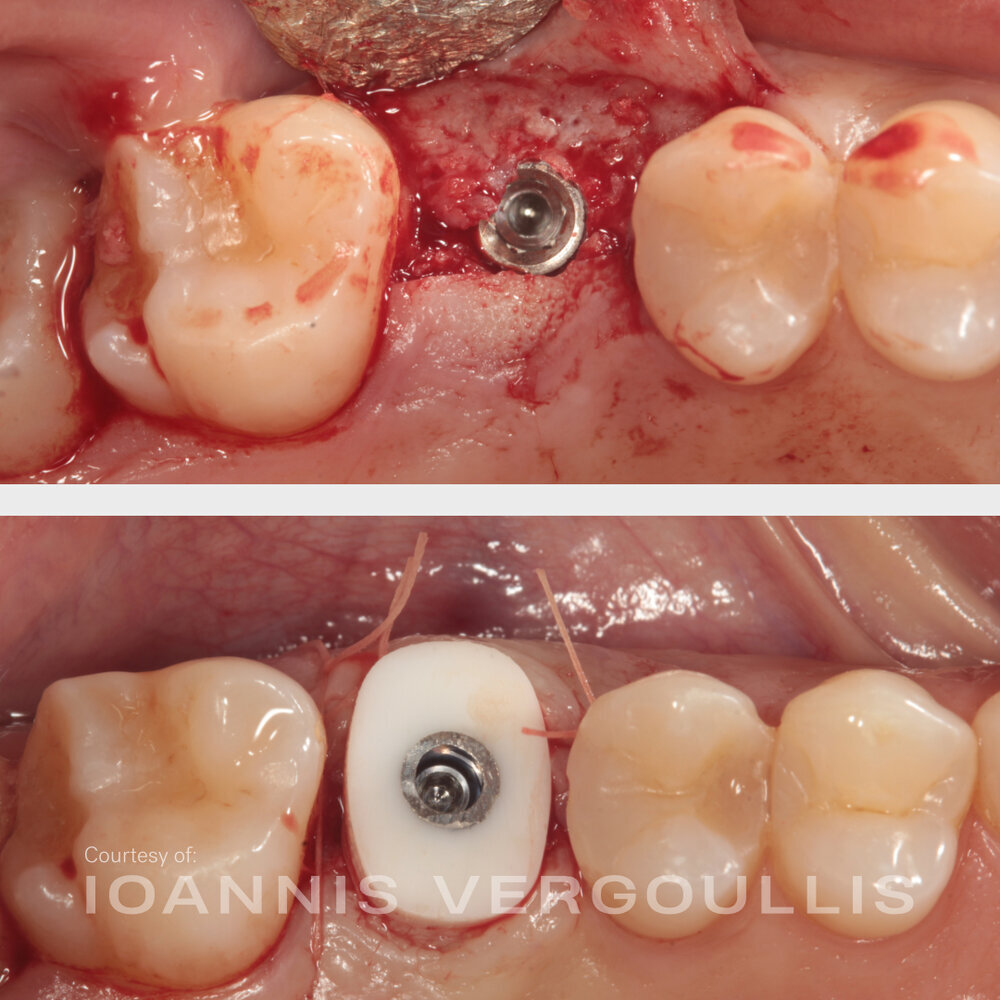
Place the implant with the flat of the prosthetic connection facing buccal, then install the m2S healing abutment. Tip: orient a marker on the transfer tool to mid-buccal.
STEP 06
Torque the healing abutment and suture. In a one-stage protocol this gives a stable connection with no micro-movement, and the patient can clean without risk of disengagement.
STEP 07
Seal the screw access with sterile PTFE tape and composite. Tip: soak the tape in an antibacterial agent such as blueM gel.
STEP 08
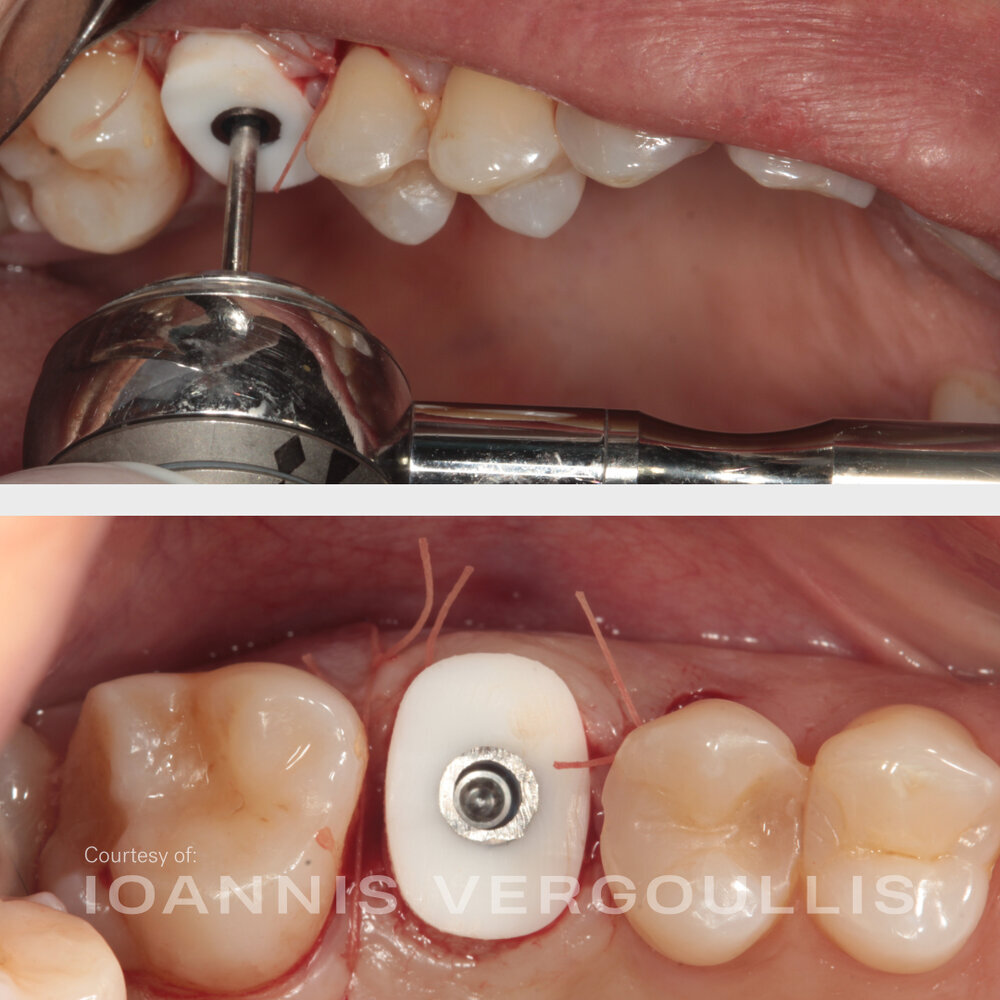
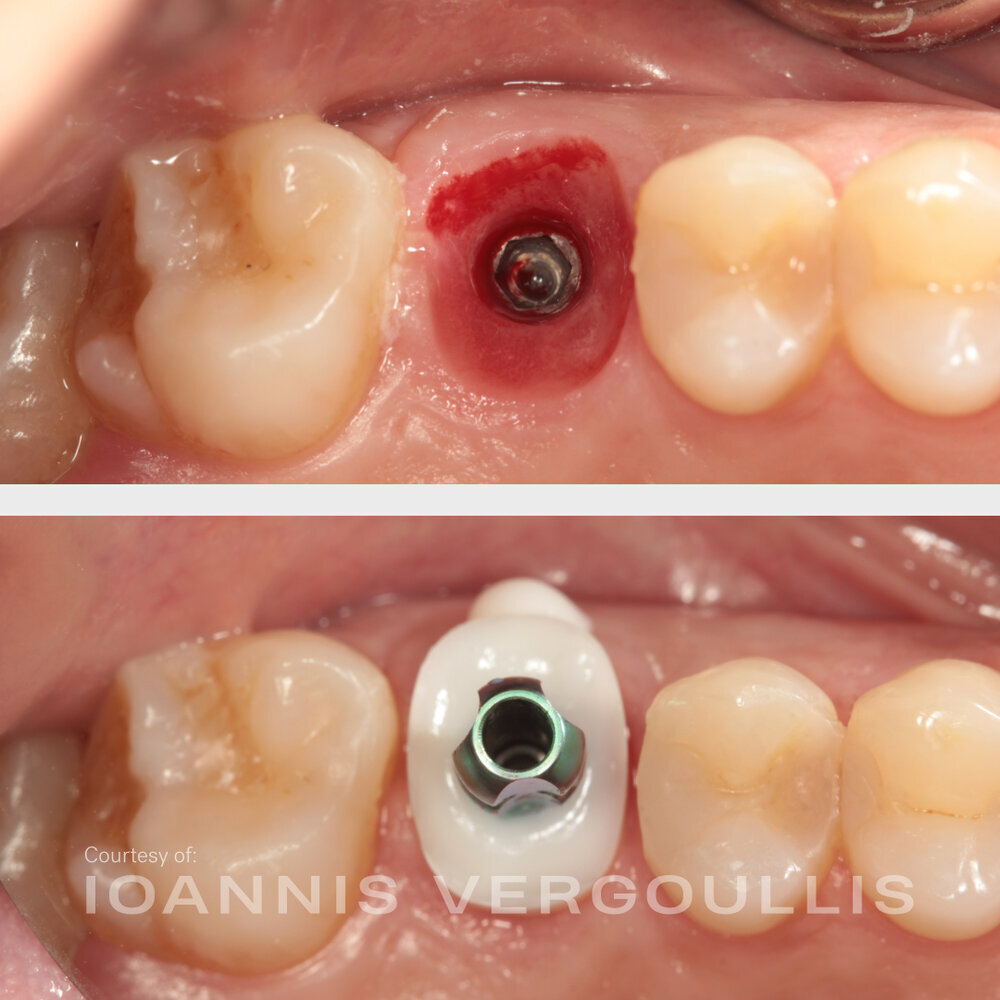
Four months later, on removal of the healer, the soft tissue is ideal for the restorative phase. Healing time depends on implant surface, bone quality and the patient.
STEP 09
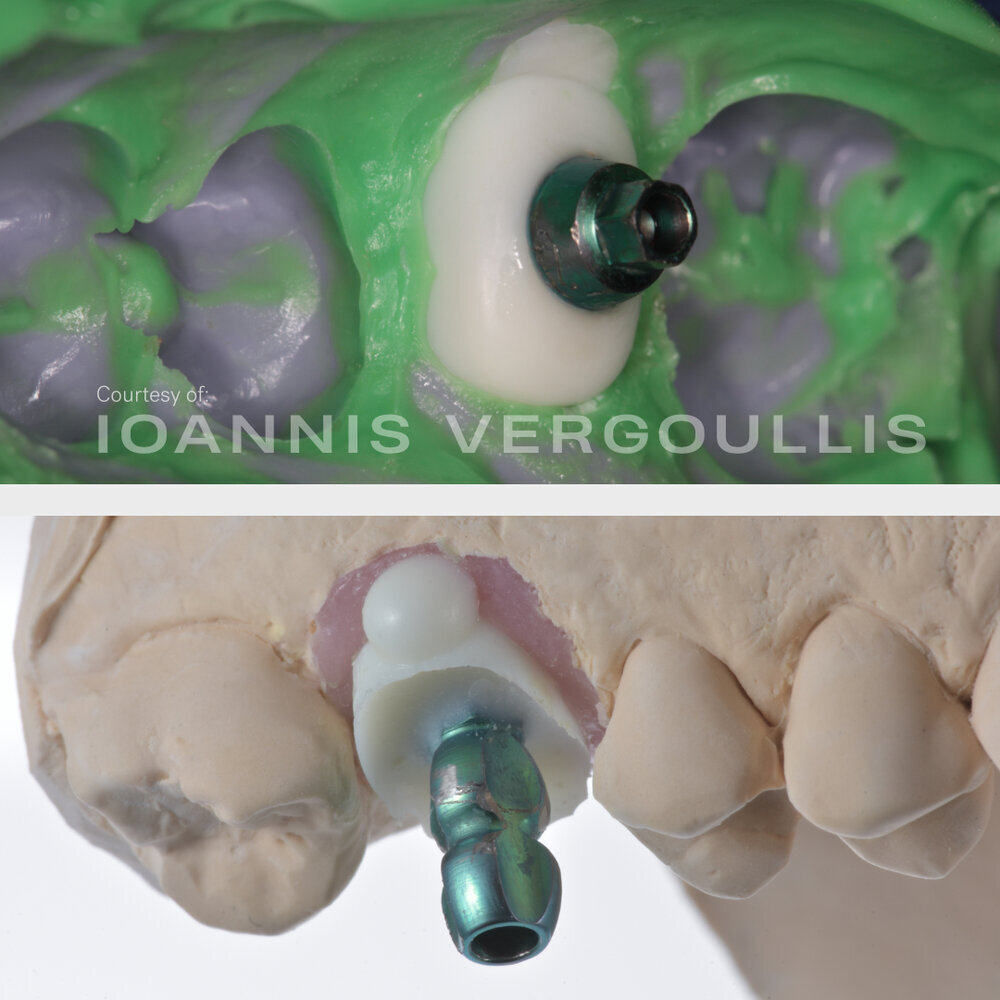
Replace the healer with the duplicate Cervico impression post. Optional: add composite over the free gingival margin for the 1FPT impression technique.
STEP 10
Fabricate the working cast. The customised post seats stably in the impression, and with 1FPT the composite bulk guarantees its three-dimensional position.
Nothing exotic happened here, which is the point. The Guide answered space, centre, inclination, healer size and orientation before the implant went in, and the same well later produced the impression post. Routine work, done to a profile.
Materials: Cervico Guide: cylindrical tab #9, surgical pin, m2 anatomical tabs · m2S Cervico healing abutment · Duplicate Cervico impression post · PTFE tape and composite · blueM gel
Credit: Case and images: Dr. Ioannis Vergoullis. Full case as published by the clinician; patient details are not disclosed.